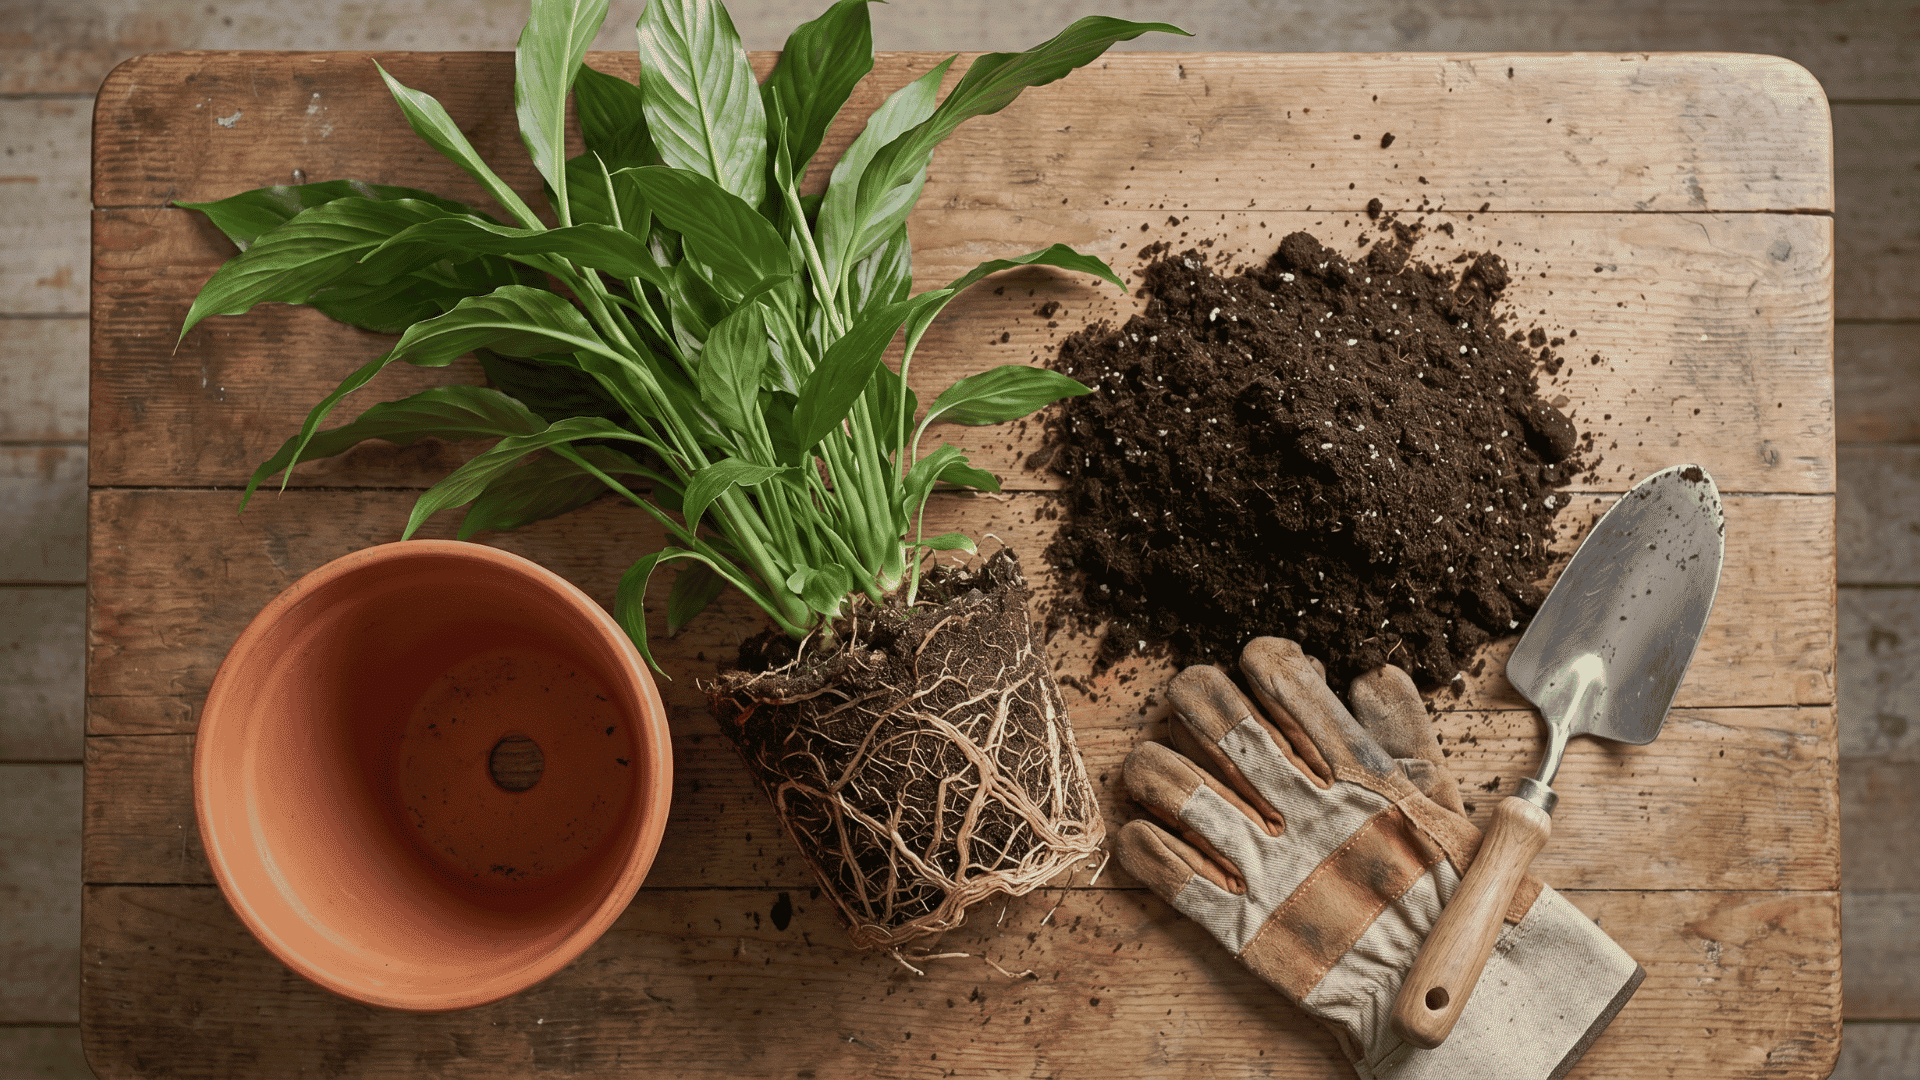

Most people think filling a raised garden bed just means adding soil. The real problem is that without proper layering, even the best soil fails to deliver results.
Knowing how to fill a raised garden bed correctly changes how well your plants grow from day one. Poor drainage, compacted layers, and wasted money are all avoidable with the right approach.
A well-filled bed gives roots the oxygen, moisture, and structure they need to stay healthy all season long.
Here you will find everything from the right materials for each layer to the mistakes that quietly kill plants before they ever get started.
How to Fill a Raised Garden Bed Properly?
A raised garden bed layout works as a layered growing system, not just a box filled with soil. Each layer serves a specific purpose for plant health.
Most vegetables need only 10 to 18 inches of good-quality soil to grow well. Everything below that can be cheaper organic filler that breaks down over time.
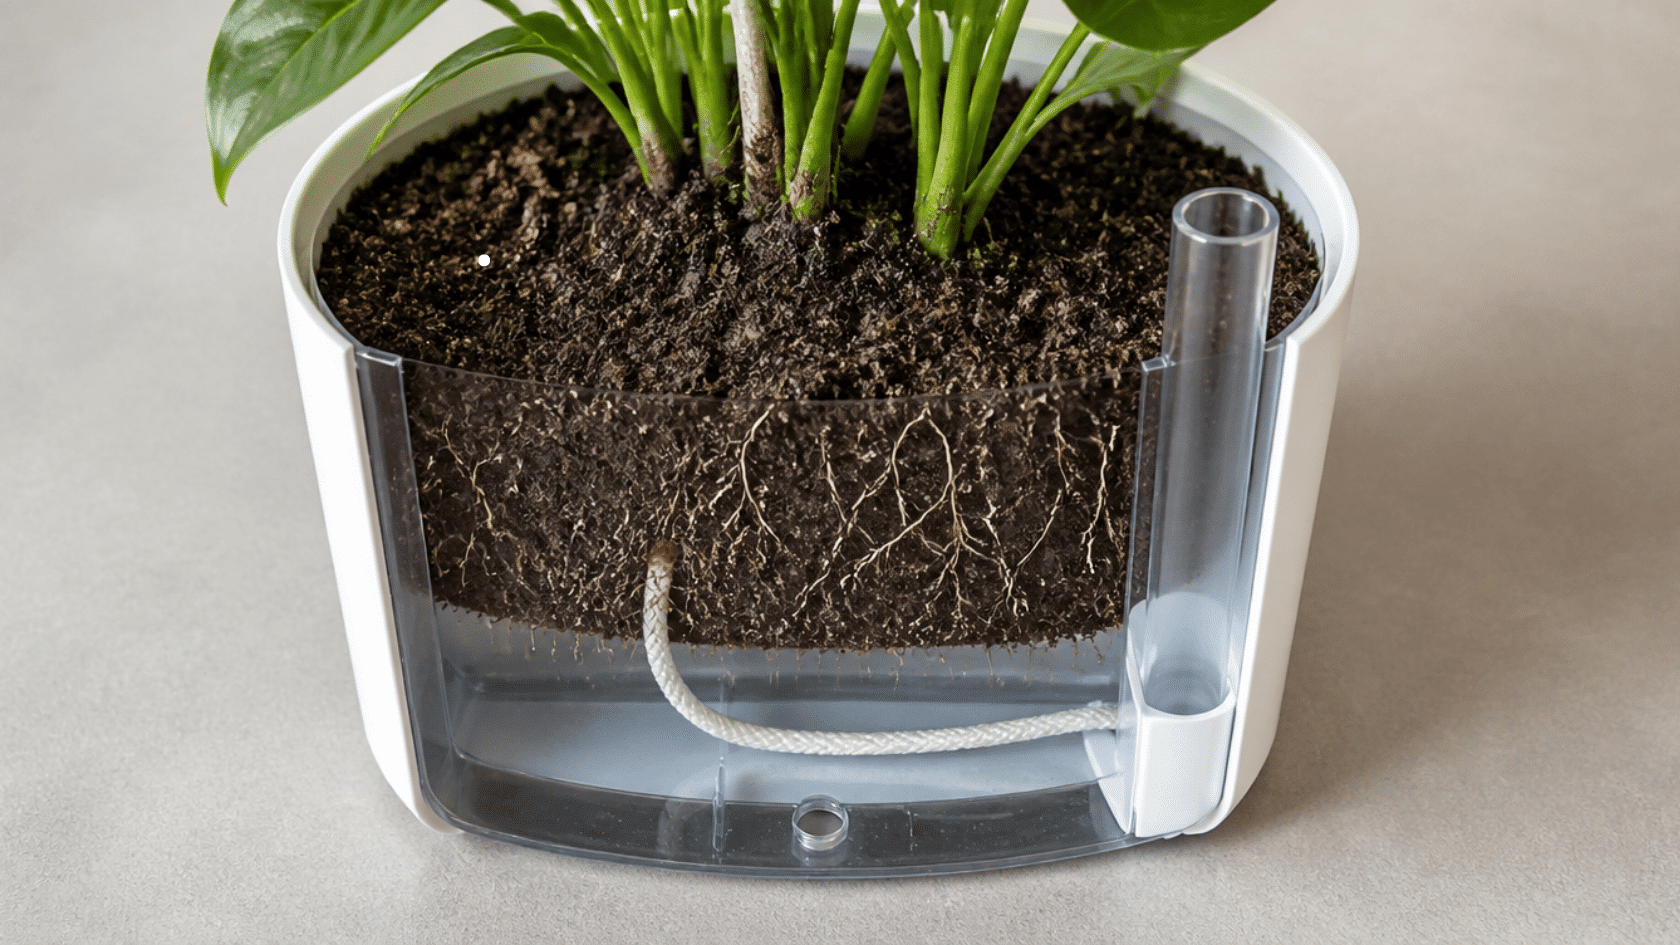
Roots need oxygen just as much as water. Poor drainage creates anaerobic conditions that rot roots and slowly damage plants from the ground up.
Quick tip: Anaerobic means “without oxygen.” Waterlogged soil kills the good microbes that roots depend on, making proper drainage just as important as watering correctly.
Materials Needed to Fill a Raised Garden Bed
Getting the right materials before you start makes the whole filling process much easier.
- Rotting logs, branches, sticks, or pinecones for the bottom layer
- Straw or cardboard as optional bottom layer additions
- Compost and native soil, or old potting soil for the buffer layer
- Dry leaves or brown yard waste as buffer layer fillers
- Topsoil or raised bed mix for the top planting layer
- Coco coir or peat moss to help retain moisture up top
- Perlite or vermiculite to keep the top layer light and airy
Materials to Avoid:
|
Steps to Fill a Raised Garden Bed
Filling a raised bed the right way takes just a few steps. Follow them in order and the bed will drain well, hold moisture, and support healthy plant growth.
Step 1: Prepare the Bottom of the Raised Bed
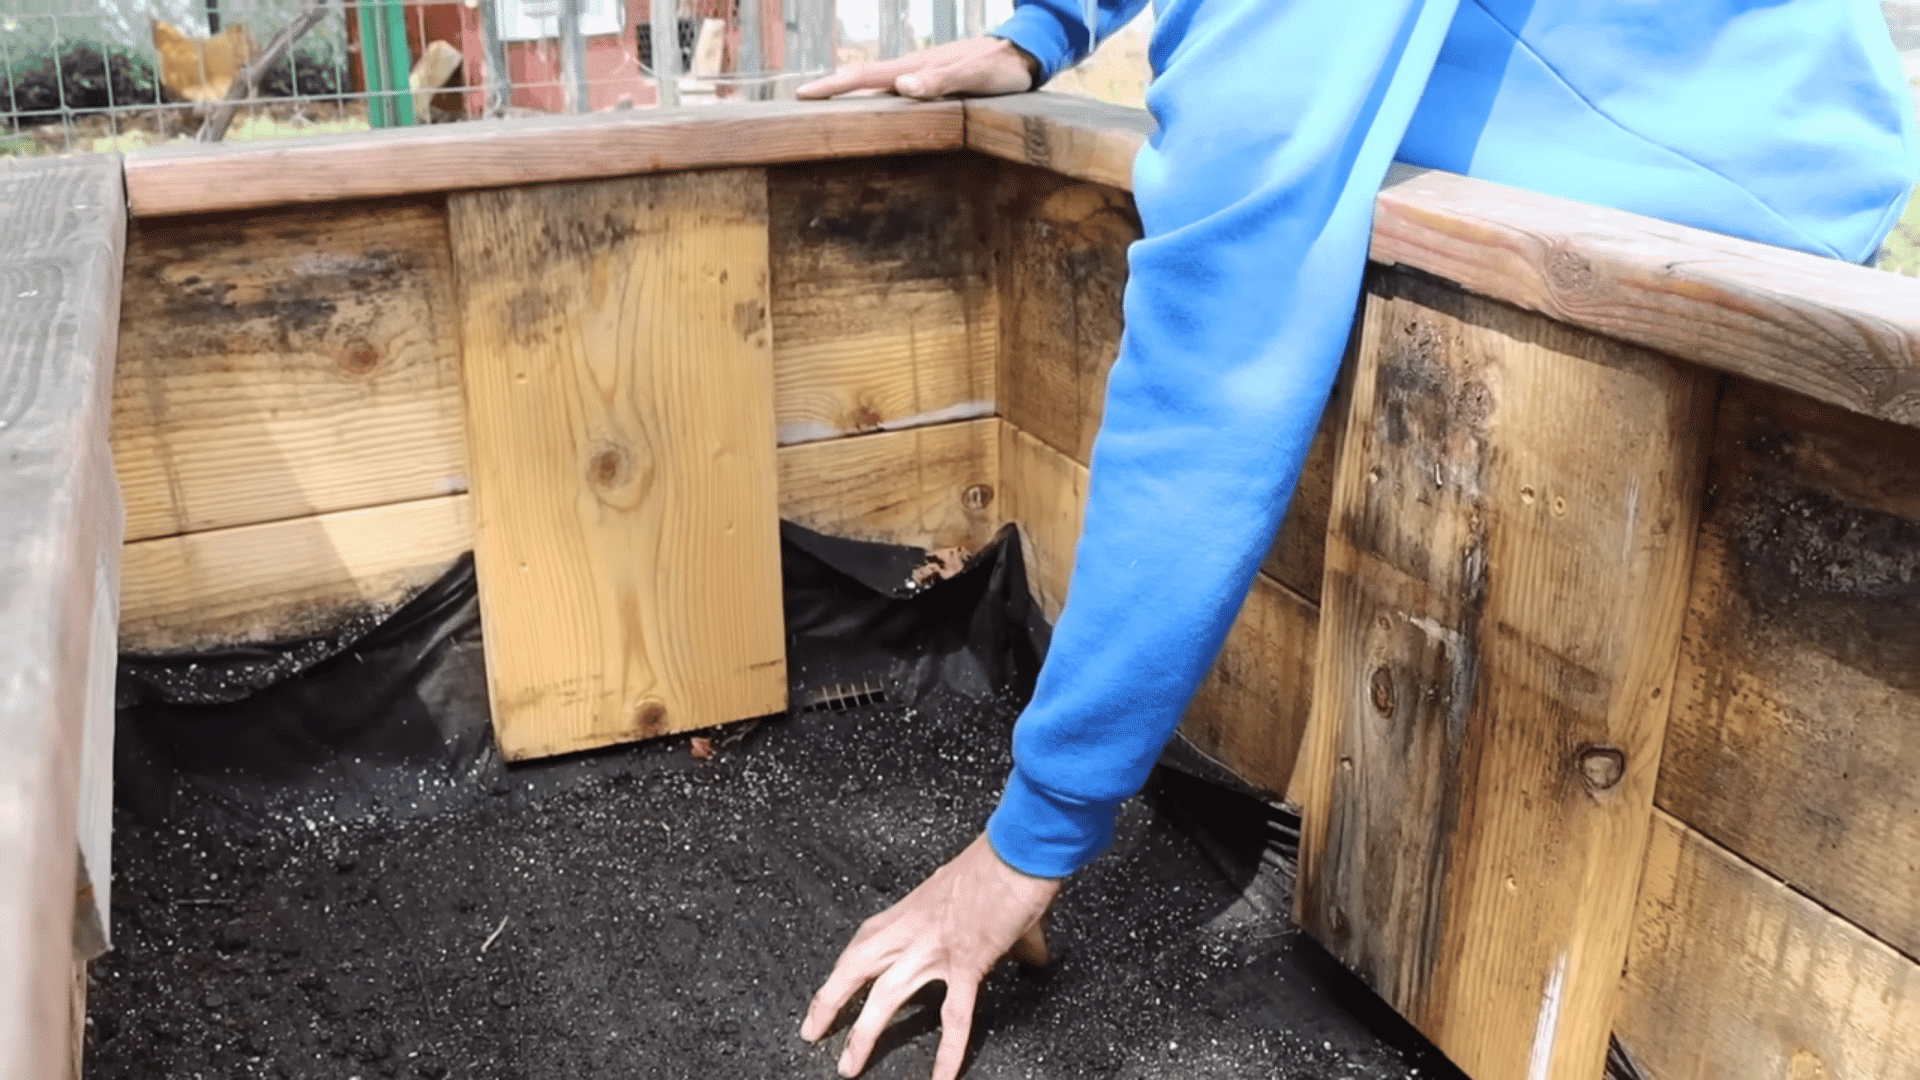
Before adding any materials, get the base of the bed ready. A clean, well-prepped bottom helps with drainage and stops weeds from coming back.
What to do:
- Clear out any weeds or grass growing inside or under the bed
- Lay cardboard on top if there is heavy vegetation underneath
- Check that water has a clear path to drain out if the bed sits on concrete
Cardboard blocks light and smothers weeds without harming the soil below. For beds on concrete, trapped water with nowhere to go will eventually rot roots and ruin the lower layers.
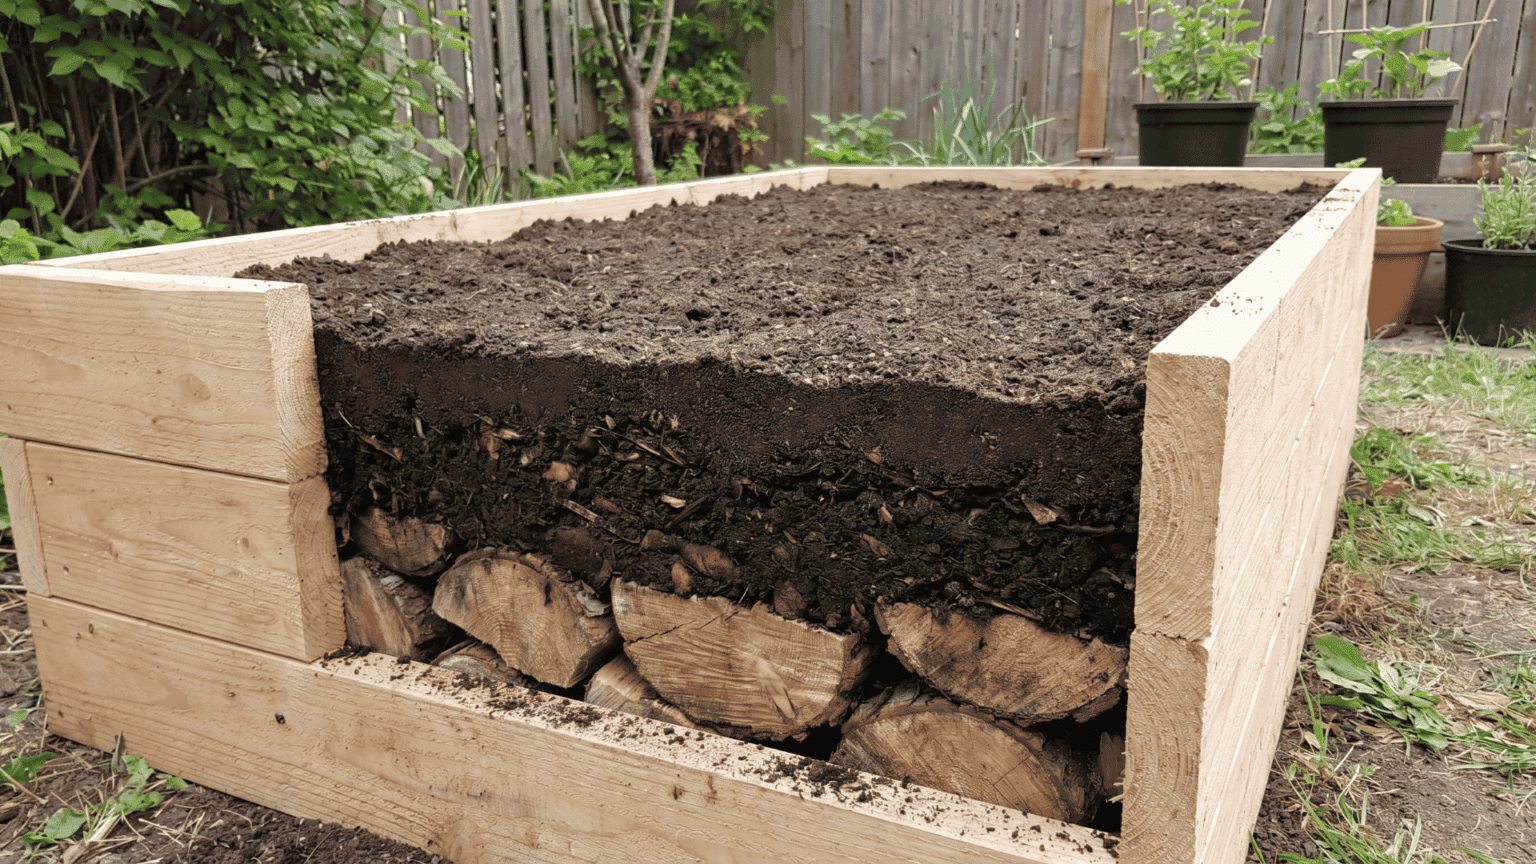
Step 2: Add a Bulk Organic Base Layer
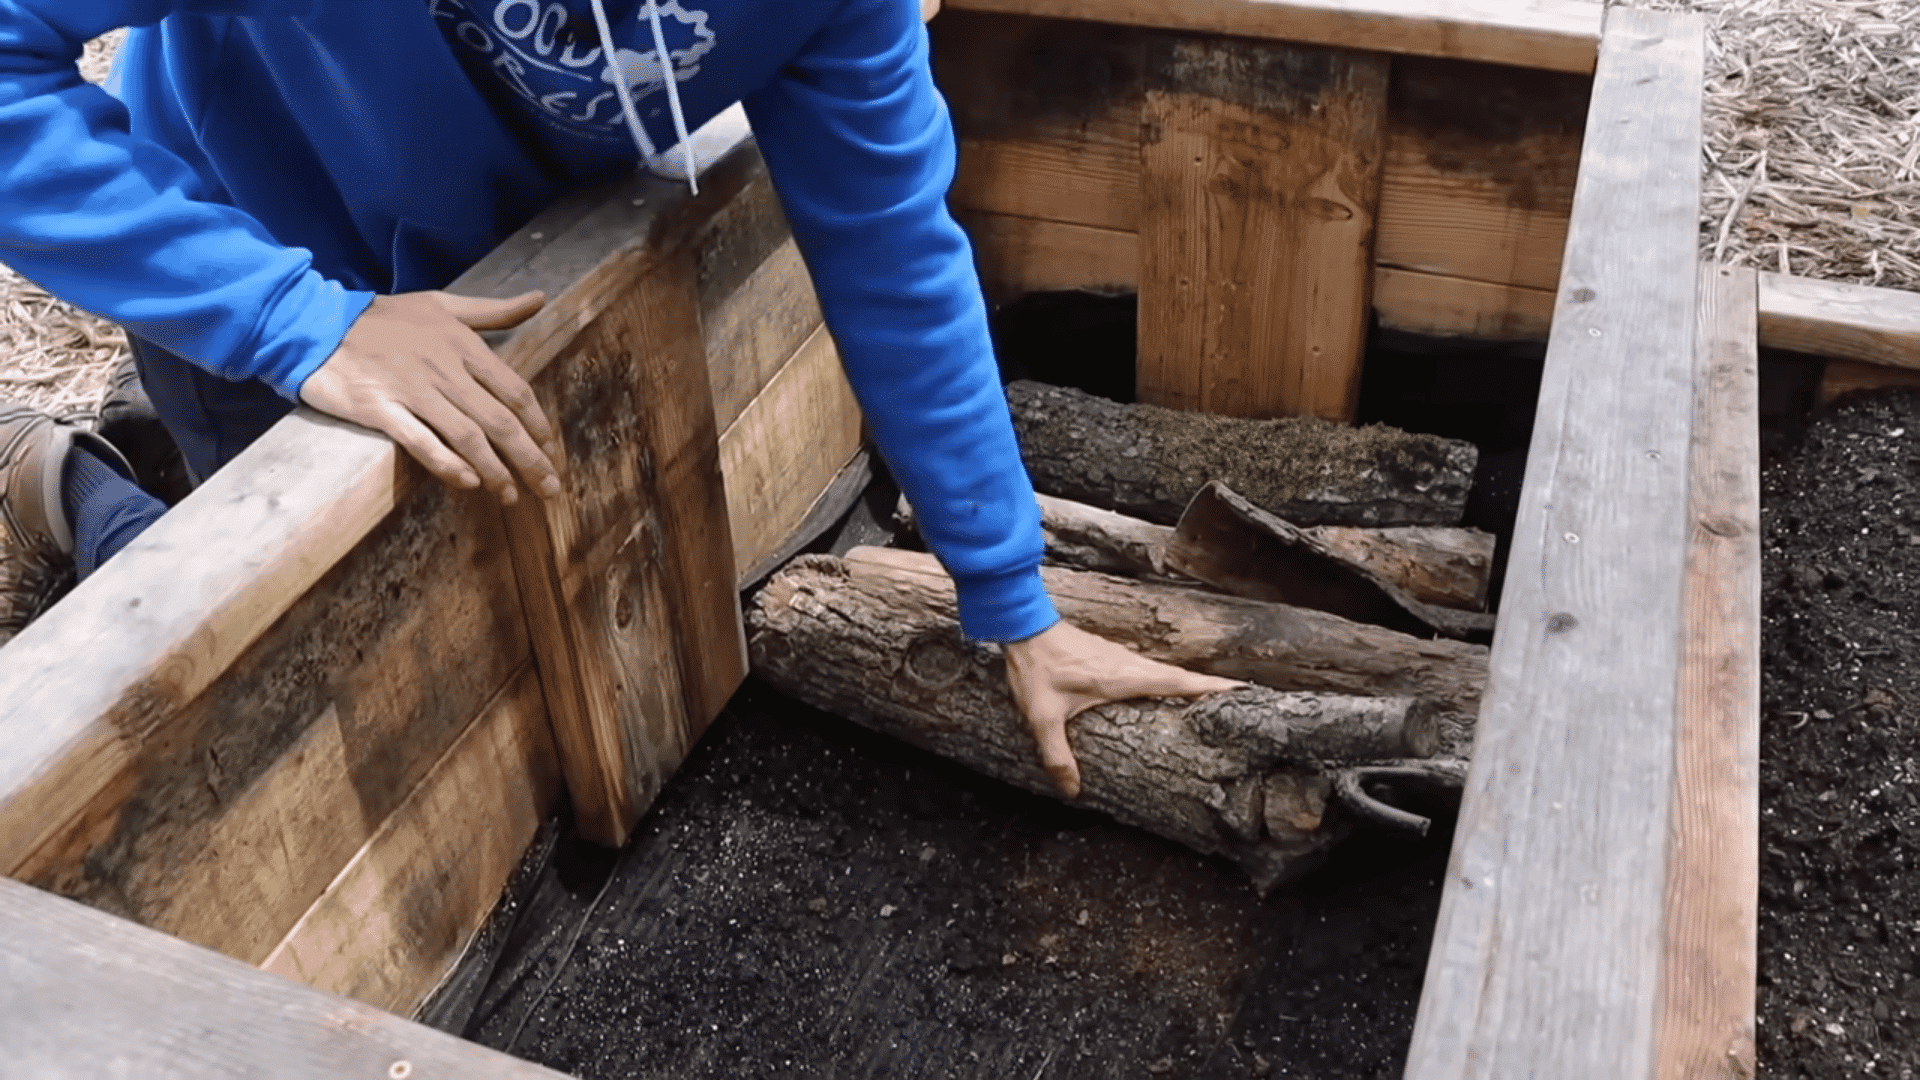
Fill the bottom with logs, sticks, branches, or woody debris. Keep the material loose so air can move through and prevent the anaerobic conditions that damage roots.
As the wood breaks down, it becomes porous and holds onto moisture, helping the bed stay hydrated over time. It is a space filler, not a fertilizer, so expect slow results.
Step 3: Add a Buffer Layer of Organic Matter
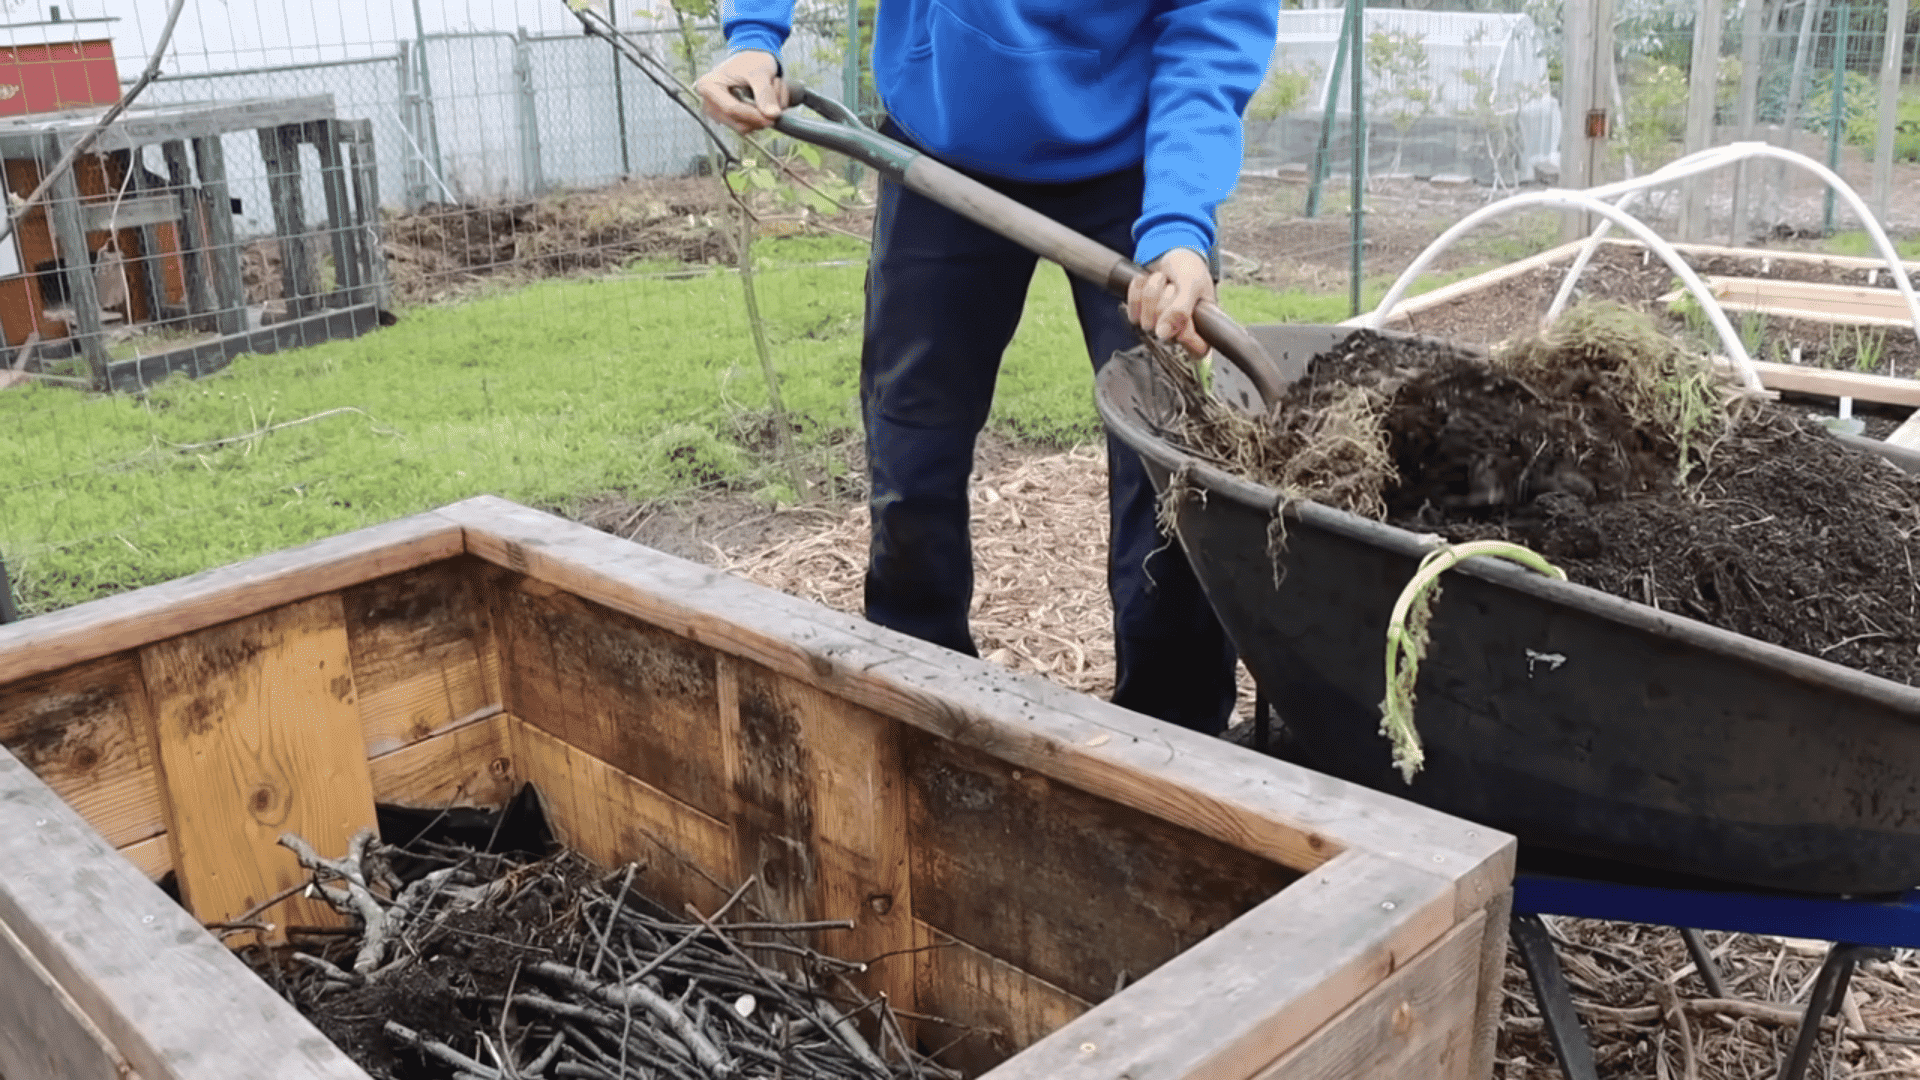
Spread compost, native soil, or partially broken-down organic matter over the woody base. Roots should never grow directly into solid wood, so this layer gives them a softer path through.
Press the material down lightly as you go but do not compact it. Too many fresh green materials here trap moisture and generate heat, leading to soggy, poorly aerated conditions.
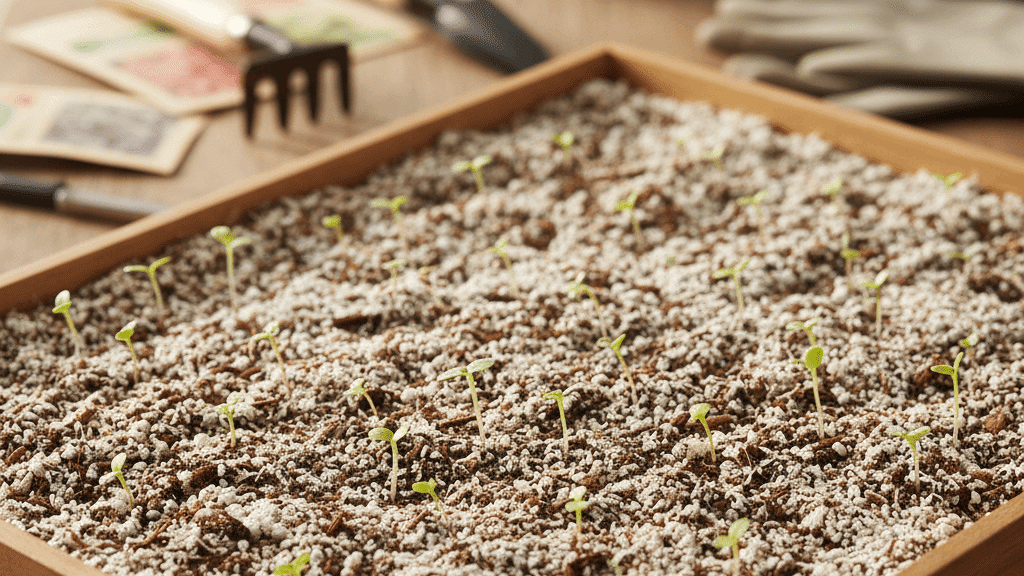
Step 4: Add the High-Quality Planting Soil Layer
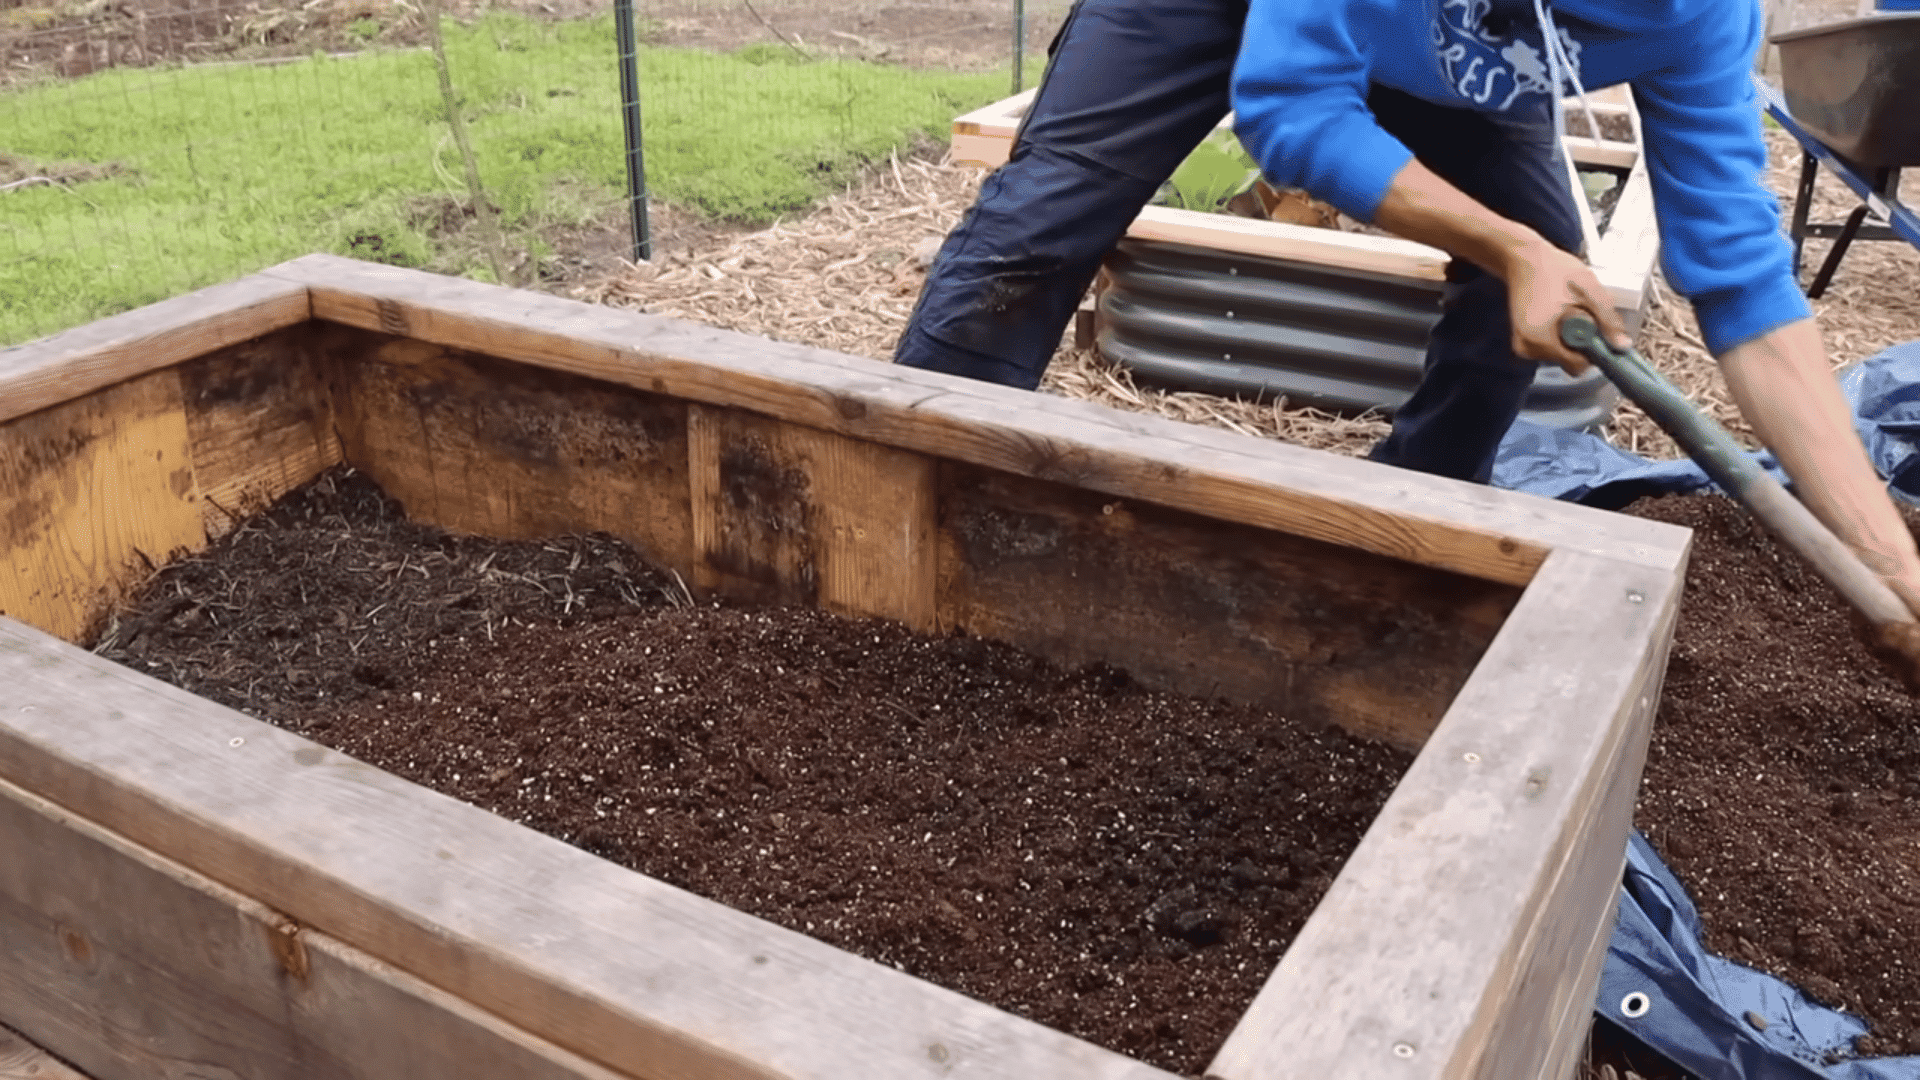
Add at least 10 to 12 inches of quality growing soil at the top. A good mix combines several materials, each doing a different job for your plants.
| Material | Role |
|---|---|
| Compost | Feeds plants with nutrients |
| Topsoil | Gives the mix structure and body |
| Coco coir or peat moss | Holds moisture without waterlogging |
| Perlite or vermiculite | Keeps the mix light and well-drained |
Dense or compacted soil slows root growth and water movement, regardless of how well you water or feed.
Step 5: Water the Bed and Check Drainage
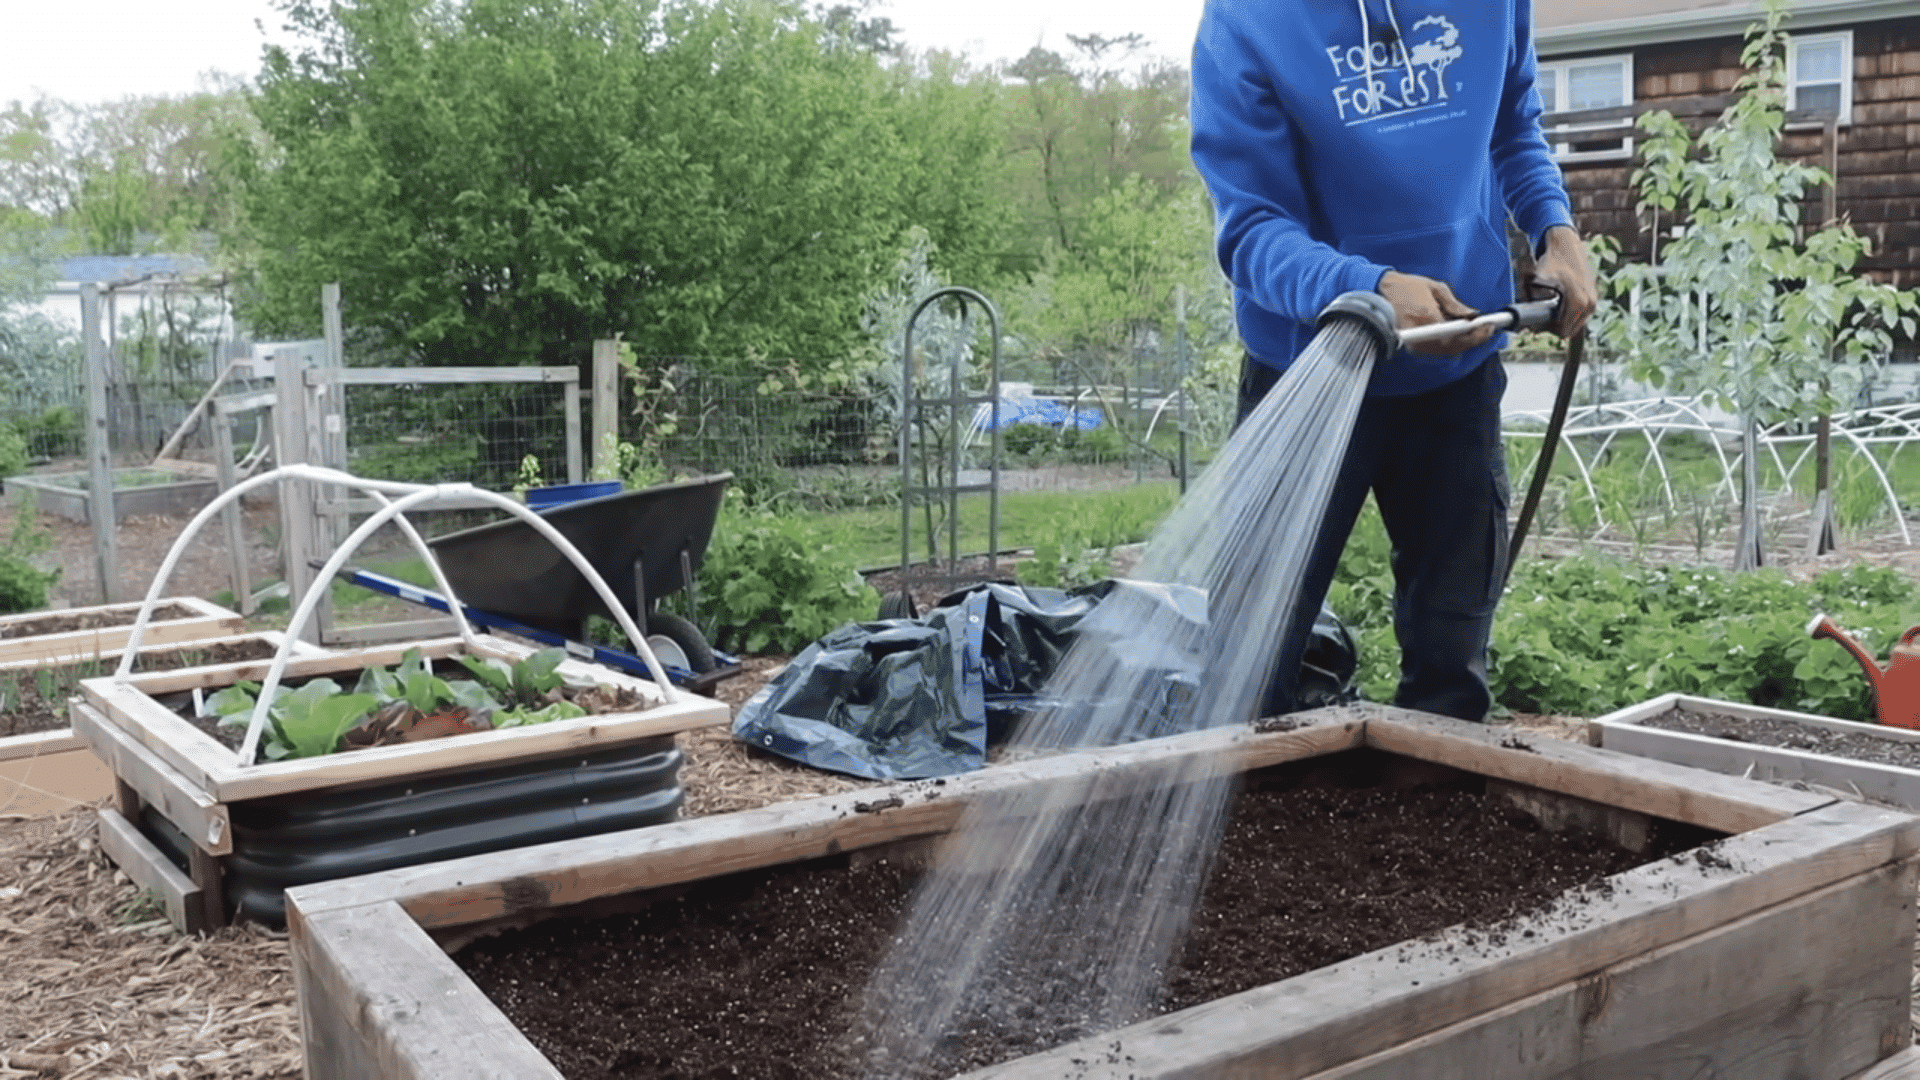
Water gradually as you add each layer, not just at the end. This helps everything settle and encourages the woody material at the base to start breaking down early.
Once fully filled, water slowly and watch how it drains. If water pools on top, the mix is too dense. Top off with fresh compost at the start of each new season.
For further help, watch this video by The Gardening Channel With James Prigioni for a visual and quicker reference:
Common Mistakes When Filling a Raised Garden Bed
Avoiding a few key mistakes upfront saves money, time, and a lot of frustration later in the season.
| Mistake | Why It’s a Problem |
|---|---|
| Filling the entire bed with expensive soil | Most plants only need 10 to 12 inches of quality soil. Going deeper wastes money with no added benefit. |
| Using rocks or gravel for drainage | Rocks create a hard barrier that traps water above them instead of letting it drain freely. |
| Packing layers too tightly | Compressed layers block airflow and root movement. Roots need loose, breathable soil to spread properly. |
| Creating wet or anaerobic conditions | Soggy soil removes oxygen, which suffocates roots and kills the beneficial microbes plants depend on. |
| Using too much fresh green material | Fresh green waste generates heat and holds excess moisture, creating compacted pockets with poor airflow. |
| Letting leaves mat into dense layers | Thick matted leaves block water and oxygen from moving through the bed freely. |
| Skipping the buffer layer | Placing soil directly on solid wood creates large air gaps and causes the bed to sink unevenly. |
| Using dense or heavy soil | Heavy soil compacts over time and stops roots from spreading and absorbing nutrients effectively. |
| Misunderstanding how wood works | Wood is a space filler that slowly breaks down. It is not a fertilizer and does not guarantee better growth. |
Wrapping Up
Now you know how to fill a raised garden bed in a way that actually supports healthy plant growth. Every layer has a purpose, and skipping even one can affect how well your plants perform.
A properly filled bed saves money, reduces watering problems, and gives roots the best possible start. These are not complicated changes, just the right ones done in the right order.
Getting this right from the beginning means fewer problems to fix later in the season. It is one of the most practical things any gardener can do before planting.
Tried this in your own garden? Drop a comment below and share what worked for you.
Frequently Asked Questions
Should I Put Topsoil in My Raised Beds?
Topsoil works well as part of a balanced mix but should not be used alone. Combine it with compost and perlite for the best growing results.
How Often Should you Add Compost to a Raised Garden Bed?
Add a fresh layer of compost at the start of each growing season. If plants look pale or growth slows mid-season, a light top dressing helps restore nutrients quickly.
How Deep Should a Raised Garden Bed Be for Vegetables?
Most vegetables do well in a bed that is 12 to 24 inches deep. Deeper beds give roots more room and allow for a fuller organic base layer underneath.