
A plain garden path can feel a lot more special when each step has a little story, color, or handmade detail.
DIY stepping stones are a fun way to add personality to a garden, backyard, or side path without spending much.
They can be simple, colorful, kid-friendly, or full of small keepsake details like handprints, names, shells, tiles, and glass gems.
This guide covers the supplies, basic steps, safety tips, and creative DIY stepping stone ideas you can try at home.
What Are DIY Stepping Stones?
DIY stepping stones are handmade garden stones used to create paths, fill dull patches, or add a personal touch to outdoor spaces.
They are usually made with concrete or cement mix poured into molds, then decorated with stones, shells, tiles, handprints, names, or small keepsake details.
They work well near flower beds, patios, sheds, backyard gates, and spots where grass struggles to grow.
People love them because they are:
- Easy to make at home
- Great for weekend DIY projects
- Fun for kids and family crafts
- Helpful for muddy or bare garden areas
- Simple to personalize with colors, prints, or patterns
- A thoughtful choice for handmade gifts or garden keepsakes
The best part is that each stone can look different. One can be neat and simple, while another can be bright, playful, and packed with tiny details.
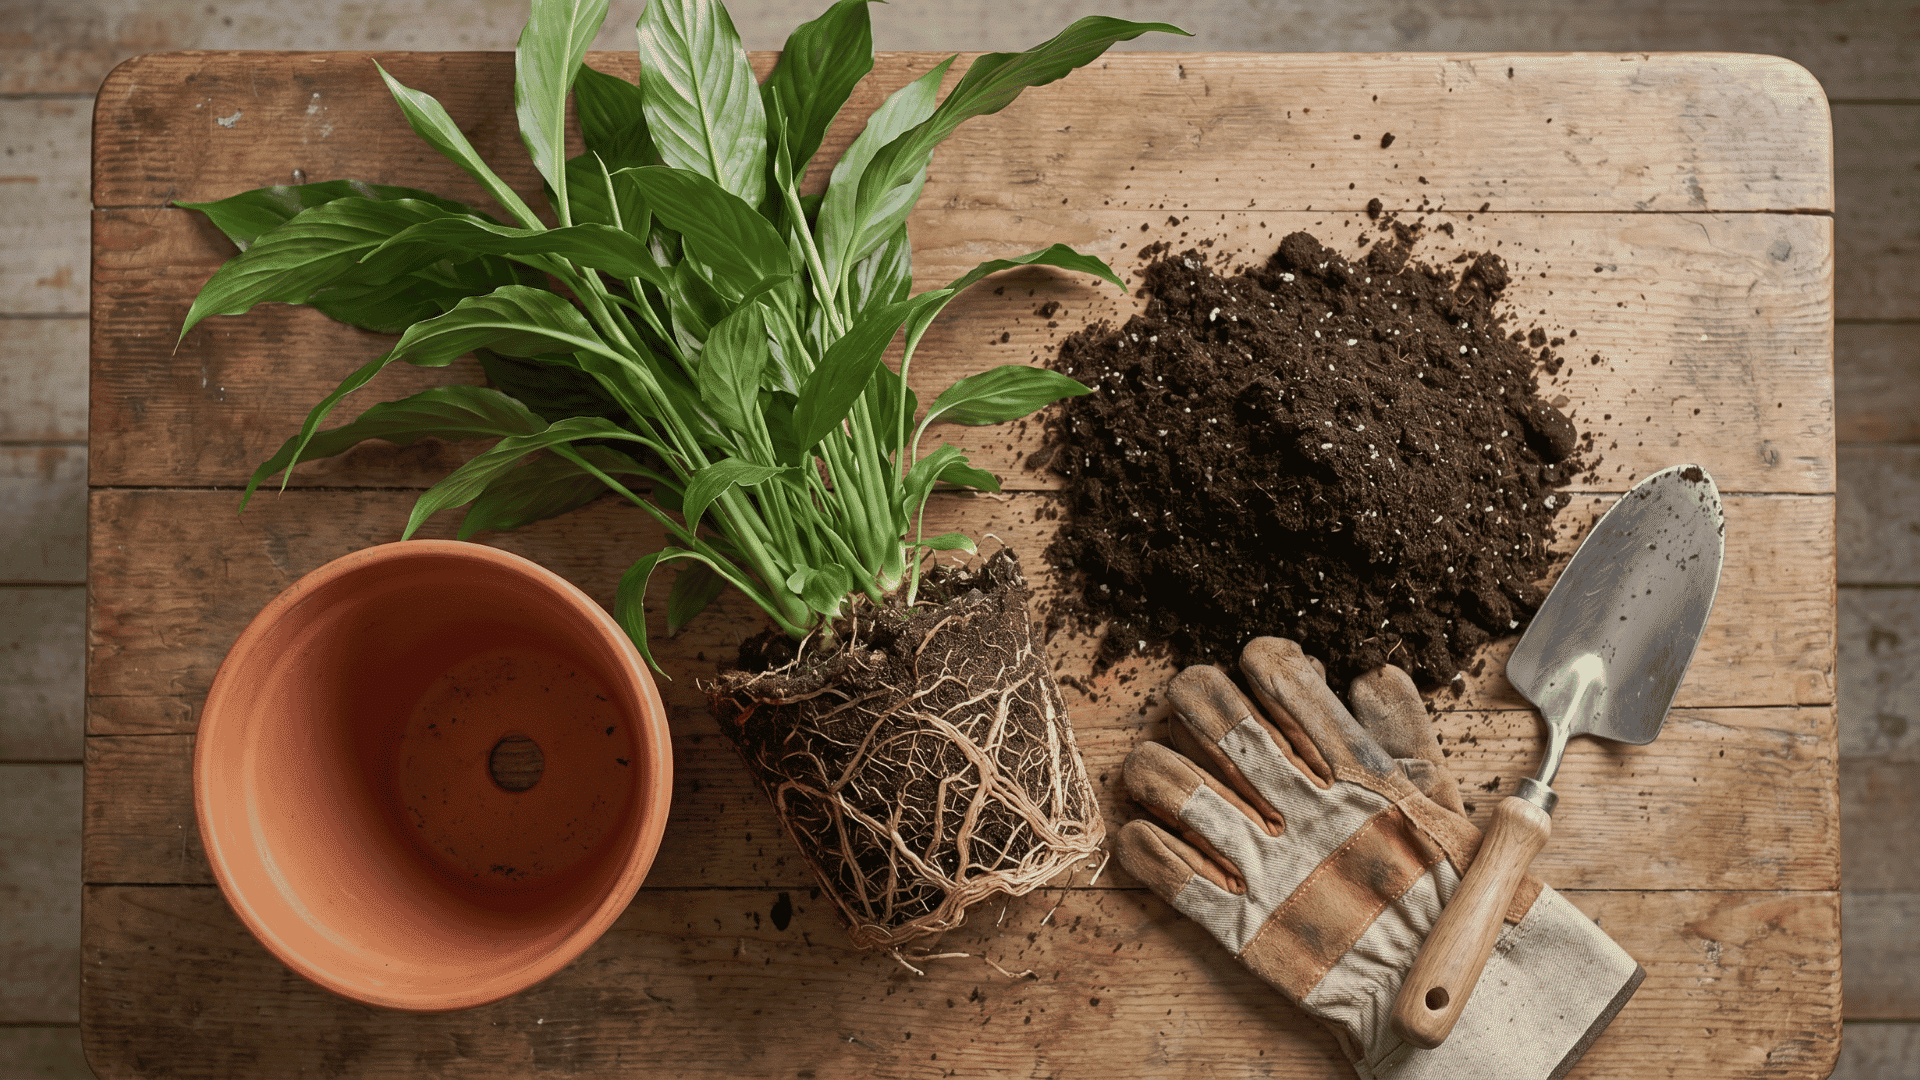
Supplies You Need for DIY Stepping Stones
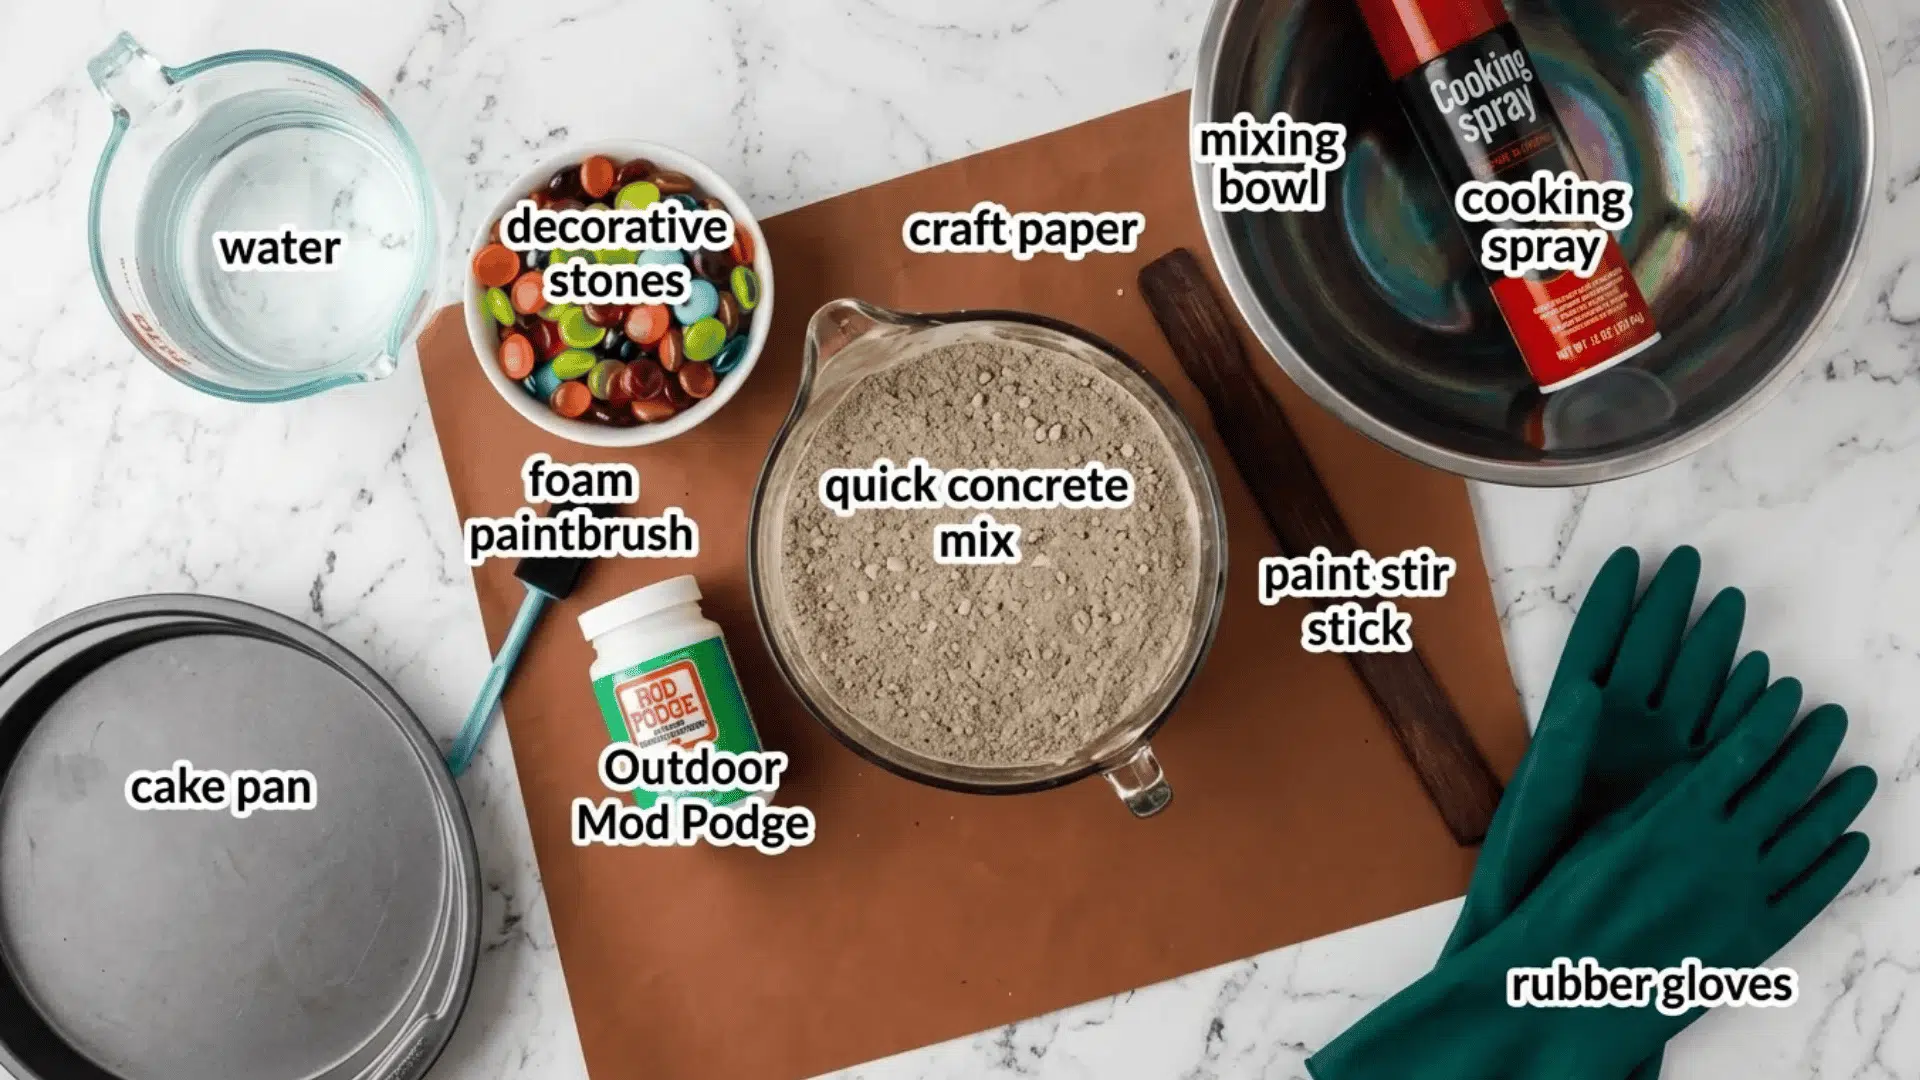
You do not need a full workshop to make DIY stepping stones. Most supplies are simple, easy to find, and safe to use with a little adult prep.
| Supply | Why You Need It |
| Concrete mix or mortar mix | Creates the solid stone base |
| Mold | Sets the final shape and size |
| Bucket | Holds the mix while you work |
| Stirring stick or trowel | Helps combine and smooth the mix |
| Gloves | Keeps hands protected |
| Dust mask | Helps when handling dry cement powder |
| Cooking spray or oil | Makes it easier to remove the stone |
| Decorations | Adds color, texture, and personality |
| Plastic wrap | Keeps the stone covered while it cures |
For molds, you can use items you may already have at home.
Try any of these options:
- Plastic plant saucers
- Disposable aluminum pans
- Old cake pans
- Silicone molds
- Bucket lids
- Ready-made stepping stone molds
Pick a mold that is wide, sturdy, and not too deep. A shallow round or square mold is usually easiest for beginners.
Best Concrete Mix for DIY Stepping Stones
The best mix depends on the look you want and how much time you need to decorate.
For a smooth surface, use sand mix, mortar mix, or a basic stepping stone kit. These work well for handprints, names, stamps, glass gems, tiles, and small stones.
Avoid mixes with large gravel if you want fine details. They can make the surface bumpy and harder to decorate.
Quick-setting cement works for simple stones, but it sets fast.
For kids’ projects, a slower-setting mix is better because it gives more time to add designs.
Safety Tips Before You Start
Concrete is simple to use, but it still needs care. Dry mix can create dust, and wet cement can irritate skin. Set up your space before you open the bag.
- Wear rubber gloves.
- Use a dust mask while handling dry mix.
- Work outside or in fresh air.
- Keep kids away during mixing.
- Let an adult handle the bucket.
- Wash hands and tools after the project.
Kids can join once the mix is poured. They can add gems, shells, handprints, names, or small stones with adult help.
How to Make DIY Stepping Stones?
This beginner method is easy to follow. Have everything ready before adding water, because concrete starts setting fast.
Step 1: Prepare the Mold
Place the mold on a flat, steady surface before you start mixing. A table, patio floor, garage floor, or flat patch of ground can work well.
Coat the inside with cooking spray or a thin layer of vegetable oil so the concrete does not cling to the sides. Check that the mold sits level from edge to edge.
If it tilts, the finished stone may come out thicker on one side and thinner on the other.
Step 2: Mix the Concrete
Pour the dry concrete mix into a bucket or large container. Add water slowly instead of pouring it all in at once. Stir as you go until the mix looks thick, smooth, and easy to scoop.
It should feel more like thick cake batter than soup.
A runny mix may seem easier to pour, but it can dry weak and crack later.
Step 3: Pour the Mix
Pour the concrete into the prepared mold. Use a trowel, stick, or gloved hand to spread it into the corners and edges. Smooth the top so the decorations have a neat surface to sit on.
Tap the sides of the mold a few times to release trapped air bubbles.
This helps the stone settle better and gives it a cleaner finish.
Step 4: Let It Firm Up
Let the concrete rest for about 20 to 30 minutes before decorating. The surface should still be soft, but not watery or loose.
This waiting time matters because decorations can sink if the mix is too wet. Once it feels firm enough to hold a shape, add handprints, stamps, tiles, shells, glass gems, or pebbles.
For handprints or footprints, press gently and lift straight up for a cleaner mark.
Step 5: Add Decorations
Press each decoration into the surface with light, steady pressure. Keep part of each piece visible so the design shows clearly after drying.
Avoid pushing items all the way down into the concrete. Leave small gaps between tiles, gems, shells, or stones so the concrete can grip around them.
For a cleaner look, start with larger pieces first, then fill smaller spaces with tiny accents.
Step 6: Let It Cure
Cover the mold loosely with plastic wrap once the design is finished. Place it in a shaded spot where it will not be bumped, moved, or dried out too fast.
Let it cure for at least 48 hours before removing it from the mold. The wait may feel long, but it helps the stone become stronger.
Moving it too soon can lead to cracks, chips, or broken edges.
Step 7: Remove and Place It
Turn the mold over carefully and ease the stone out. If it feels stuck, flex the mold gently instead of forcing it.
For garden use, choose the spot first and dig a shallow space that matches the stone’s shape. Add a thin layer of sand or gravel to help with drainage and stability.
Set the stone on top, press it down, and check that it does not wobble.
A flat, steady stone is safer to walk on and looks better in the path.
DIY Stepping Stones Ideas
DIY stepping stones do not have to look plain.
You can make them playful, personal, colorful, rustic, or gift-worthy with simple add-ons like handprints, shells, tiles, stones, paint, or stamps.
Here are easy ideas for beginners, families, and weekend craft projects.
1. Handprint Stepping Stones
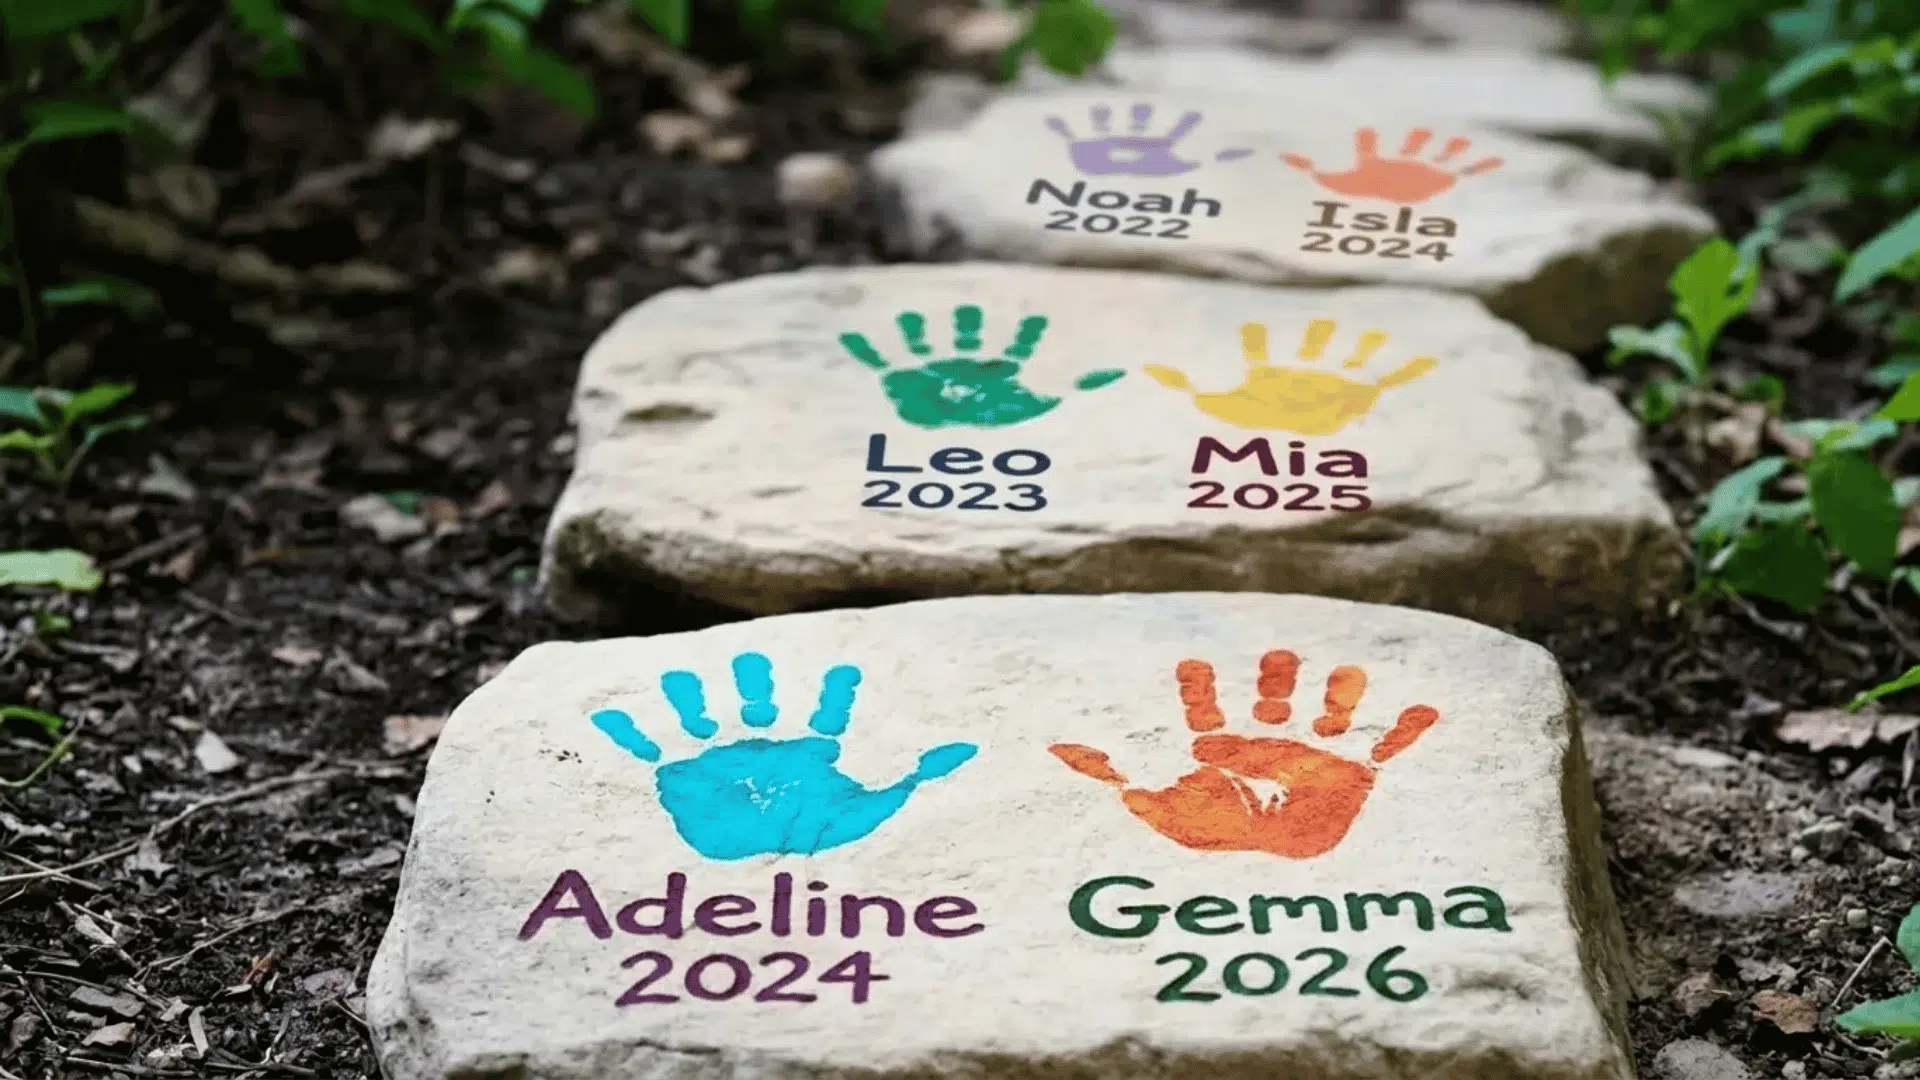
Handprint stones are a favorite for family gardens. Kids can press their hands into damp concrete, then add their name and the year beside it.
Make one every summer and line them along a path to show how much they have grown.
Decorate the edges with:
- Letter stamps
- Glass gems
- Small tiles
- Painted dots
- Smooth pebbles
Keep the center clear so the handprint stays easy to see.
2. Footprint Keepsake Stones
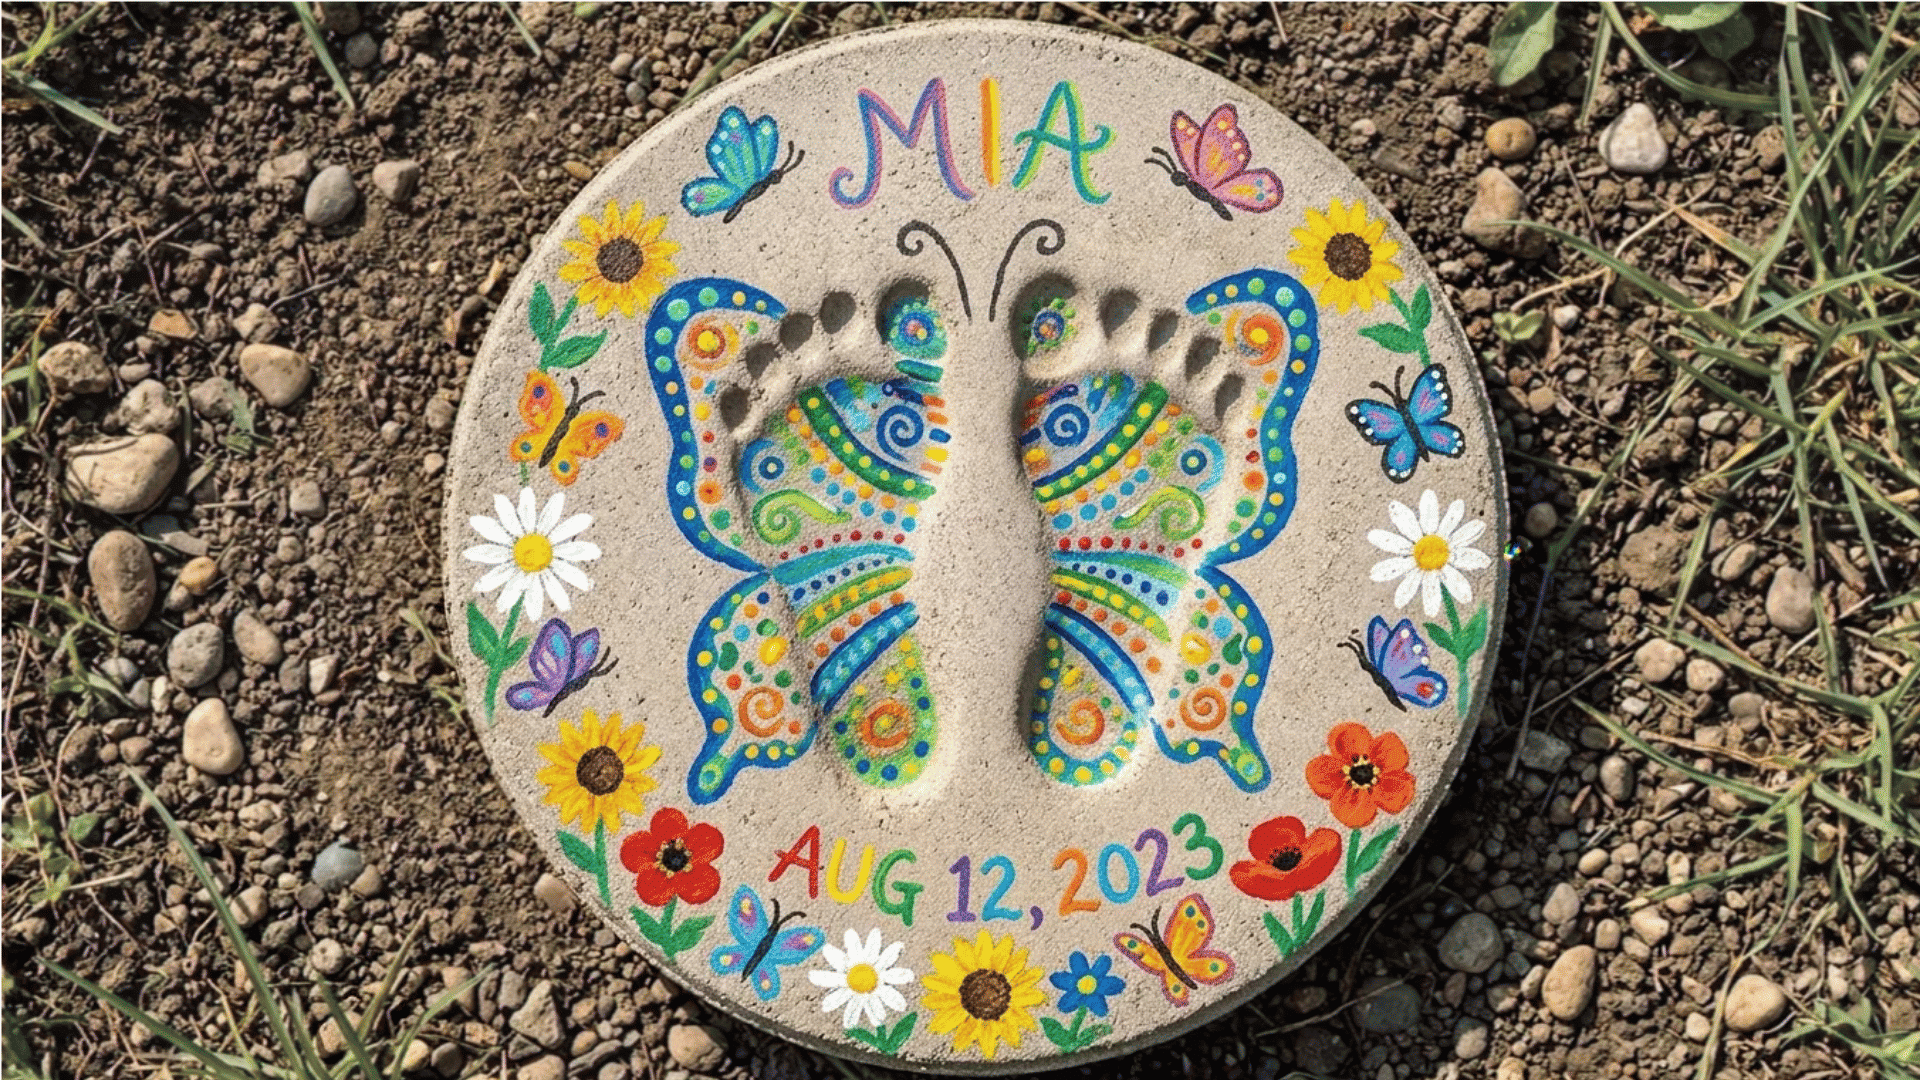
Footprint stones are cute for toddlers, babies, and young kids. They also make sweet gifts for parents, grandparents, or Mother’s Day.
Place one footprint in the center, or turn two footprints into butterfly wings with paint after the stone dries.
Add the child’s name, date, or a small border to finish it.
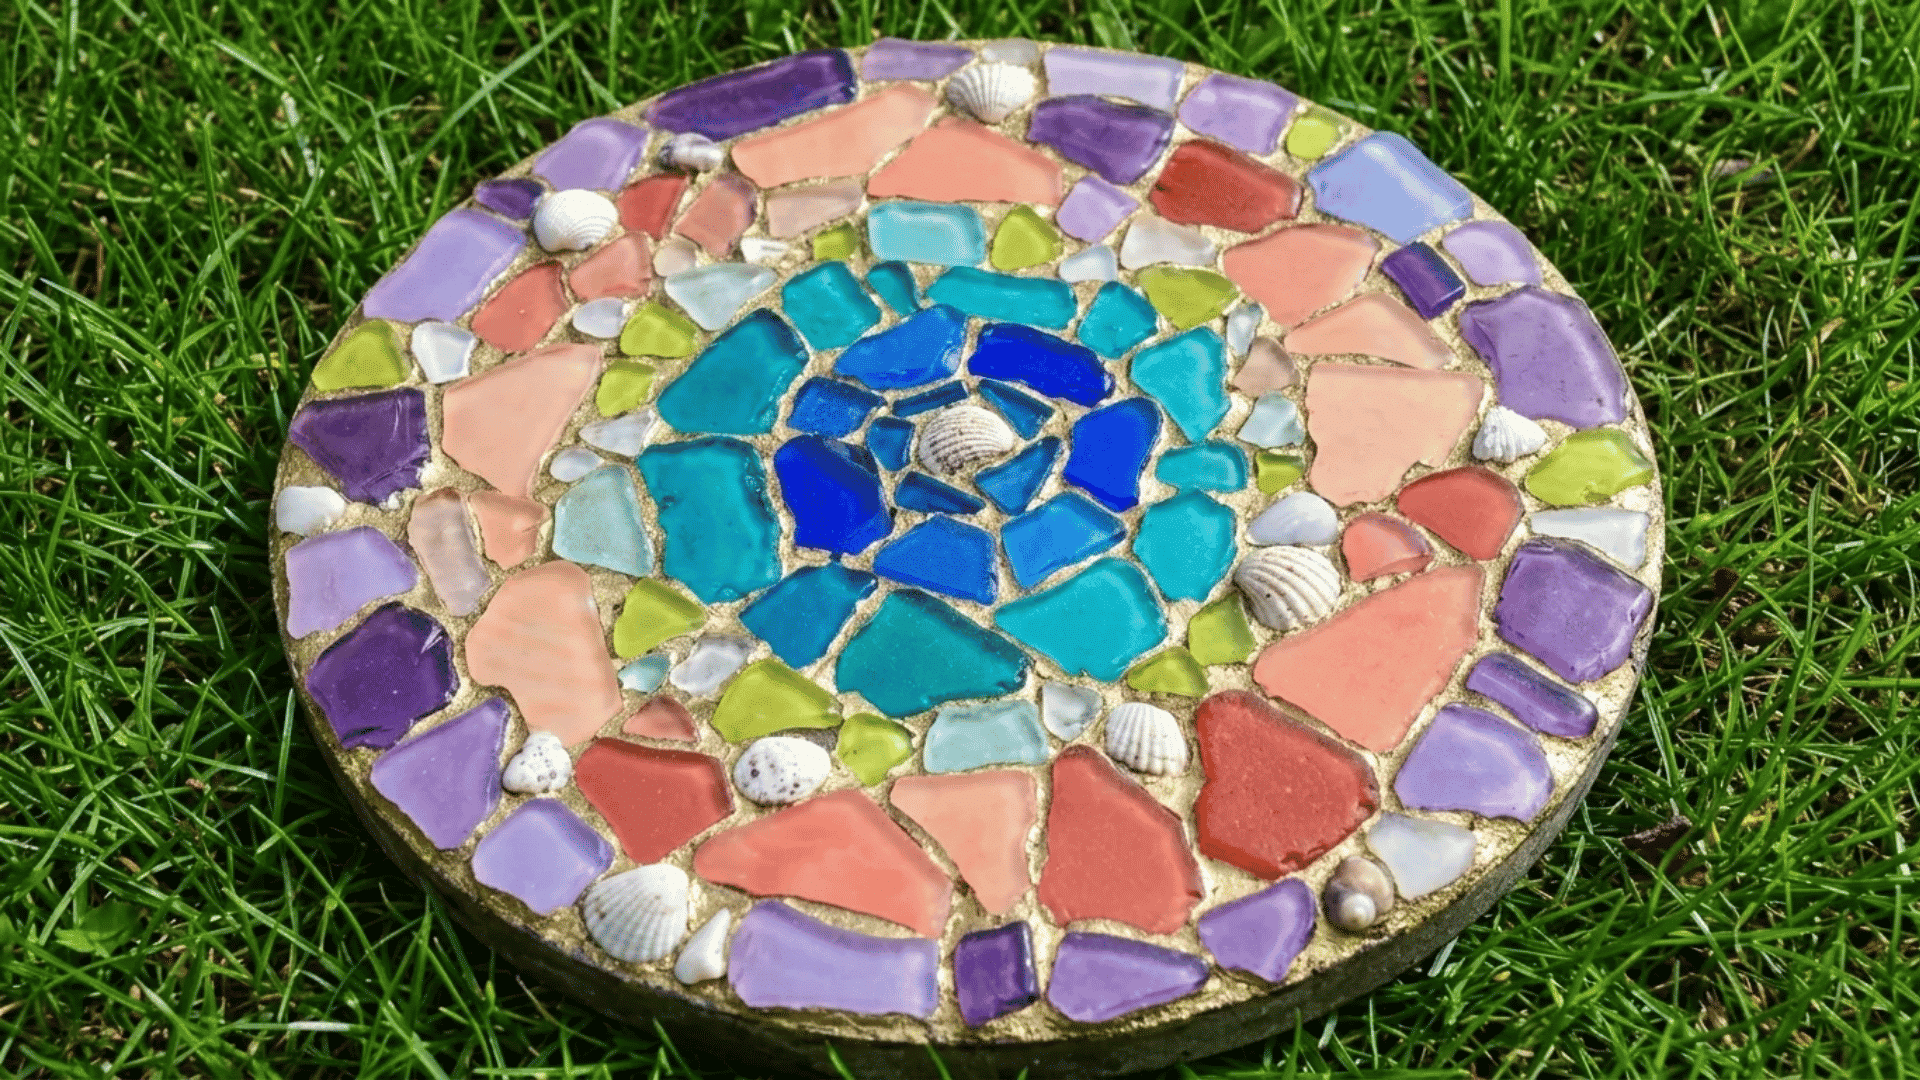
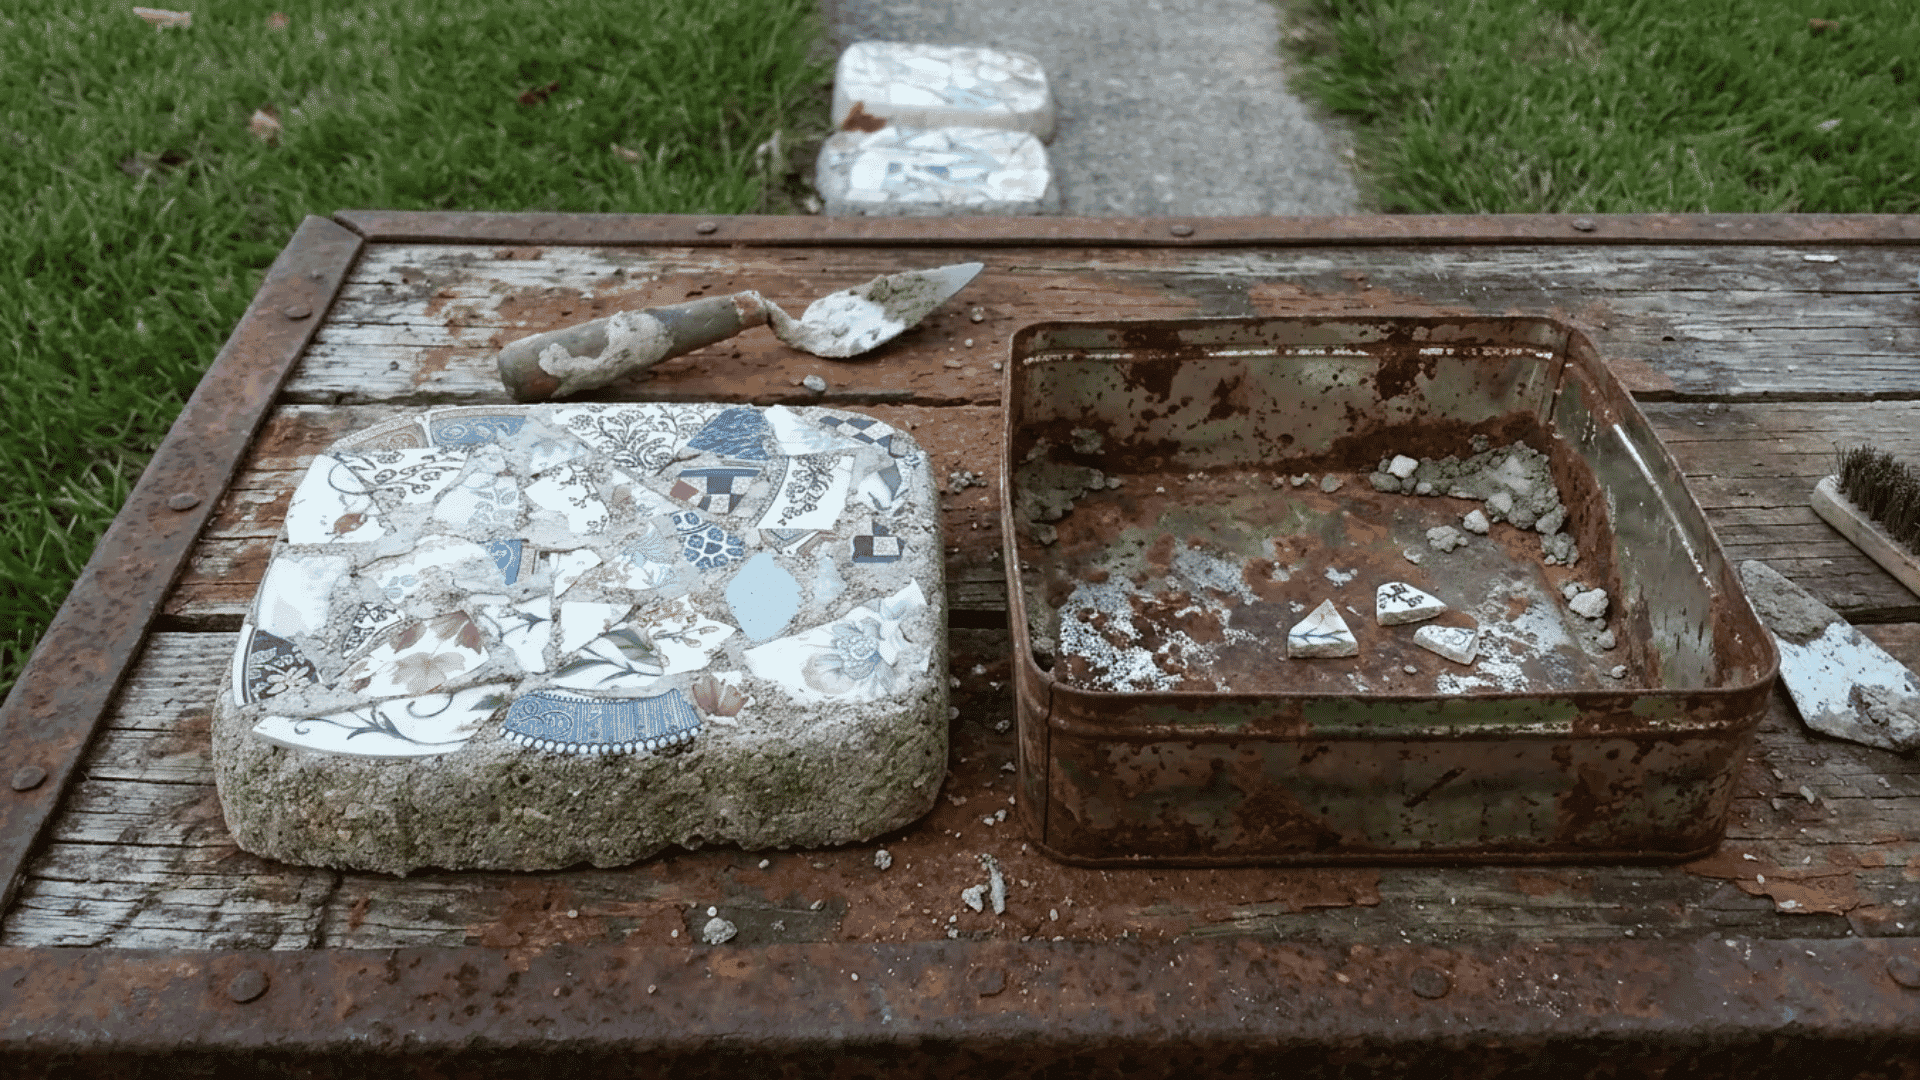
3. Mosaic Stepping Stones
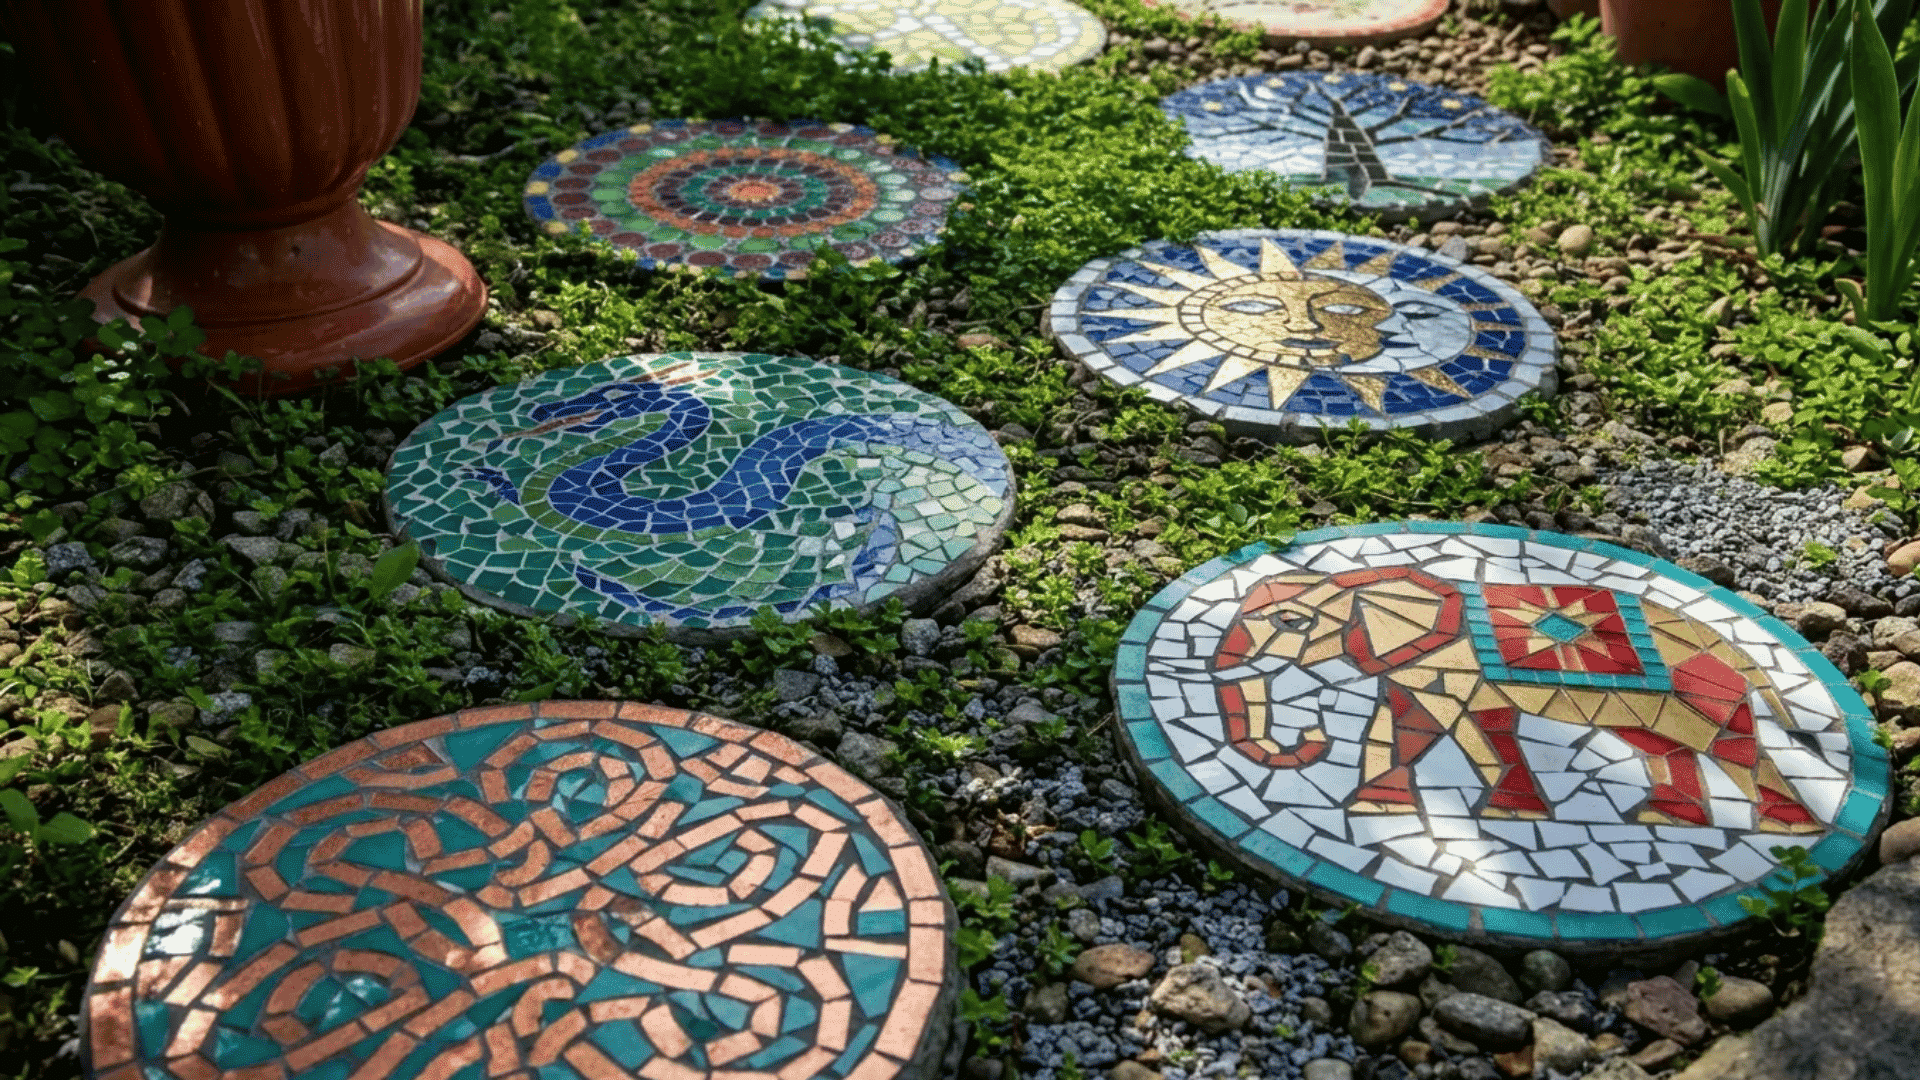
Mosaic stones are a good pick if you want color without paint.
Use broken tiles, ceramic pieces, glass gems, or small stones to make shapes, borders, or patterns. For a beginner-friendly version, use pre-cut mosaic tiles.
You get the look without tile cutters or extra tools.
4. Sea Glass Stepping Stones
Sea glass stones work well for a beach-style garden path. Use smooth sea glass pieces in blue, green, white, or mixed colors.
Press them lightly into the surface once the concrete starts to firm up. A simple ring around the edge keeps the design neat.
5. Shell Stepping Stones
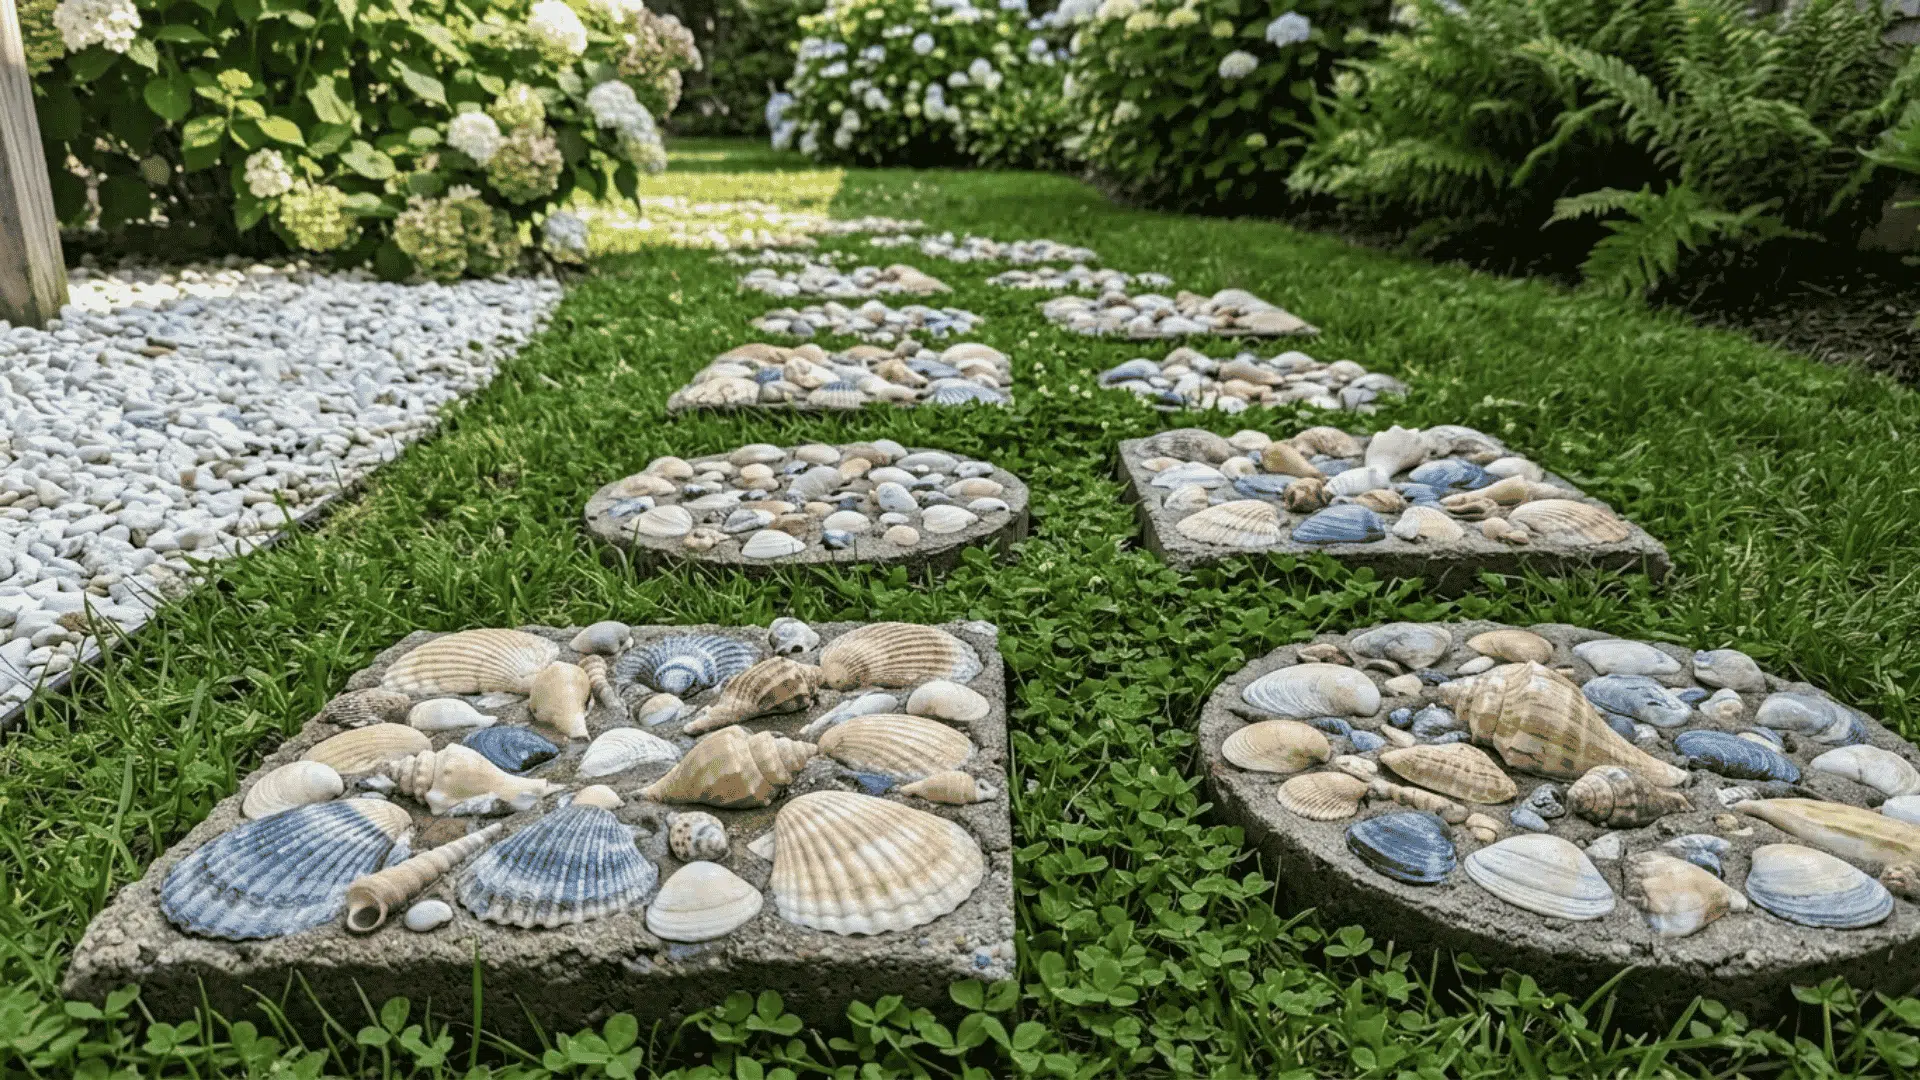
Shell stones are great for beach houses, poolside paths, or flower beds. Use clean, dry shells and press them into the concrete with the open side facing down.
Save thin shells for stones near plants instead of walking areas. Stronger shells work better for paths.
6. River Rock Stepping Stones
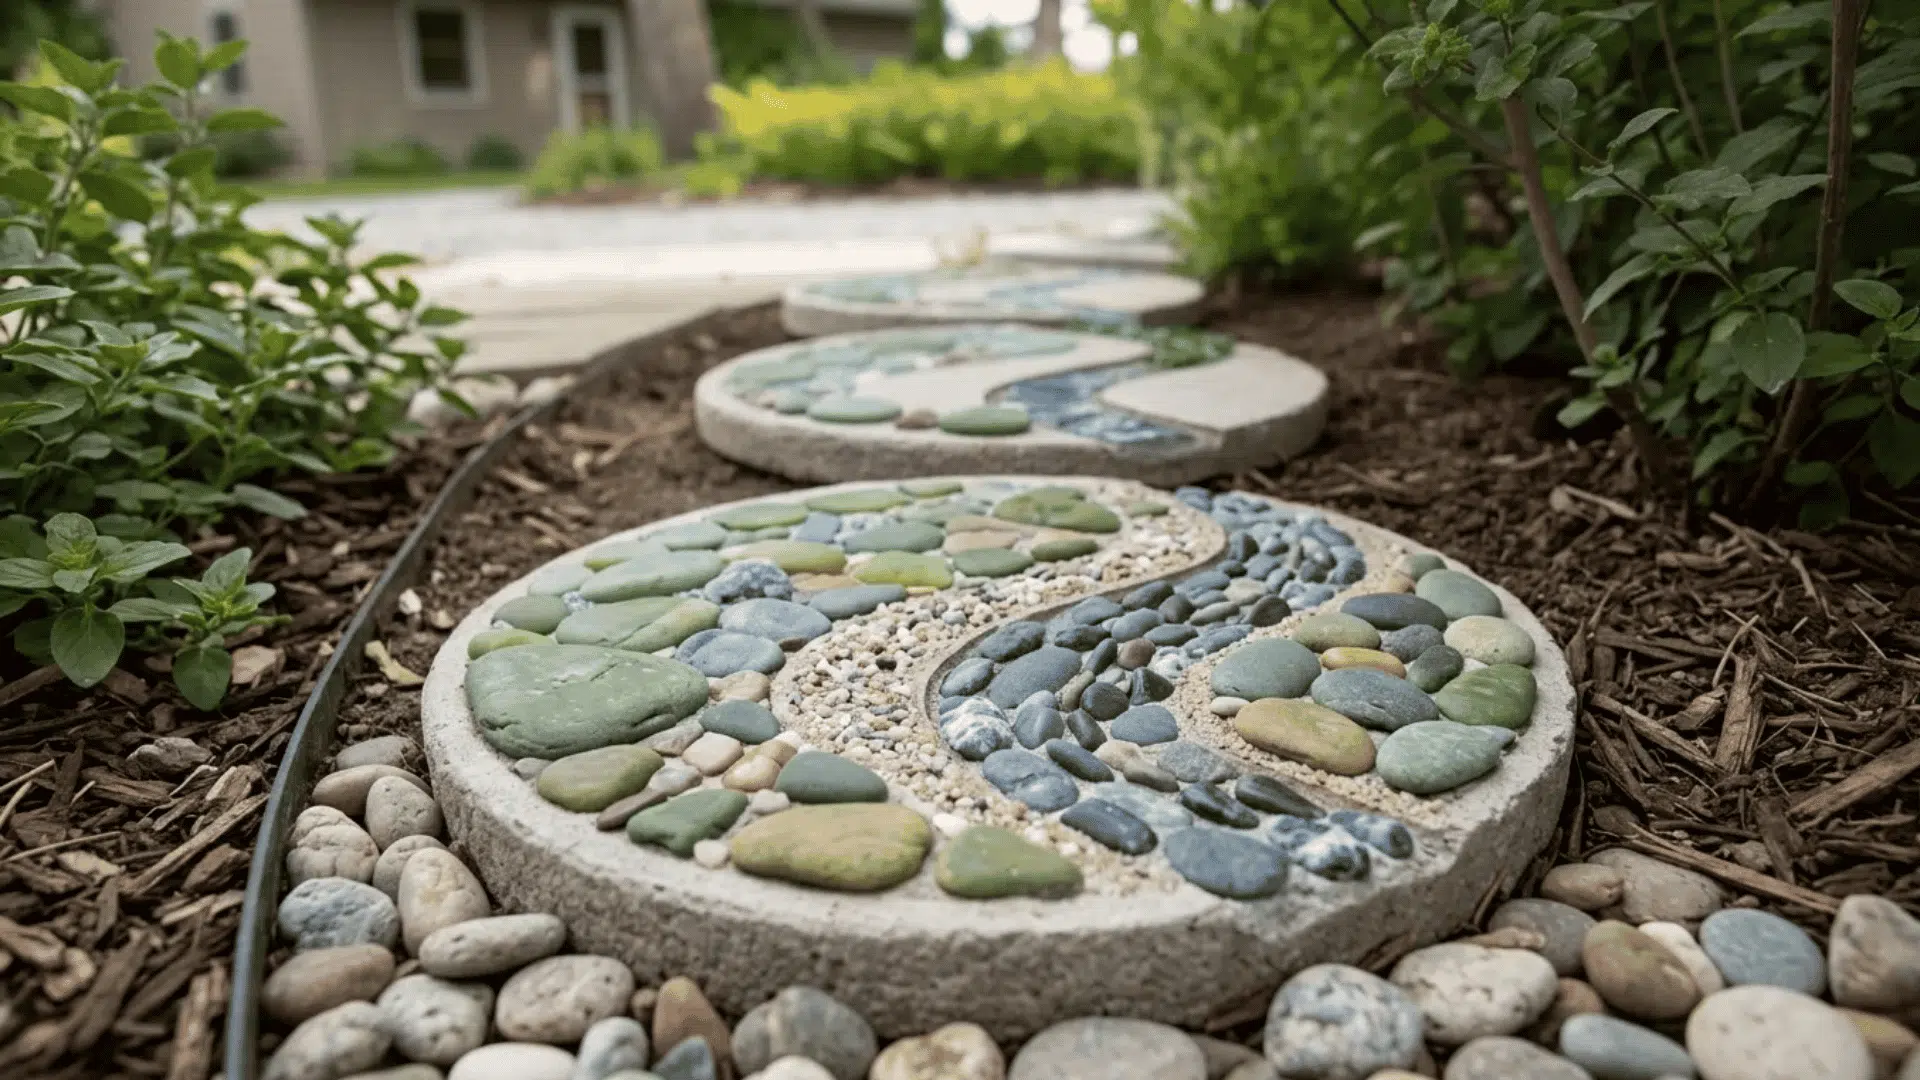
River rock stones give a garden path a natural look.
Use smooth rocks in different sizes and press them in firmly. You can make circles, loose waves, simple lines, or a pebble border.
This idea works well near grass, mulch, gravel, or raised beds.
7. Leaf Print Stepping Stones

Leaf print stones are simple but full of detail. Press a large leaf into wet concrete, then lift it away once the surface holds the shape.
Leaves with strong veins give the clearest print. Hosta, rhubarb, fern, and similar large leaves work well.
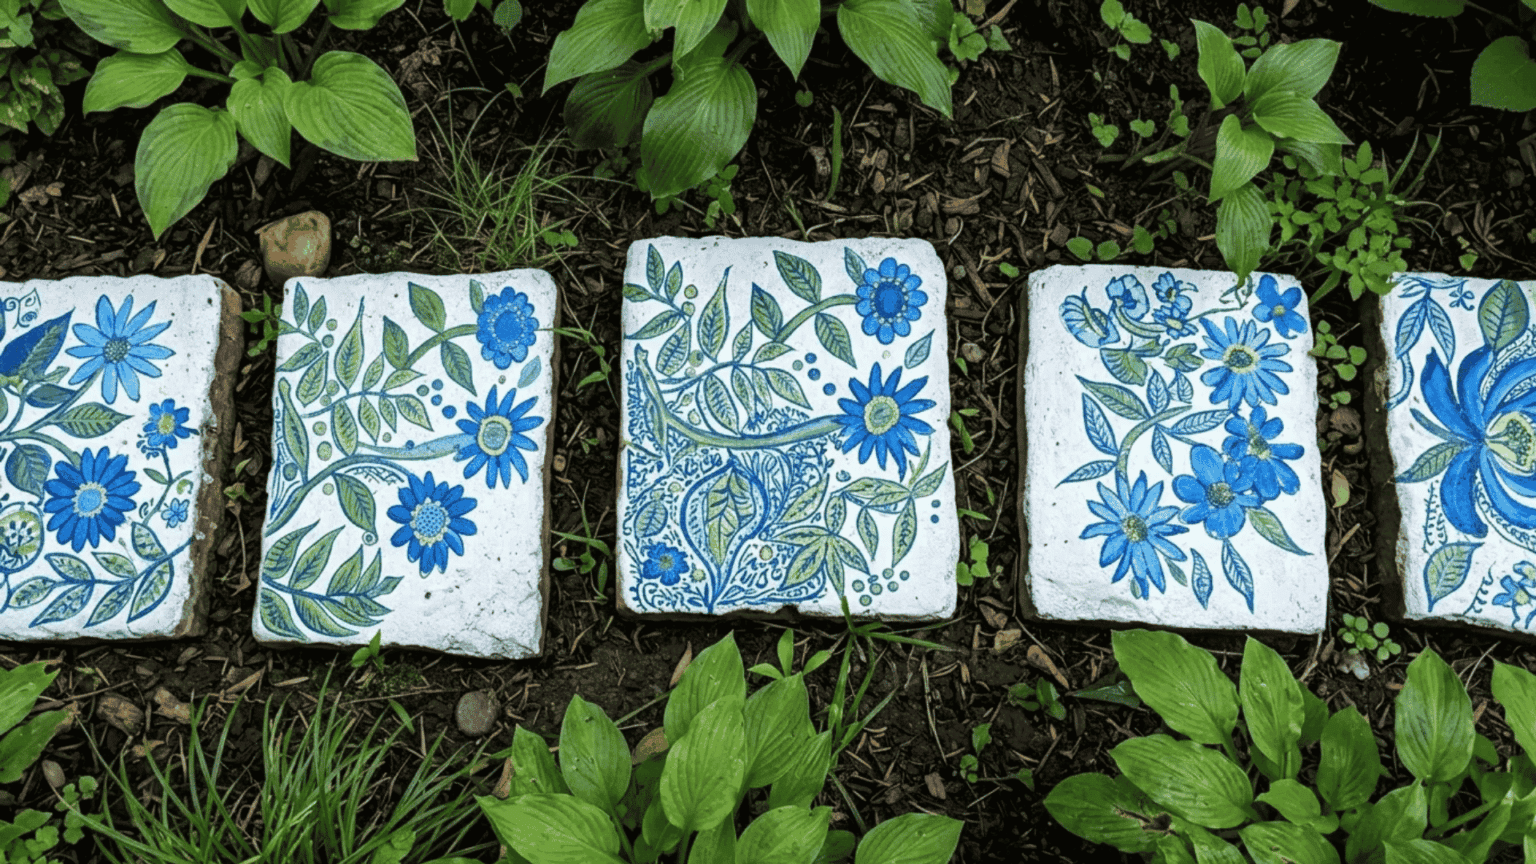
8. Painted Stepping Stones
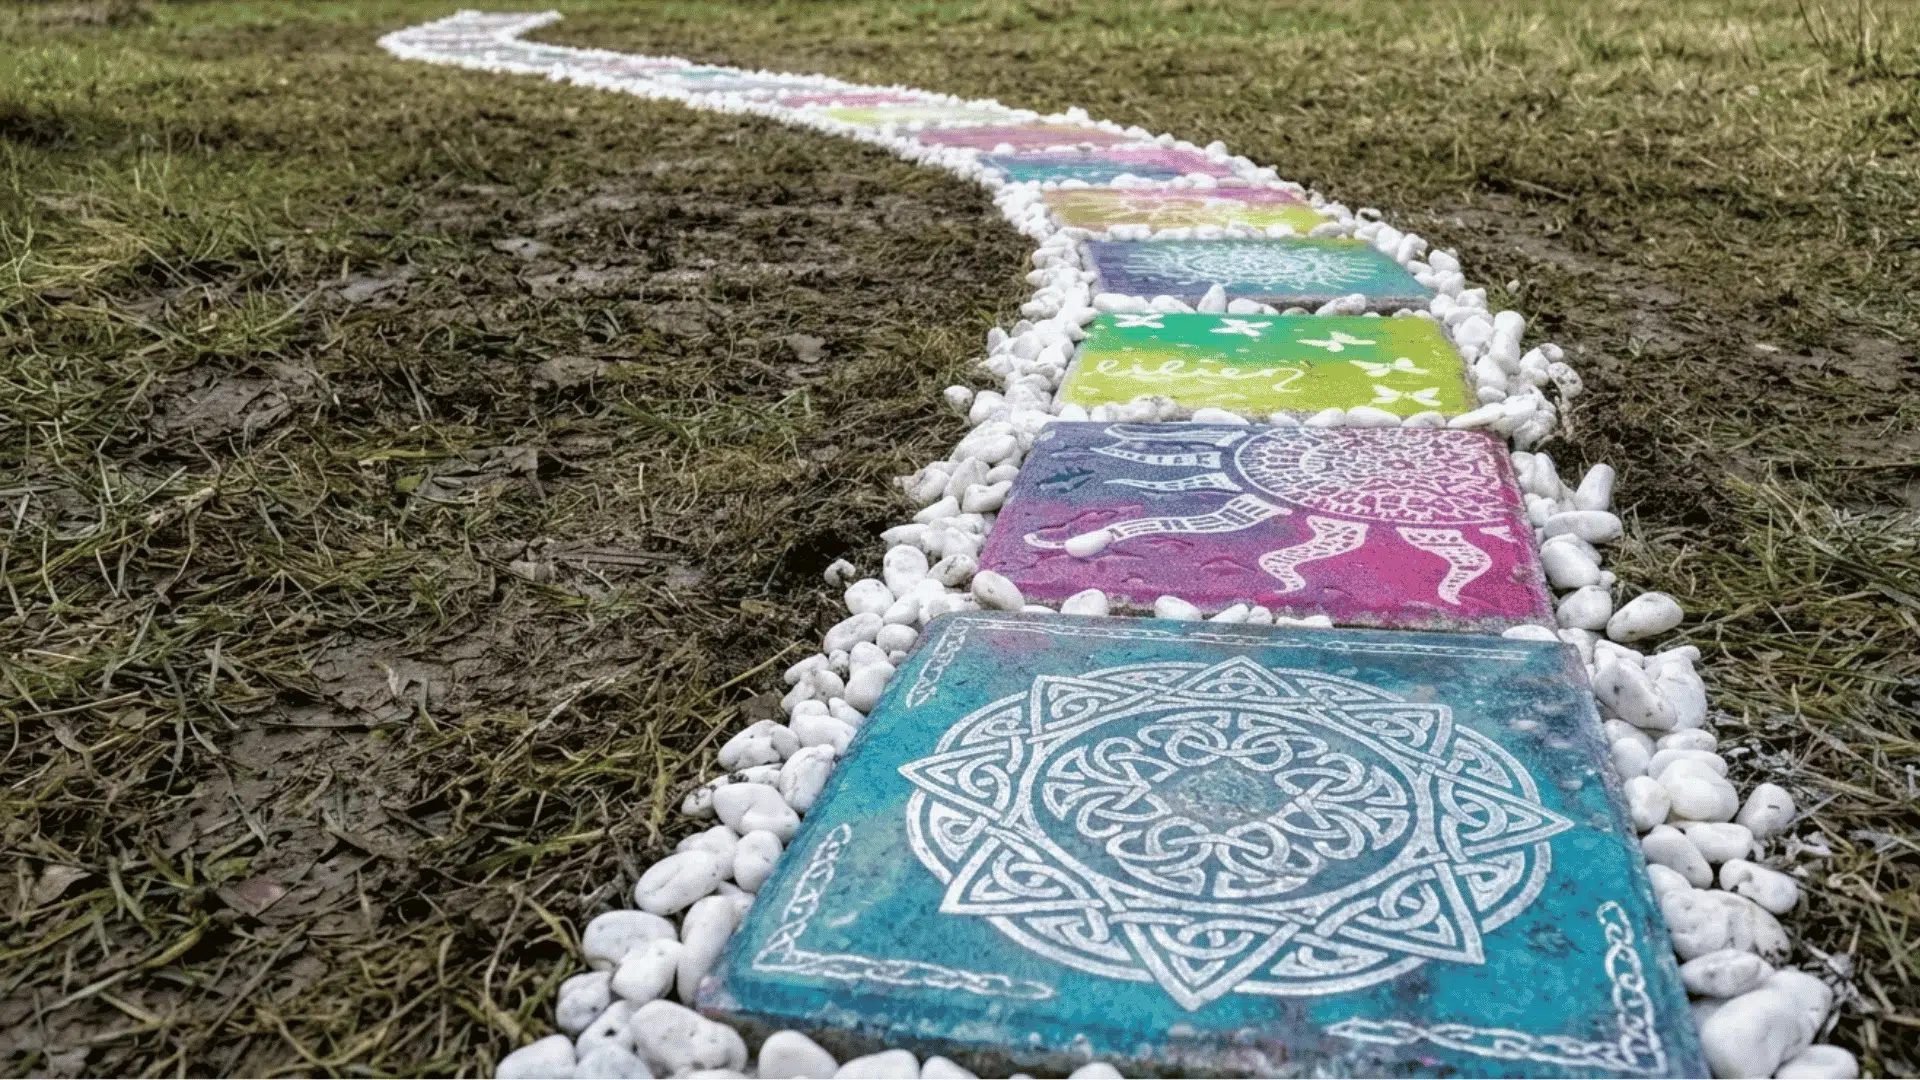
Painted stones are fun once the concrete has cured.
Kids can add flowers, bugs, rainbows, garden signs, or simple color blocks. Use outdoor acrylic paint so the design lasts longer outside.
Finish with an outdoor-safe sealer to protect the surface.
9. Letter Stamp Stepping Stones
![]()
Letter stamps let you add names, dates, short words, or garden labels. They work best when the concrete is firm but not fully dry.
Try short words or phrases like:
- Welcome
- Grow
- Bloom
- Family
- Herb Garden
- This Way
- Grandma’s Garden
Short text looks cleaner and is easier to read.
10. Recycled Mold Stepping Stones
You do not need a store-bought mold to start. Many household items can shape a stepping stone if they are sturdy.
Try using:
- Old cake pans
- Pie tins
- Plastic trays
- Plant saucers
- Bucket lids
- Cardboard boxes lined with plastic
Coat the inside with oil before pouring. This helps the stone slide out without cracking at the edges.
DIY Stepping Stones With Kids
DIY stepping stones can turn into a fun backyard craft for kids. Adults should handle the dry mix, water, and pouring.
Once the concrete is in the mold, kids can help with handprints, footprints, stamps, gems, shells, pebbles, or paint.
Easy kid-friendly ideas include:
- Handprint stones with names
- Footprint butterfly stones
- Gem border stones
- Painted garden stones
- Shell and pebble stones
- Name and date keepsakes
Set out all decorations before mixing.
That way, kids can start designing as soon as the surface is ready. For younger kids, keep each stone focused on one main idea.
One handprint, one border, or one short name design usually looks better than too many pieces packed together.
DIY Stepping Stones: Common Mistakes to Avoid
Even a simple stepping stone project can go a little sideways if the mix, mold, or curing step is rushed.
Here are the small slip-ups that can turn a cute garden stone into a cracked pancake:
- Adding too much water: A runny mix may look easier to pour, but it can dry weak and crumbly.
- Pulling it out too early: Give the stone enough time to firm up before removing it from the mold.
- Forgetting to grease the mold: A dry mold can make the stone stick, chip, or break when you try to release it.
- Curing it in harsh sun: Direct heat can dry the surface too fast and lead to cracks.
- Placing it on bare soil: A sand or gravel base helps the stone sit flat instead of wobbling after rain.
Final Thoughts
A handmade path has a way of making a yard feel more lived-in and loved.
Once the first stone is done, it is easy to see how many directions this project can go.
You can keep the design soft and simple, let kids take over the decorating, or turn each stone into a small memory from a season, trip, or family day.
The best projects are not perfect. They have tiny fingerprints, uneven gems, funny letters, and little details that make people stop and smile.
Now it’s your turn.
Which DIY stepping stone idea would you try first?
Share your favorite design idea in the comments and tell us where you would place it in your garden.
Frequently Asked Questions
Is It Cheaper to Make Your Own Stepping Stones?
Yes, making your own stepping stones is significantly cheaper, especially if you need multiple stones or prefer custom, decorative designs.
Can You Use Quikrete for Stepping Stones?
Yes, you can absolutely use Quikrete for stepping stones. For the smoothest and easiest results, it is highly recommended to use QUIKRETE Sand Topping Mix or QUIKRETE 5000 Concrete Mix.
What Does Coca-Cola Do for Concrete?
Coca-Cola primarily acts as a concrete surface retarder due to its high sugar content. When applied to fresh concrete, the sugar delays the curing of the top layer, allowing builders to easily wash away the cement paste.