
A mud kitchen is one of those backyard projects that costs little but gets used for months.
With a few boards, an old sink, some thrifted utensils, and a little creativity, you can create an outdoor play space where kids mix, pour, scoop, and invent all kinds of muddy recipes.
The best part? There is no single right way to build one.
Some are made from pallets. Some start as old furniture. Others are built from scratch using simple lumber.
This guide covers practical mud kitchen DIY ideas, step-by-step build options, creative upgrades, and setup tips to help you create one that fits your space and budget.
What Is a Mud Kitchen and Why Do Kids Love It?
A mud kitchen is an outdoor play space where kids can mix, pour, scoop, and create using mud, water, leaves, stones, and other natural materials.
It turns a simple backyard corner into a place for hands-on play and imaginative fun.
A Place for Messy Outdoor Fun
Unlike indoor play kitchens, spills and muddy hands are part of the experience. Kids can freely make mud pies, soups, and all kinds of pretend recipes.
Imagination Leads the Way
A mud kitchen can become something new every day. One day it’s a bakery, the next it’s a restaurant, science lab, or potion station.
Easy to Build on Any Budget
Many DIY mud kitchens can be made using:
- Wooden pallets
- Old furniture
- Fence boards
- Scrap wood
- Thrift-store kitchen tools
Planning Your DIY Mud Kitchen
A little planning helps create a setup that fits your space and lasts longer.
Choosing the Right Location
Look for a spot with:
- Partial shade
- Level ground
- Easy access to water
- Enough room for active play
Deciding on Size
| Child Age | Recommended Counter Height |
| 1–3 Years | 18–22 inches |
| 3–6 Years | 22–26 inches |
| 6+ Years | 26–30 inches |
Questions to Ask Before Building
- Will it stay outdoors year-round?
- Do you want a sink or water feature?
- How many children will use it?
- Do you need storage space?
- Will it stand alone or sit against a fence?
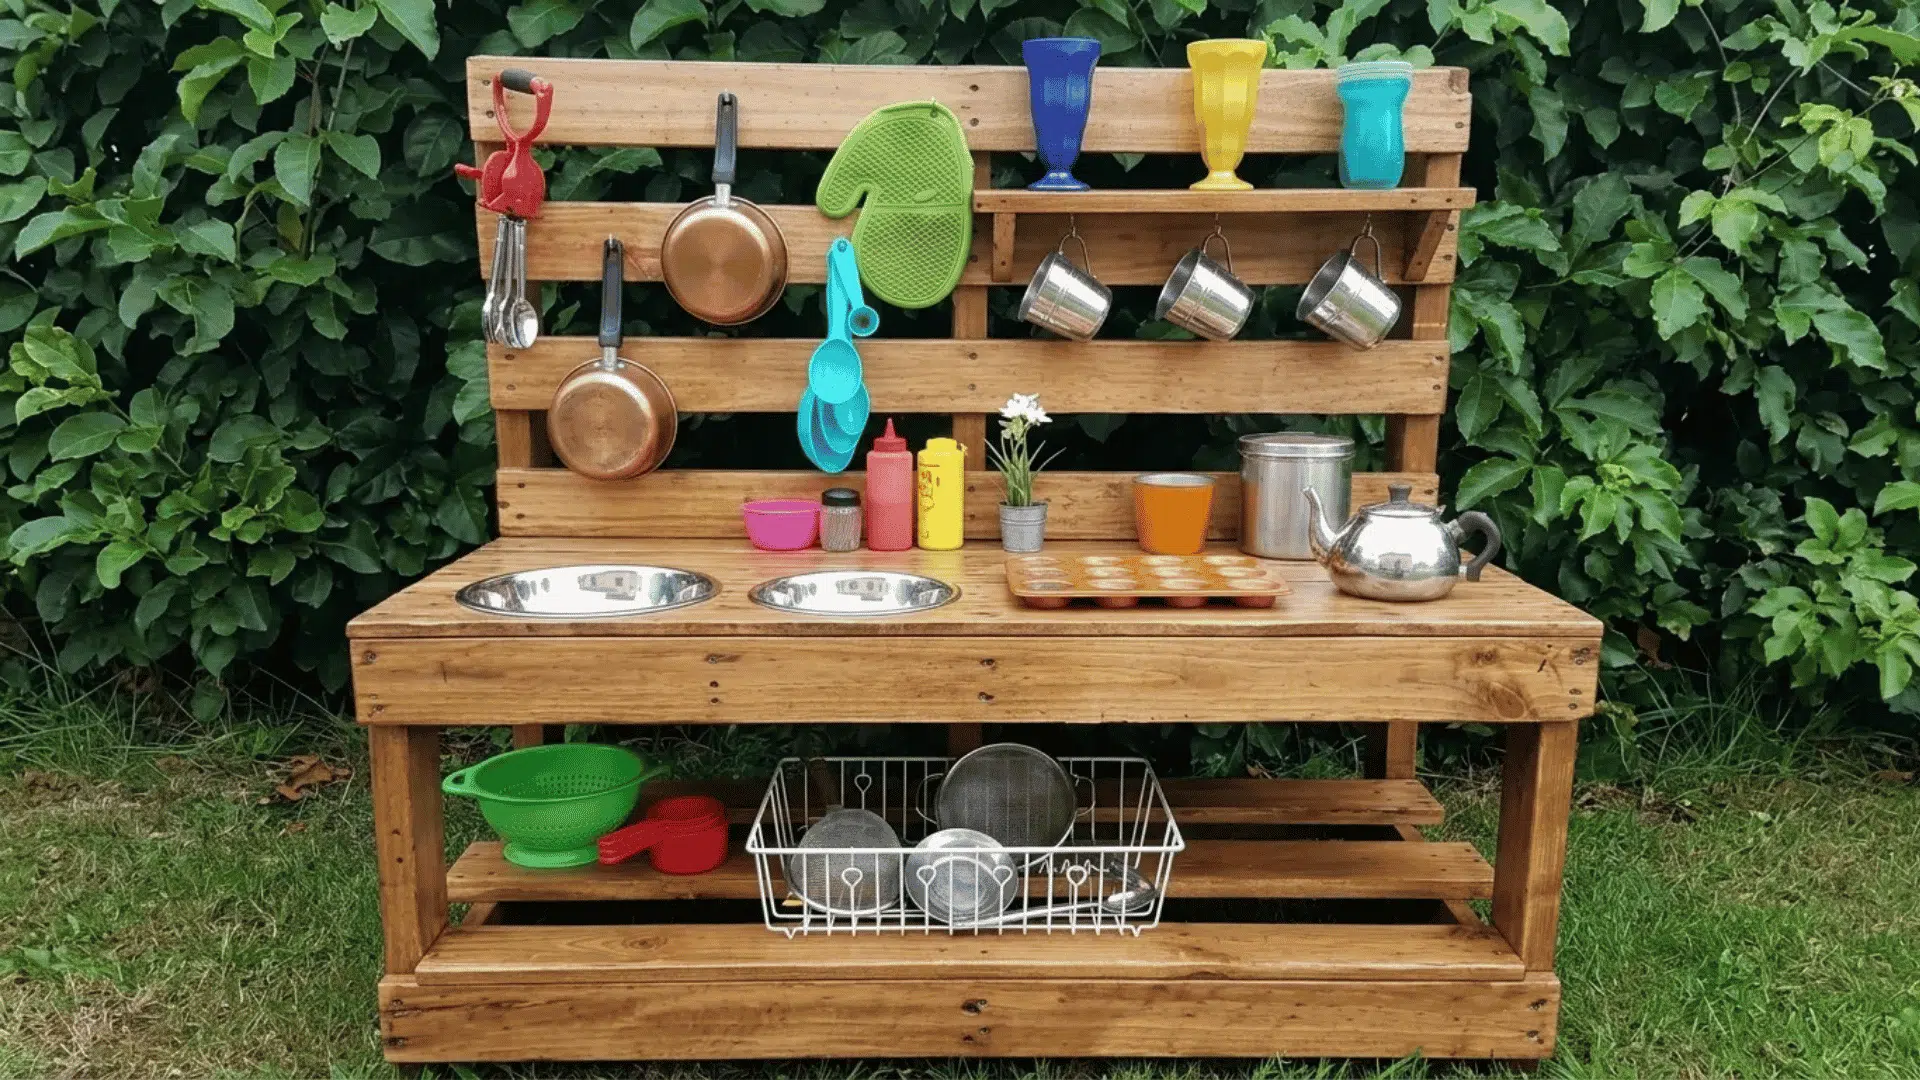
What to Put in a Mud Kitchen?
The best mud kitchens keep things simple. A mix of kitchen tools, natural materials, and water accessories creates plenty of opportunities for creative play.
Essential Items
- Pots and bowls
- Funnels and measuring cups
- Ladles, whisks, and strainers
- Sand, soil, pebbles, and flower petals
- Spray bottles and watering cans
- Small buckets and squeeze bottles
Many of these items can be found at thrift stores, around the house, or right in the backyard.
How to Build a Basic Mud Kitchen: Step by Step
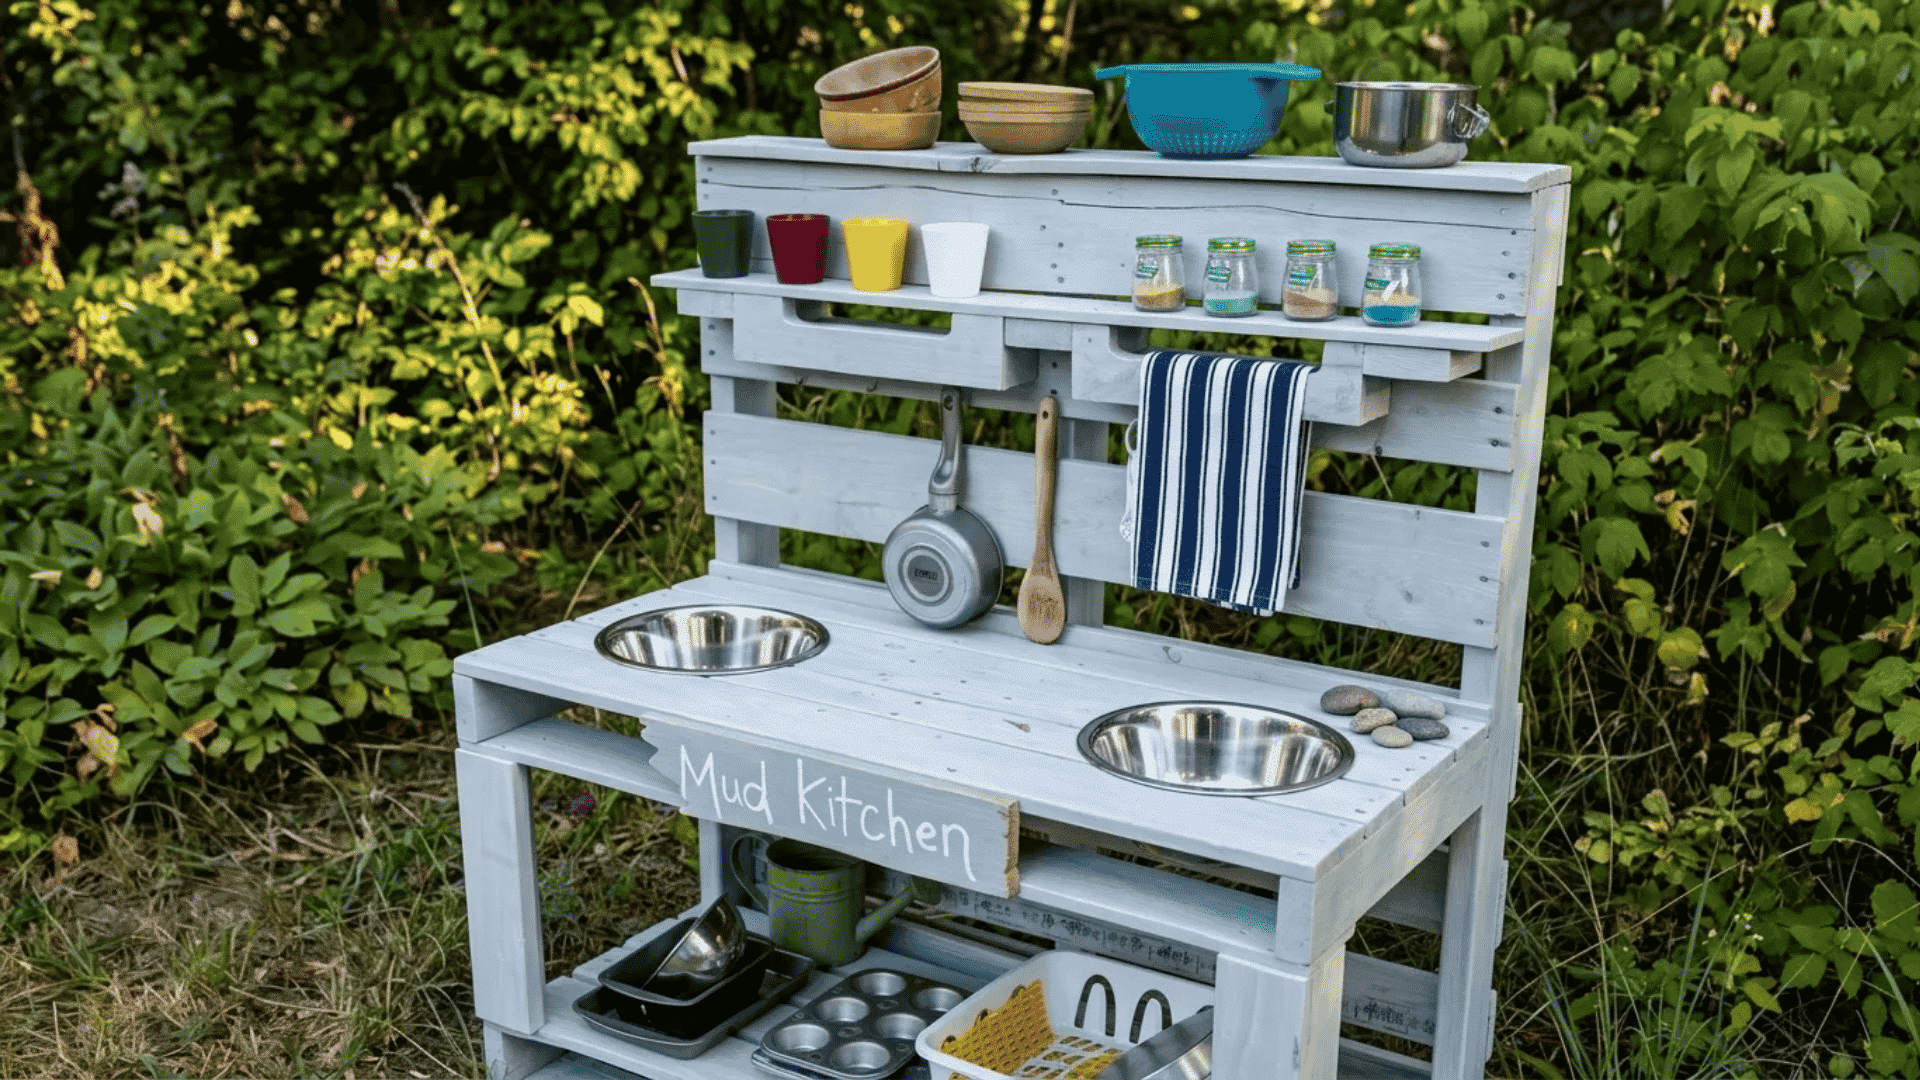
Building a mud kitchen doesn’t require advanced woodworking skills or a garage full of tools.
Start with a simple structure, add a few playful features, and you’ll have an outdoor play station ready for countless muddy creations.
Step 1: Build a Strong Base
The frame is what holds everything together, so it’s worth taking a little extra time here.
Suitable materials include:
- Wooden pallets
- Fence boards
- Reclaimed timber
- Leftover decking boards
Check that the structure sits level on the ground and doesn’t wobble when pushed. A solid base makes every other step easier.
Step 2: Fit the Work Surface
The countertop becomes the main preparation area for mud pies, soups, and backyard experiments.
Choose a weather-resistant board and secure it firmly to the frame. Before attaching it permanently, decide where the sink and accessories will go so everything feels balanced.
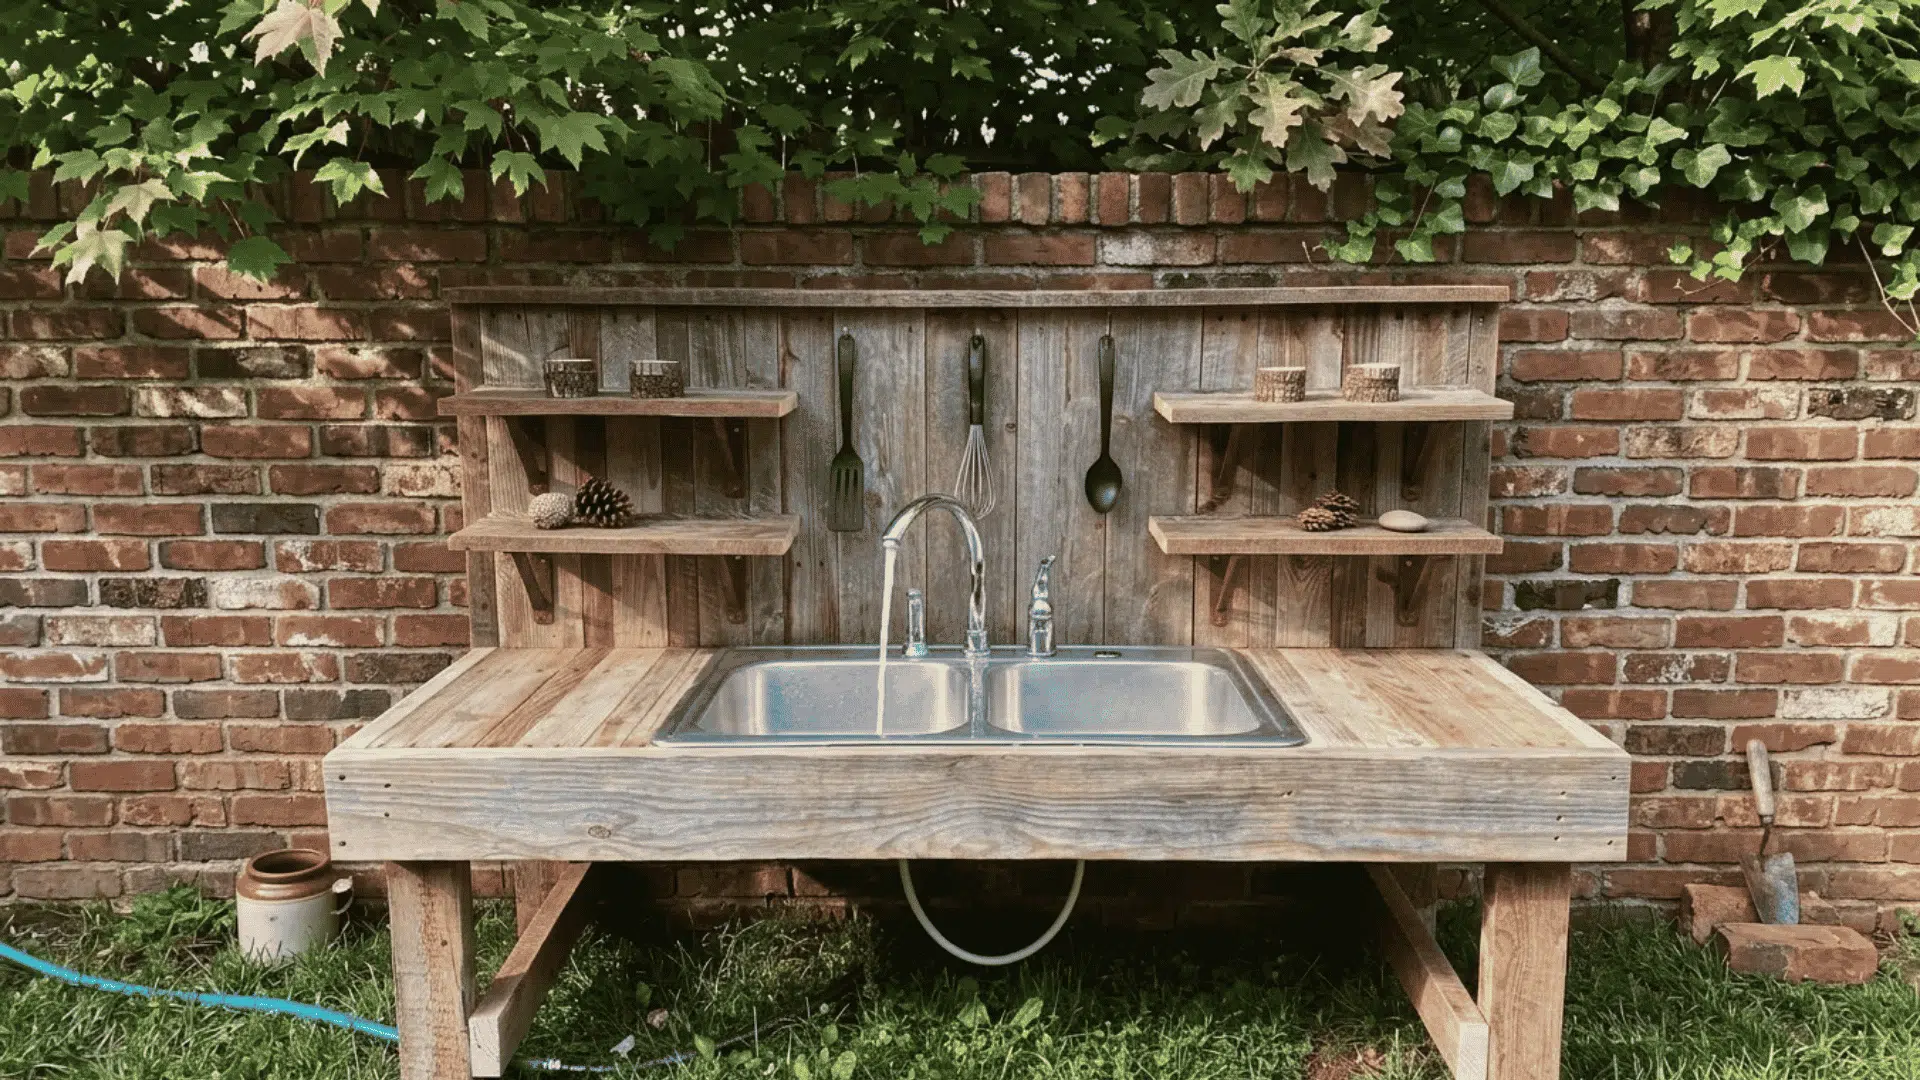
Step 3: Install the Sink Area
A sink instantly makes the kitchen feel more realistic and gives kids a place to mix water and mud.
Popular choices include:
- Metal mixing bowls
- Plastic tubs
- Storage containers
- Utility basins
Trace around the rim, cut the opening, and drop the container into place. It should sit snugly without sliding around during play.
Step 4: Make a Pretend Cooktop
No outdoor kitchen feels complete without a place to “cook”.
Easy burner ideas include:
- Painted hob circles
- Wooden slices
- Recycled jar lids
- Dark-colored coasters
Arrange them in a realistic layout to create a familiar kitchen feel.
Step 5: Add Interactive Controls
Small details often become the most-used features.
Try attaching:
- Bottle caps
- Wooden discs
- Cabinet handles
- Rubber furniture feet
Children love spinning, turning, and adjusting controls while preparing their latest muddy masterpiece.
Step 6: Create Handy Storage Areas
A little organization keeps play materials within reach and reduces clutter around the workspace.
Useful storage additions include:
- Hanging hooks
- Peg rails
- Side shelves
- Wire baskets
These simple extras give every spoon, pan, and bucket its own spot.
Step 7: Smooth and Finish the Surface
The final step is often the most important.
Run your hands over every edge and corner, then sand any rough spots thoroughly. Rounded edges create a safer play area and give the finished project a cleaner look.
DIY Mud Kitchen Ideas for Every Budget
A great mud kitchen doesn’t have to cost much.
From free pallet projects to custom backyard builds, these ideas work for different budgets, spaces, and skill levels.
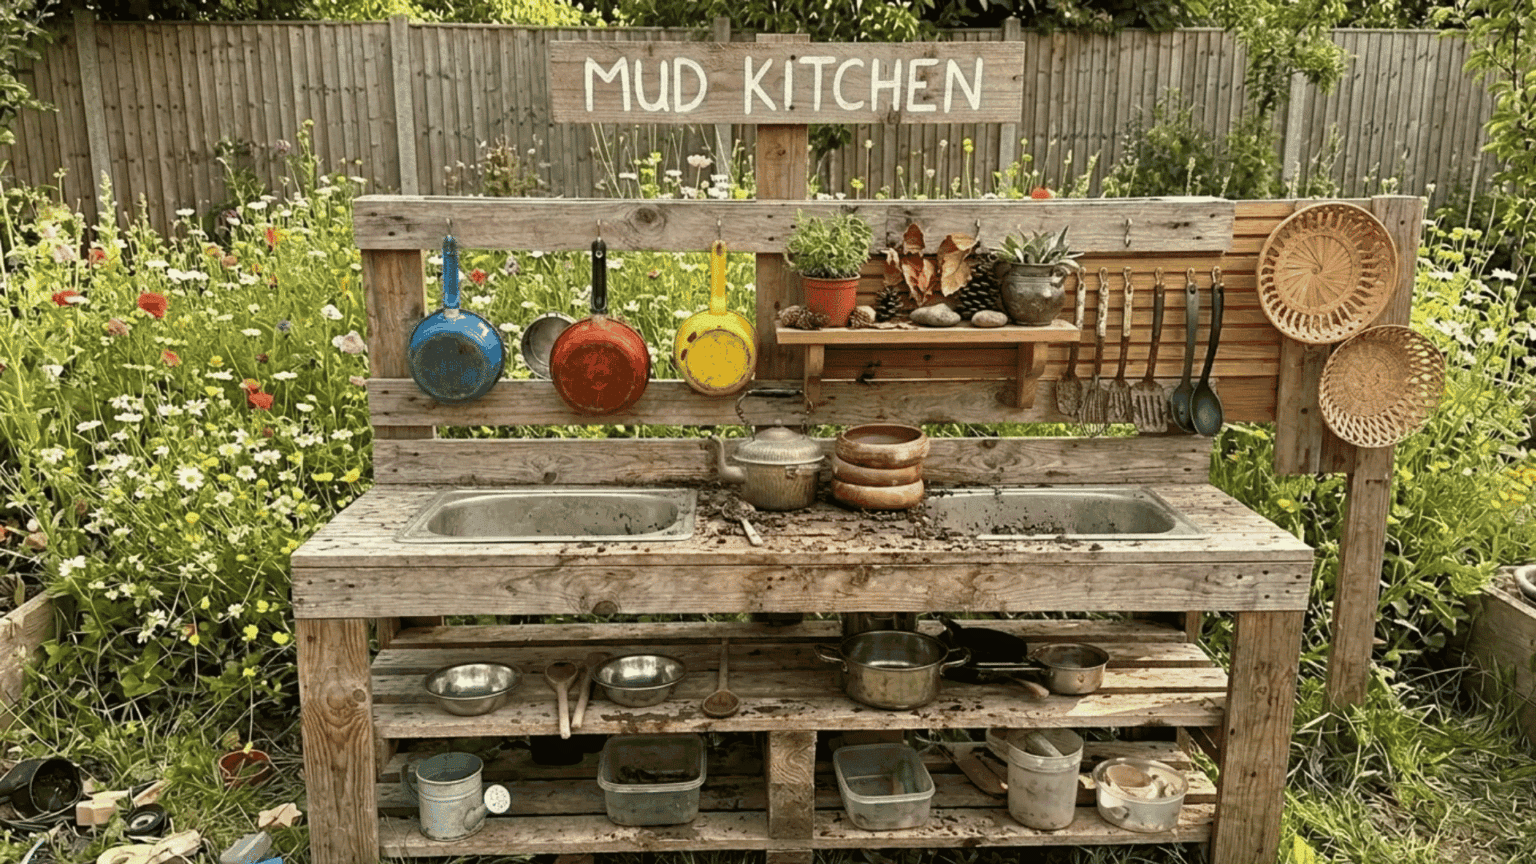
1. Pallet Mud Kitchen
Pallets are one of the most affordable ways to build a mud kitchen. With some sanding and a few simple cuts, they can become a sturdy play station with built-in storage.
What You’ll Need
- 2 wooden pallets
- Screws
- Sandpaper
- Sink bowl
- Paint (optional)
Why It Works
- Very low cost
- Strong frame
- Built-in shelving
- Easy to customize
Things to Watch For
- Remove nails carefully
- Sand rough surfaces thoroughly
- Use heat-treated pallets only
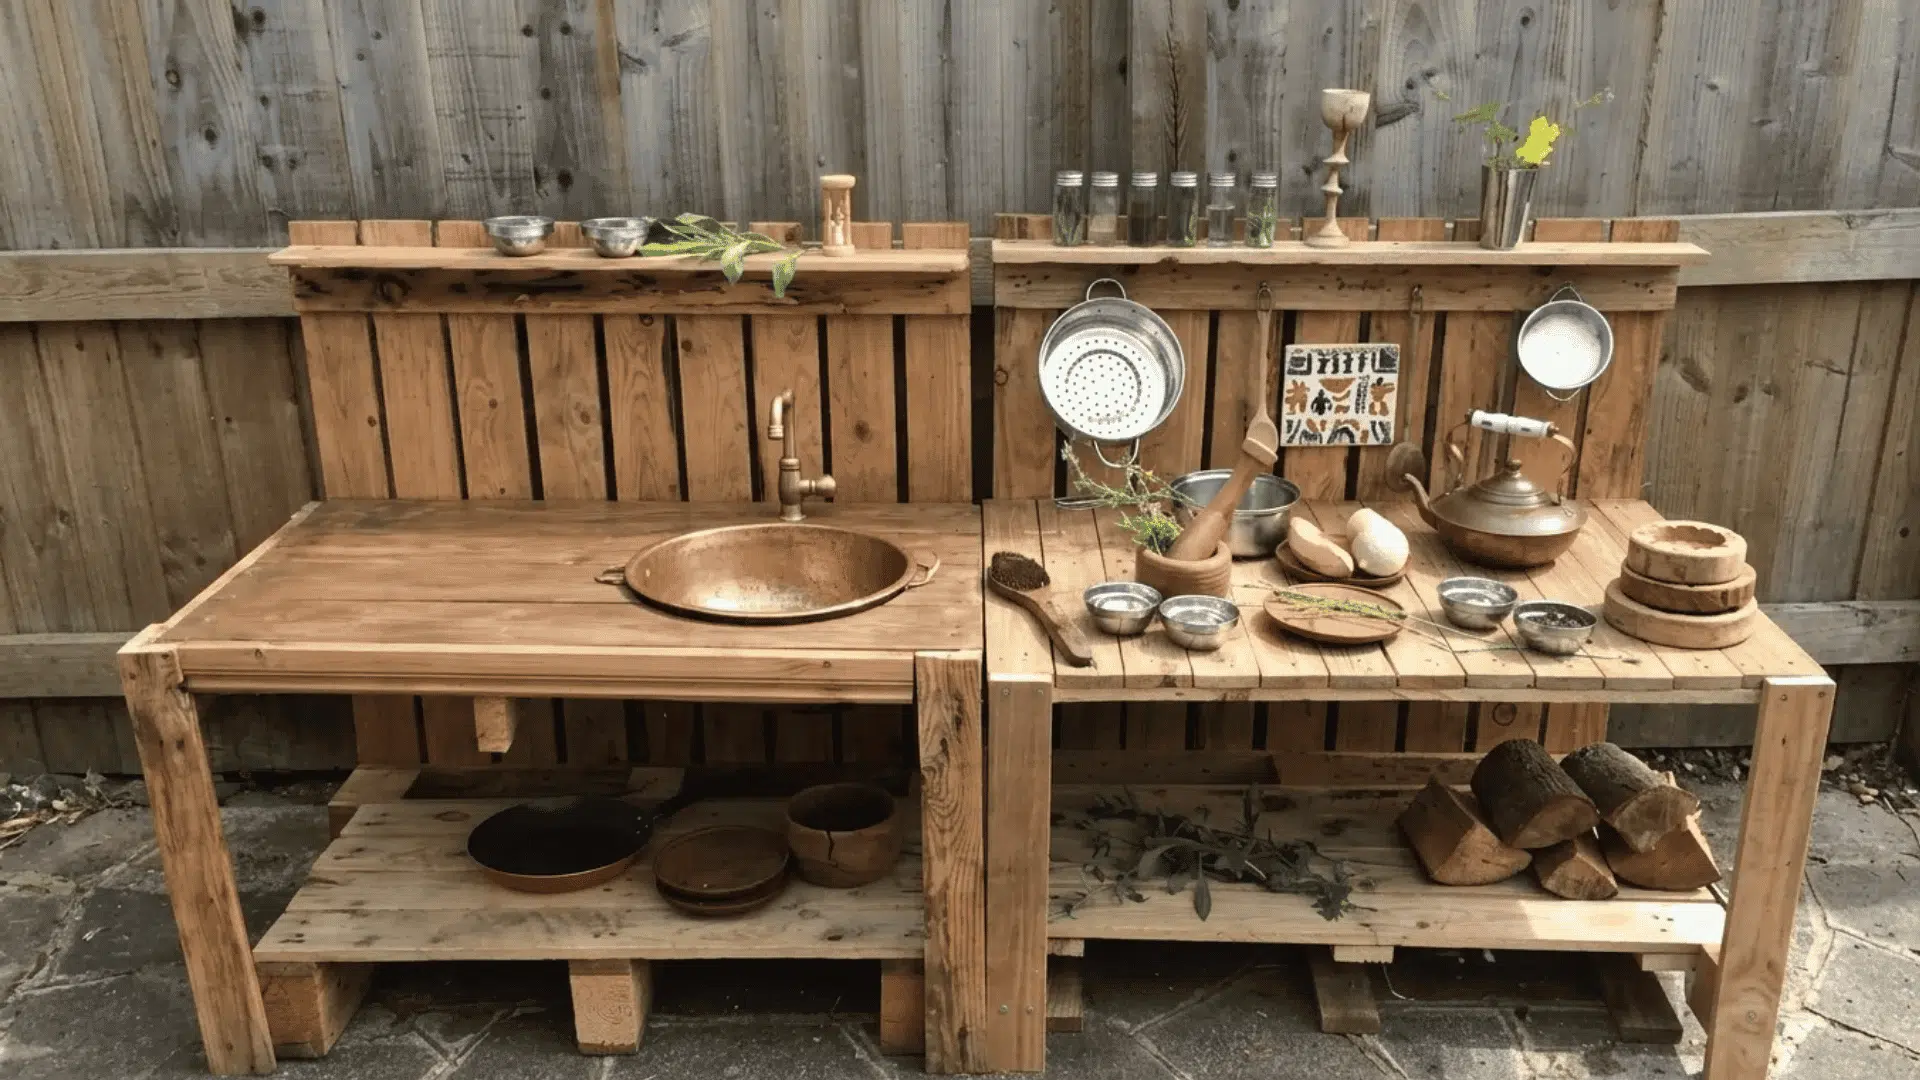
2. Upcycled Furniture Mud Kitchen
Old furniture can become a mud kitchen in just a few hours. Many pieces already include shelves and storage, making the build much easier.
Great Pieces to Repurpose
- Nightstands
- Coffee tables
- Bookcases
- TV stands
- Small cabinets
Easy Modifications
- Add a sink cutout
- Install hooks
- Paint stove burners
- Add storage crates
Best For
Parents who want a quick project with minimal building.
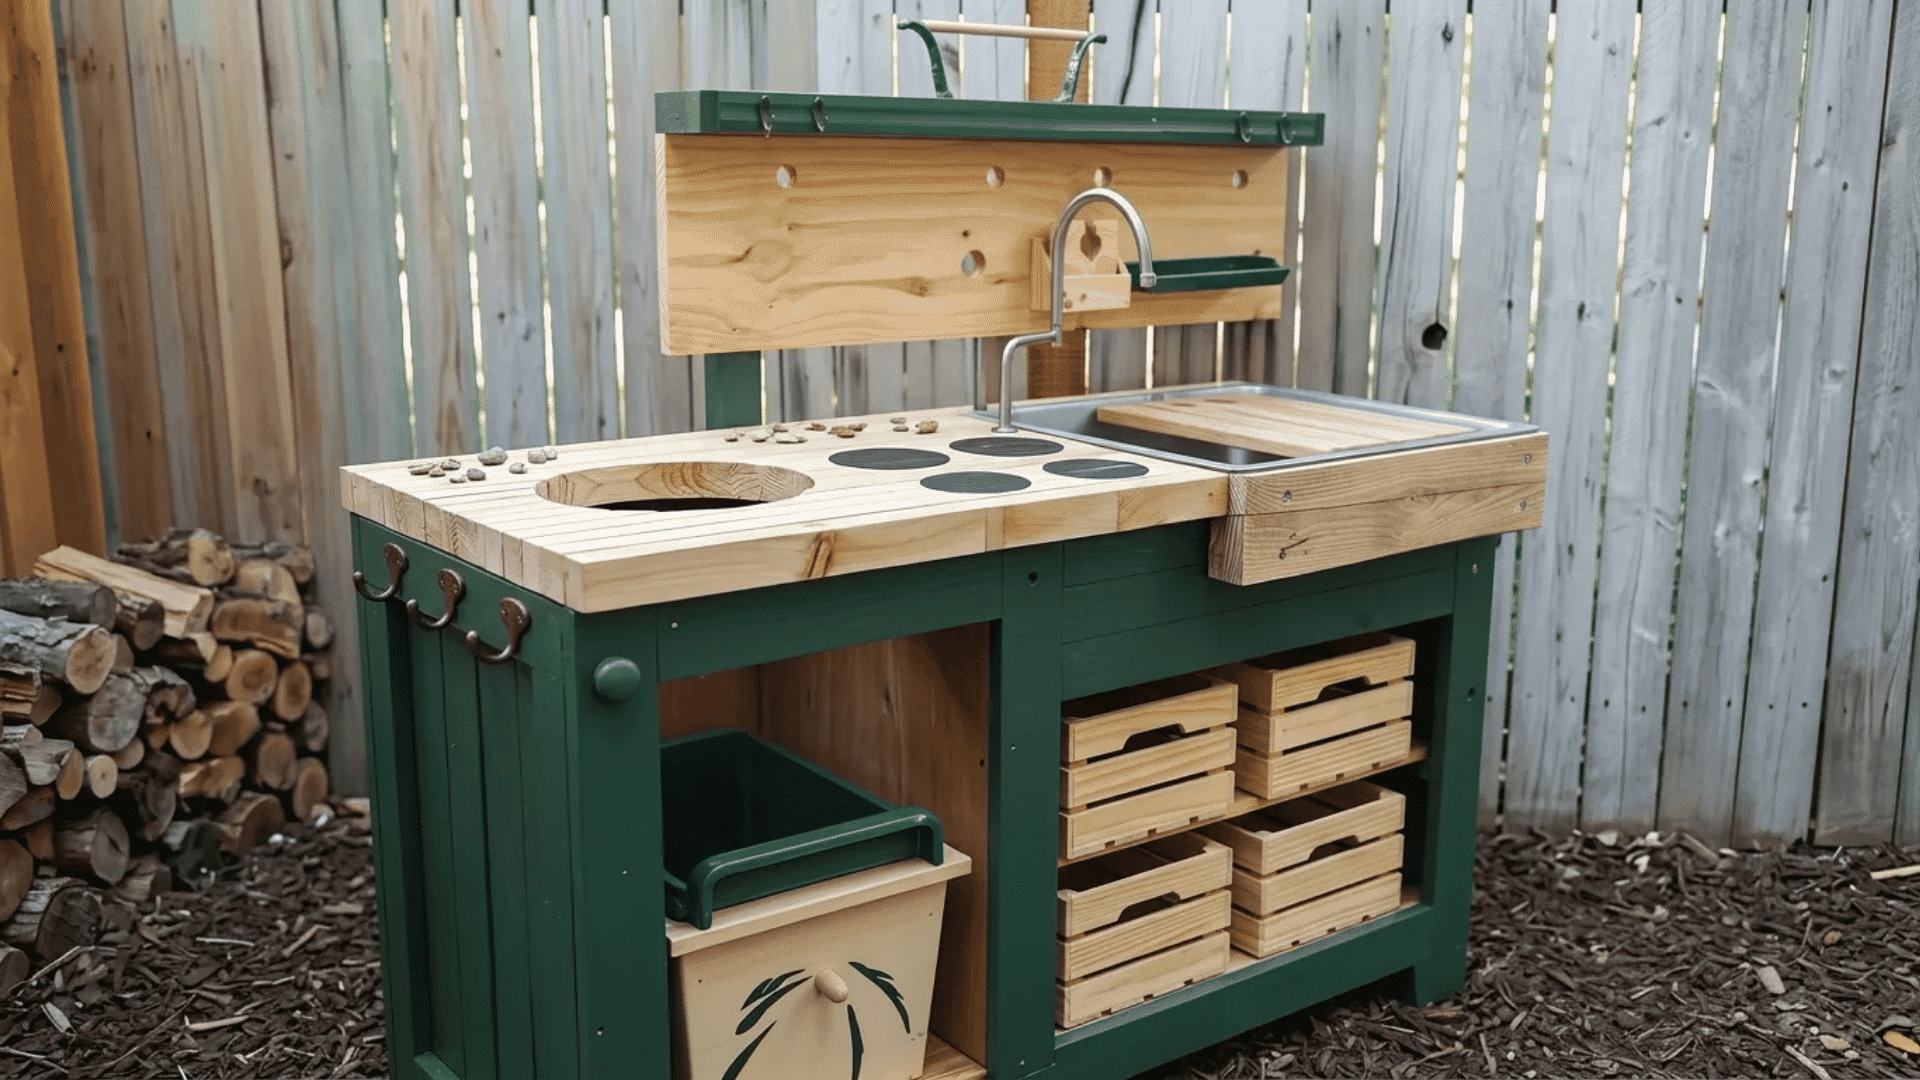
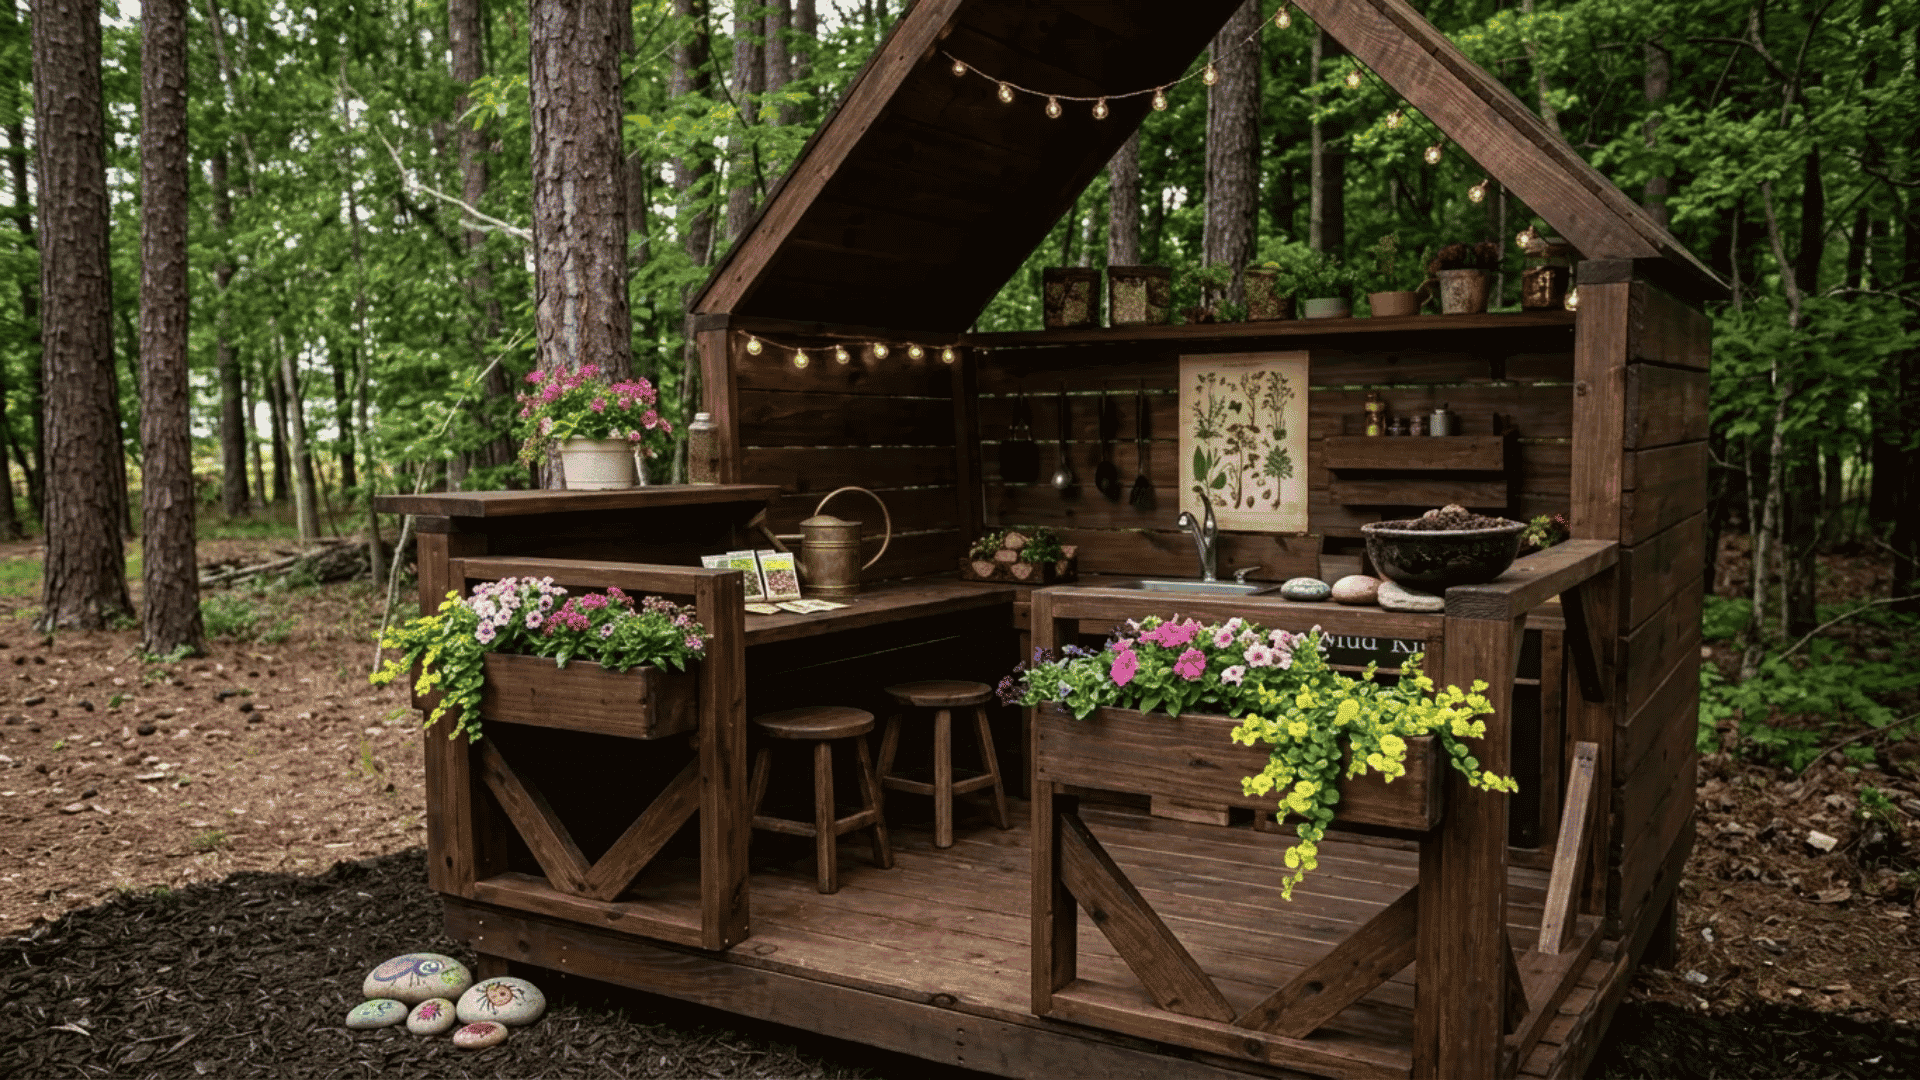
3. Cedar Fence Board Mud Kitchen
Cedar boards create a cleaner, more finished look while remaining budget-friendly. They’re also suitable for long-term outdoor use.
Benefits
- Clean appearance
- Weather resistant
- Lightweight
- Easy to cut
Features You Can Add
- Shelves
- Backsplash
- Hanging rails
- Decorative signs
- Storage compartments
4. Wooden Crate Mud Kitchen
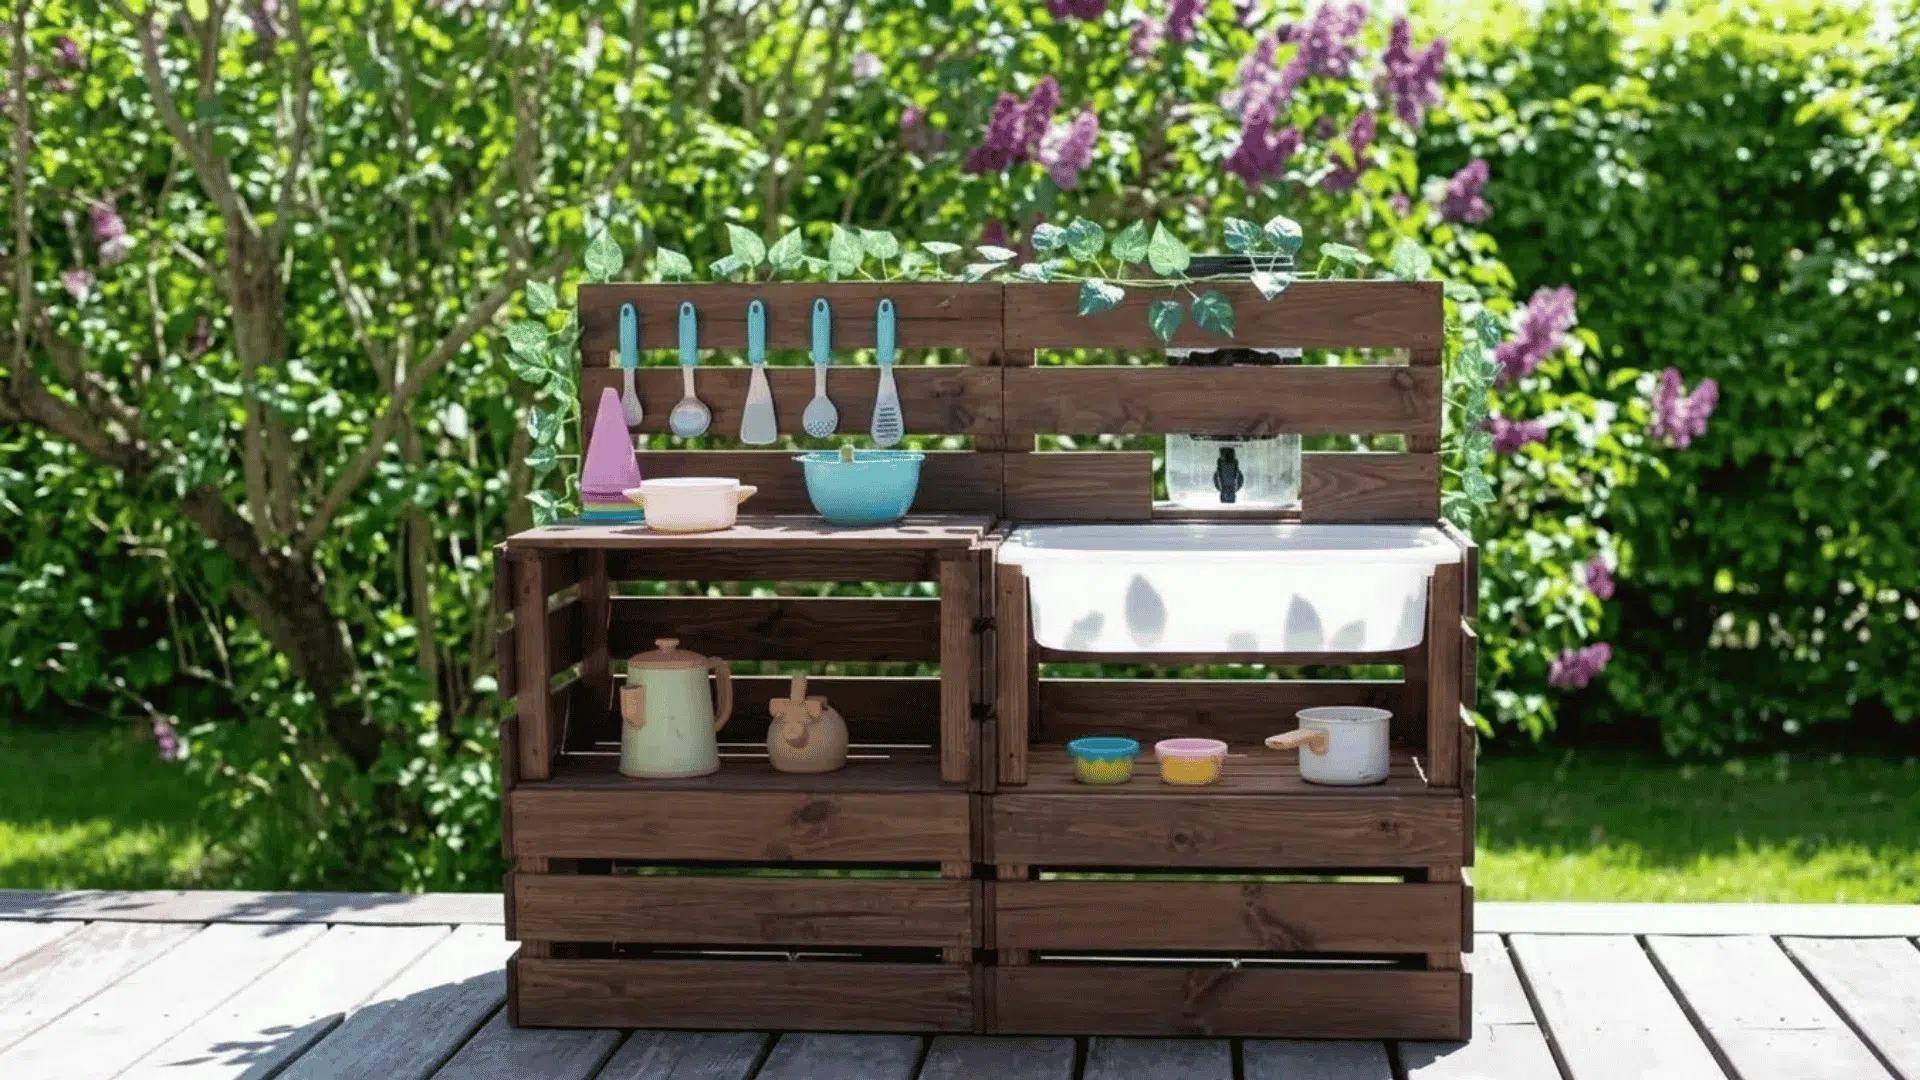
Wooden crates offer a simple build that requires very few tools. They’re compact, portable, and easy to rearrange when needed.
Why Parents Like It
- Beginner friendly
- Portable
- Small-space friendly
- Minimal tools required
Best Use Case
Patios, balconies, and smaller backyards.
5. Double-Sided Mud Kitchen
A double-sided setup gives multiple children space to play at the same time. It works especially well for siblings and playdates.
Design Features
- Work surfaces on both sides
- Shared sink area
- Multiple cooking zones
- More room for teamwork
When to Choose This Design
A good choice if two or more children regularly use the mud kitchen.
Mud Kitchen Ideas by Theme
A themed mud kitchen can turn everyday outdoor play into something kids look forward to again and again.
These simple setups use items you may already have at home while giving each play session its own personality.
6. Garden Café Mud Kitchen
Turn the mud kitchen into a cozy outdoor café where every dish starts fresh from the garden.
Add small herb pots, watering cans, seed packets, and wooden plant markers. Kids can “harvest” mint leaves, serve flower petal salads, and water their garden between customer orders.
A few small baskets and pretend menus make the space feel busy without adding clutter.
7. Mud Pie Bakery Mud Kitchen
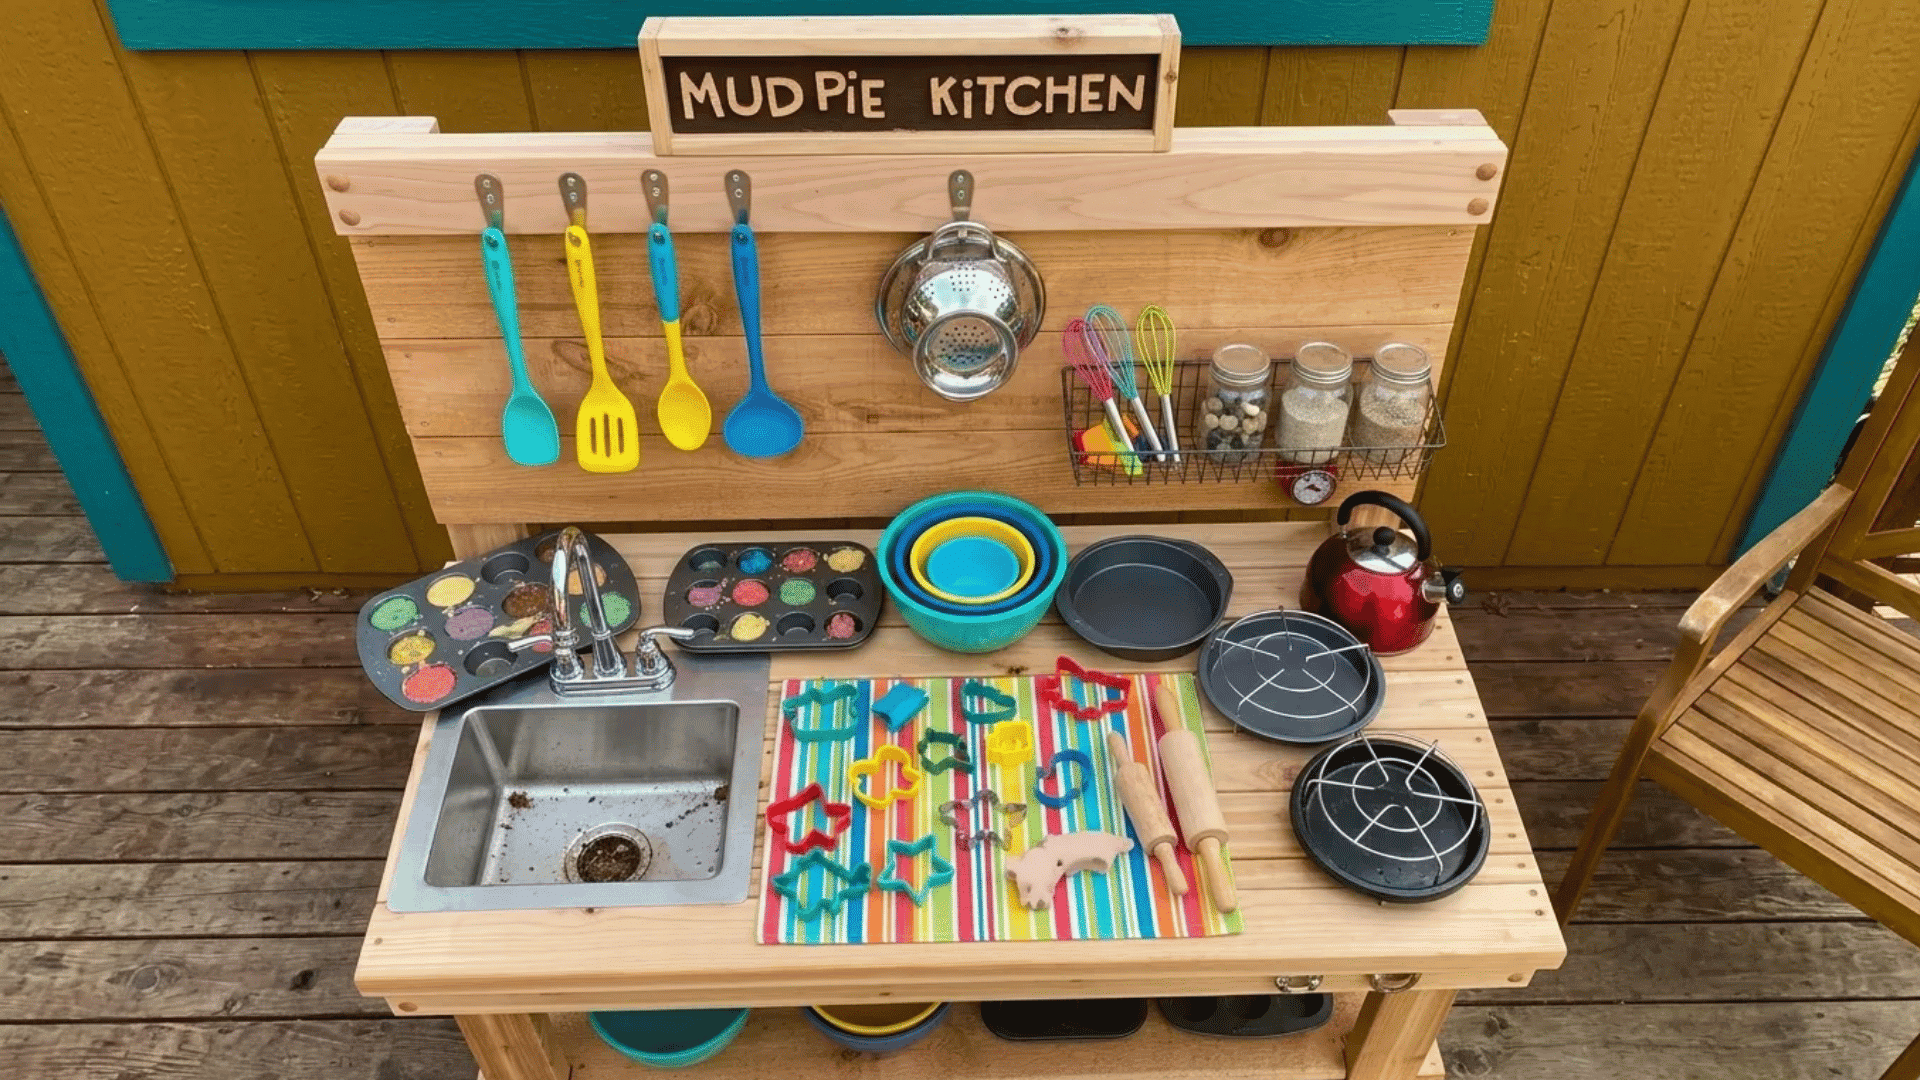
For little bakers who believe every muddy masterpiece deserves a display case.
Set out muffin tins, cake pans, cookie cutters, rolling pins, and mixing bowls. Kids can shape mud cupcakes, decorate pies with pebbles, and stack leaf-covered cakes for special occasions.
A small shelf for finished creations gives their latest recipes a place to shine.
8. Outdoor Science Lab Mud Kitchen
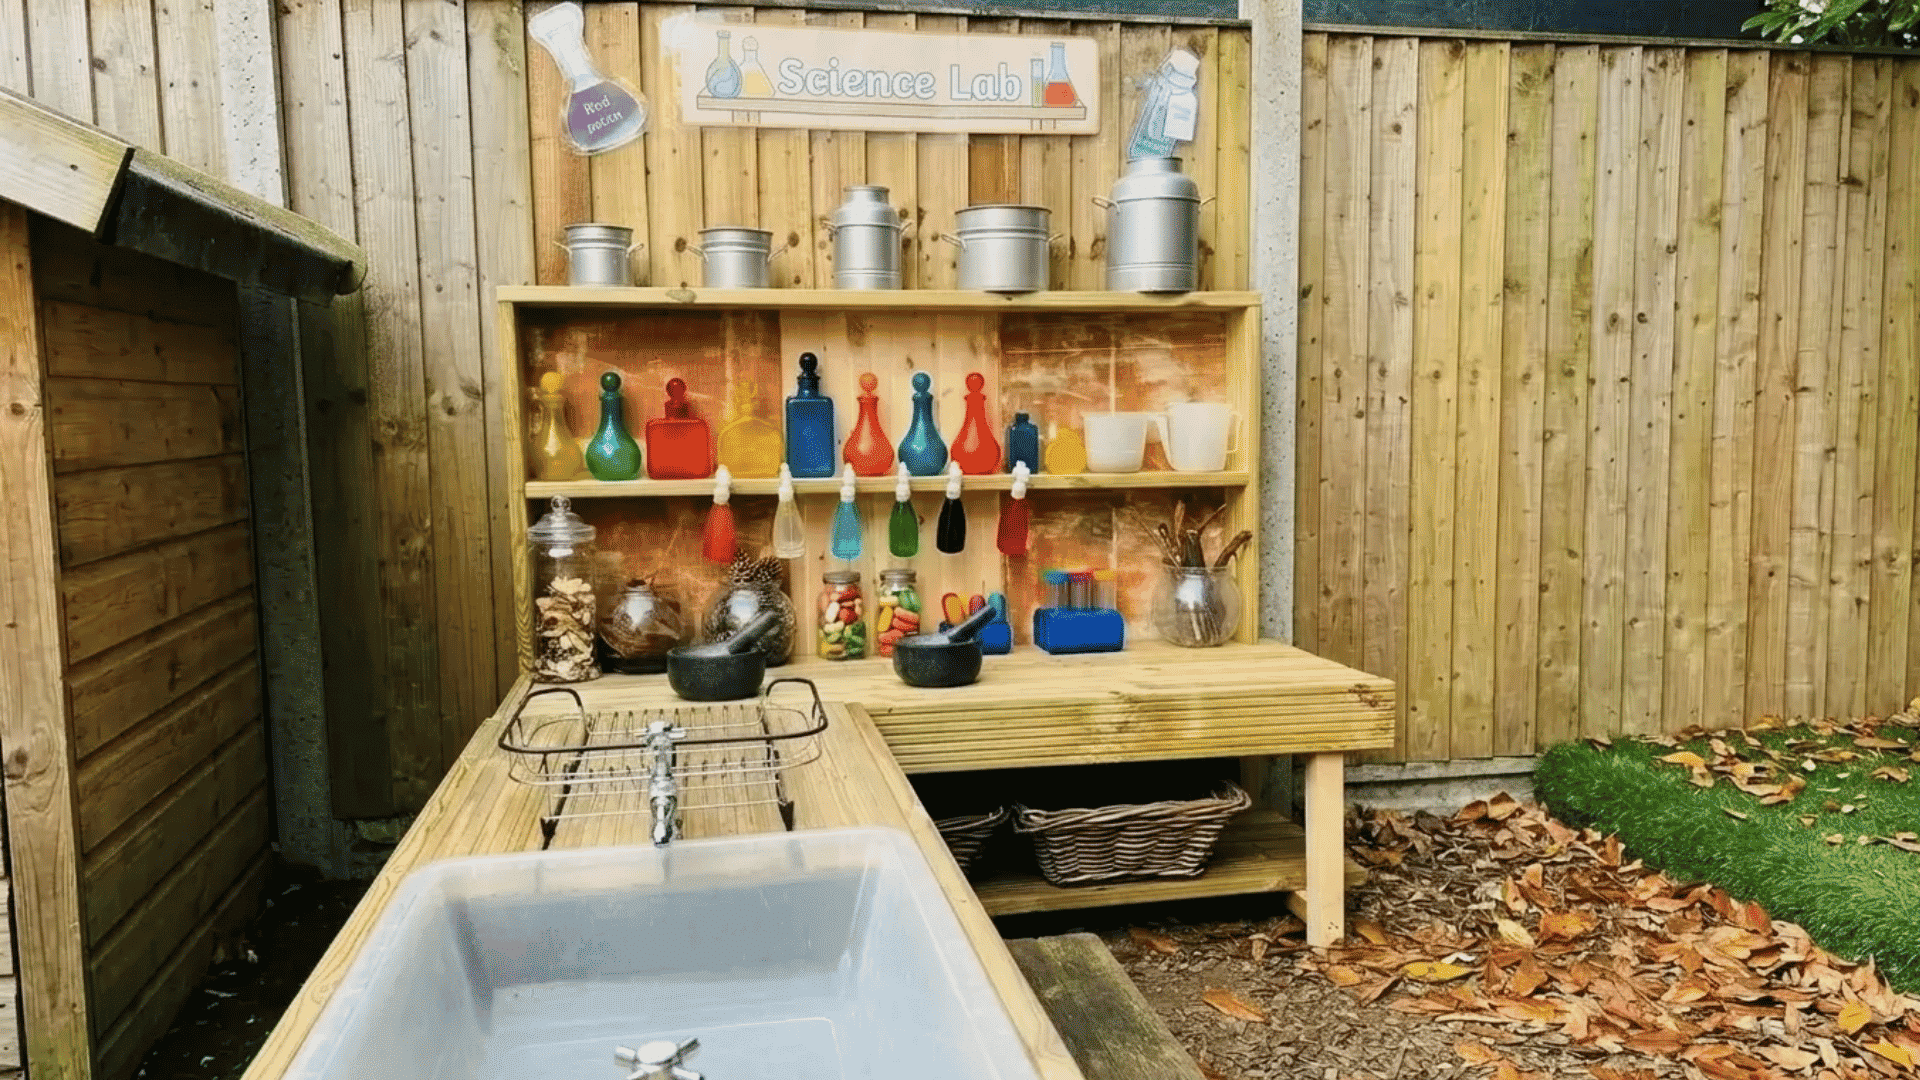
Part experiment station, part imagination zone.
Fill the space with funnels, measuring cups, droppers, jars, and simple scales. Children can compare textures, test water flow, and create their own outdoor mixtures using natural materials.
This setup encourages curiosity while keeping play completely hands-on.
9. Forest Potion Station Mud Kitchen
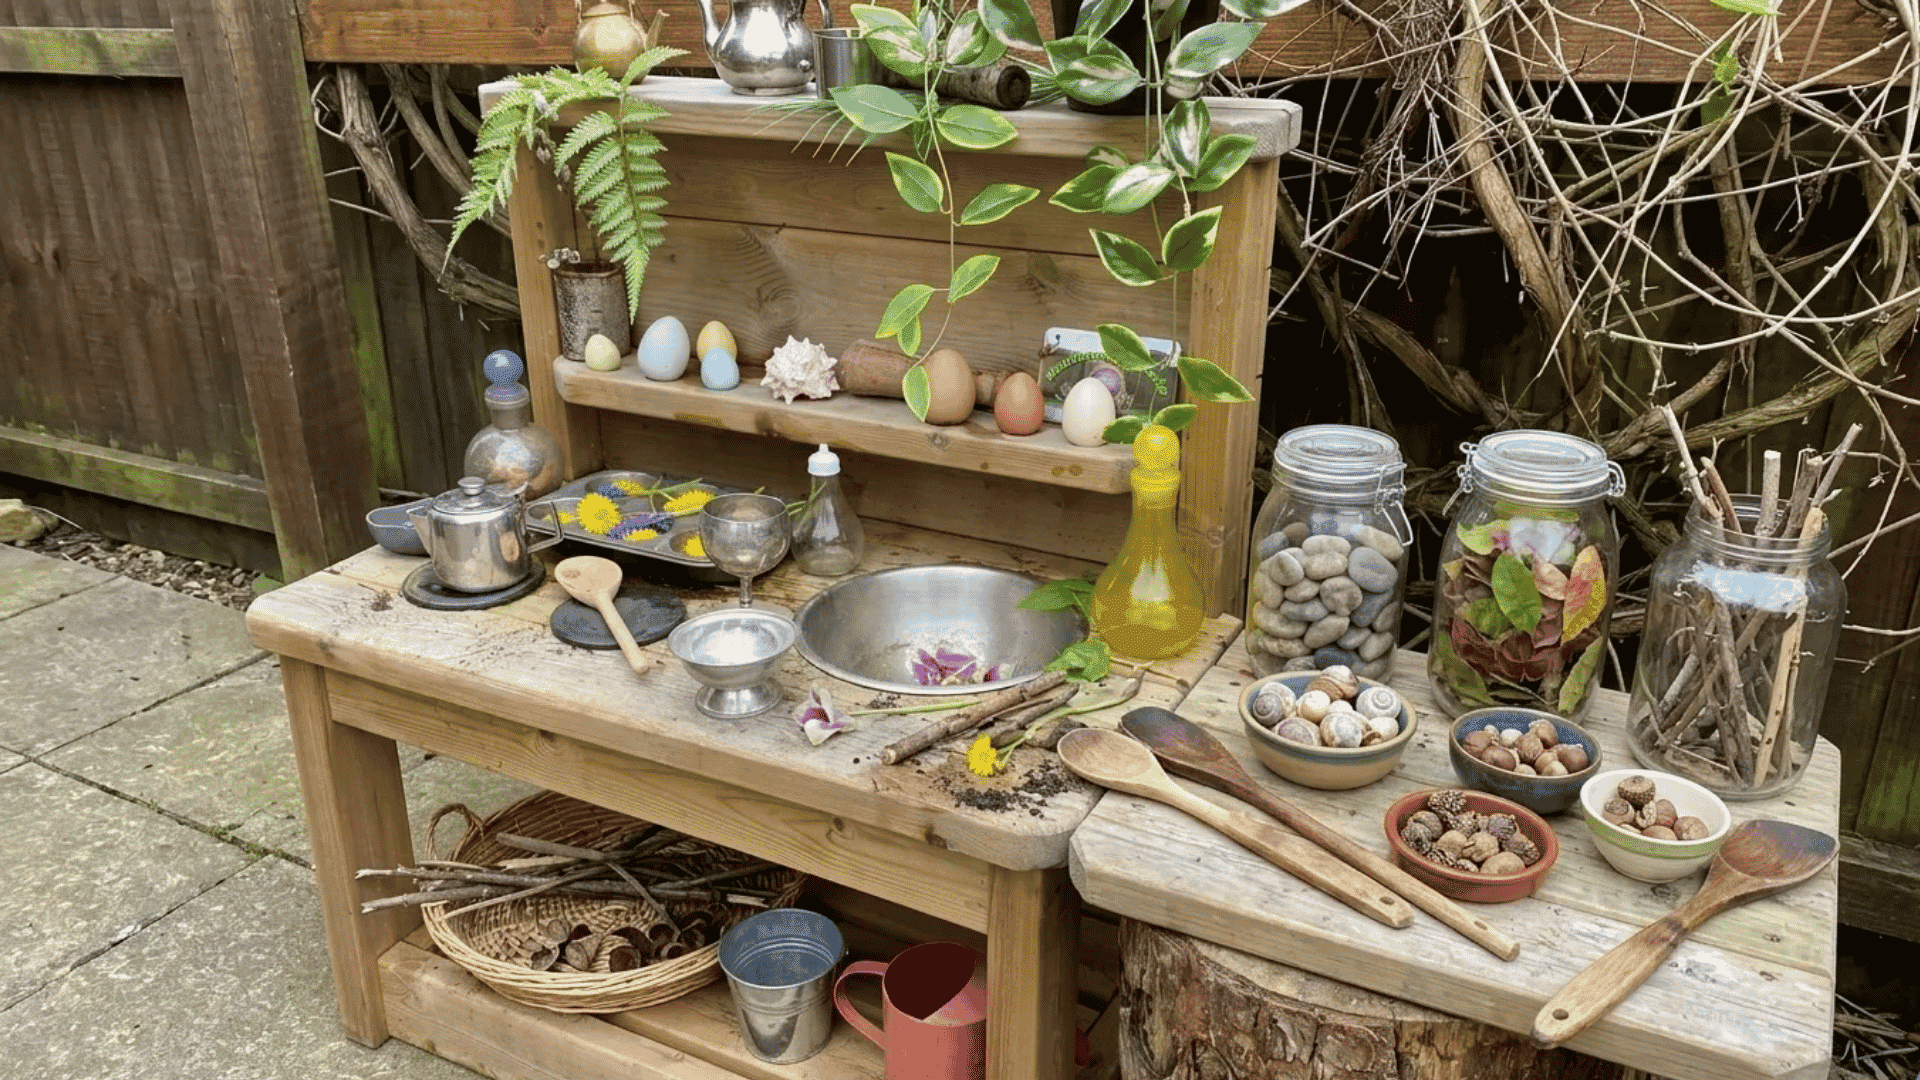
A magical corner where every stick, leaf, and flower becomes an important ingredient. Provide jars, wooden spoons, bowls, and containers for collecting treasures from around the yard.
Kids can invent secret recipes, mix colorful potions, and name their latest woodland creations. The more natural materials they gather, the more interesting the play becomes.
10. Mini Farmers Market Mud Kitchen
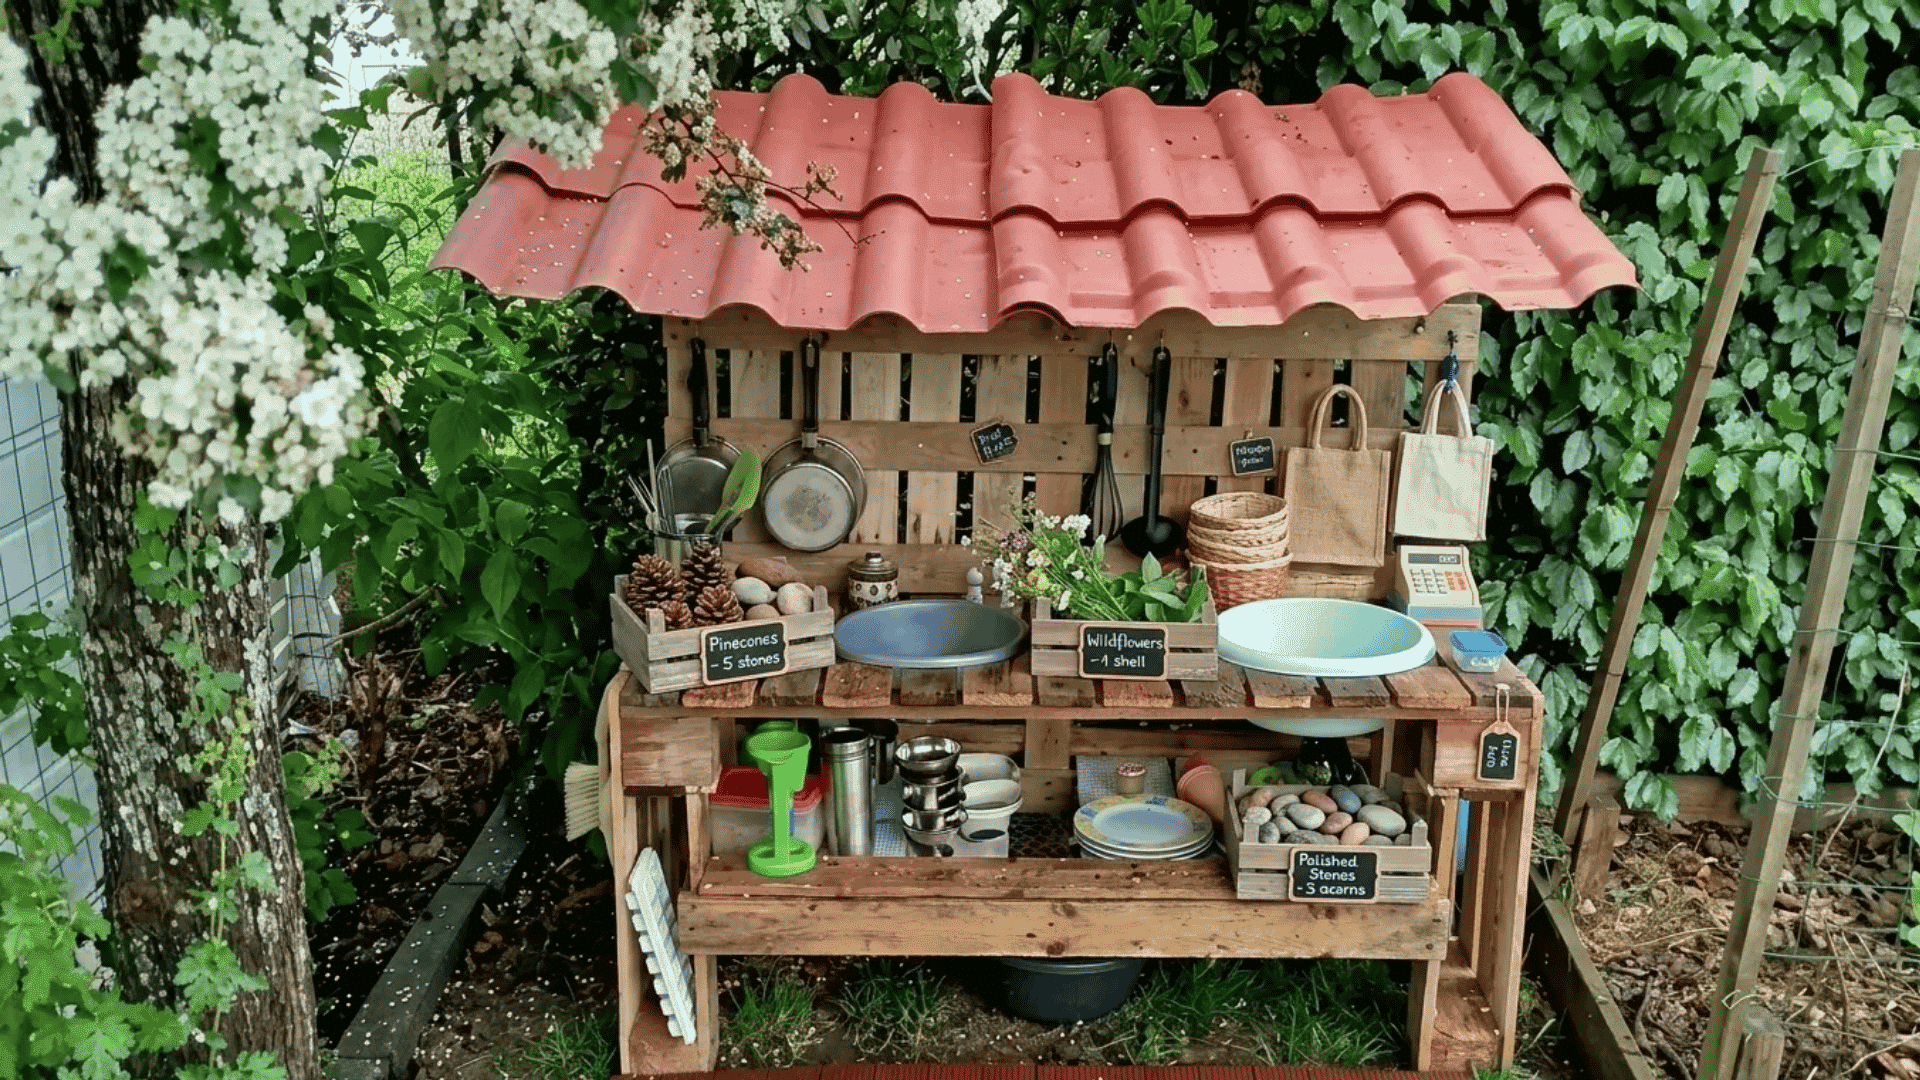
Bring the energy of a busy market stall into the backyard.
Use wooden crates to display pinecones, stones, flowers, seed pods, and other nature finds.
Kids can sort, arrange, trade, and restock their goods throughout the day.
Adding price tags, baskets, and reusable shopping bags creates plenty of opportunities for role-play without requiring extra building work.
Budget Breakdown: How Much Does a DIY Mud Kitchen Cost?
The cost depends on the materials and features you choose. Many families build a great mud kitchen using reclaimed wood, old furniture, and secondhand kitchen tools.
Mud Kitchen Build Costs at a Glance
| Mud Kitchen Idea | Estimated Cost |
| Pallet Mud Kitchen | Free–$30 |
| Upcycled Furniture Mud Kitchen | $10–$50 |
| Cedar Fence Board Mud Kitchen | $30–$100 |
| Wooden Crate Mud Kitchen | $20–$60 |
| Double-Sided Mud Kitchen | $50–$150+ |
Theme Setup Costs at a Glance
| Mud Kitchen Theme | Estimated Cost |
| Garden Café | $10–$30 |
| Mud Pie Bakery | $10–$25 |
| Outdoor Science Lab | $15–$40 |
| Forest Potion Station | $5–$20 |
| Mini Farmers Market | $10–$35 |
Most themed setups rely on accessories rather than construction, making them an easy way to refresh a mud kitchen without starting a new build. Many items can be found at thrift stores, dollar stores, or in the backyard.
Mud Kitchen Safety Tips
A few simple precautions can keep the focus on muddy creations, water play, and outdoor fun.
- Use non-toxic finishes, smooth wood, and child-friendly hardware to create a safe play space.
- Secure taller mud kitchens to a fence, wall, or a sturdy base to keep them stable during energetic play.
- Check wooden surfaces regularly for splinters, loose screws, or signs of wear, and sand rough spots when needed.
- Stick to metal or durable plastic bowls, utensils, and containers rather than glass.
- Keep the area tidy and cover the kitchen during heavy rain to help it stay clean and last longer.
Regular maintenance takes only a few minutes and helps keep the mud kitchen ready for many play sessions ahead.
Final Thoughts
A DIY mud kitchen is proof that outdoor play does not need to be fancy to feel special.
With the right mix of simple materials, safe setup, and playful details, it can become a backyard favorite that grows with your child’s ideas.
Start small, add pieces over time, and let the mess be part of the fun.
Now it’s your turn.
Which mud kitchen idea would your kids love most: the bakery, garden café, science lab, potion station, or farmers market?
Share your favorite idea in the comments, or tell us what clever add-on you would include in your own DIY mud kitchen.
Frequently Asked Questions
How Much Is Aldi’s Mud Kitchen?
Aldi’s popular mud kitchen (officially sold as the Belavi Kid’s Potting Bench) costs $29.99.
What Mud Is Best for A Mud Kitchen?
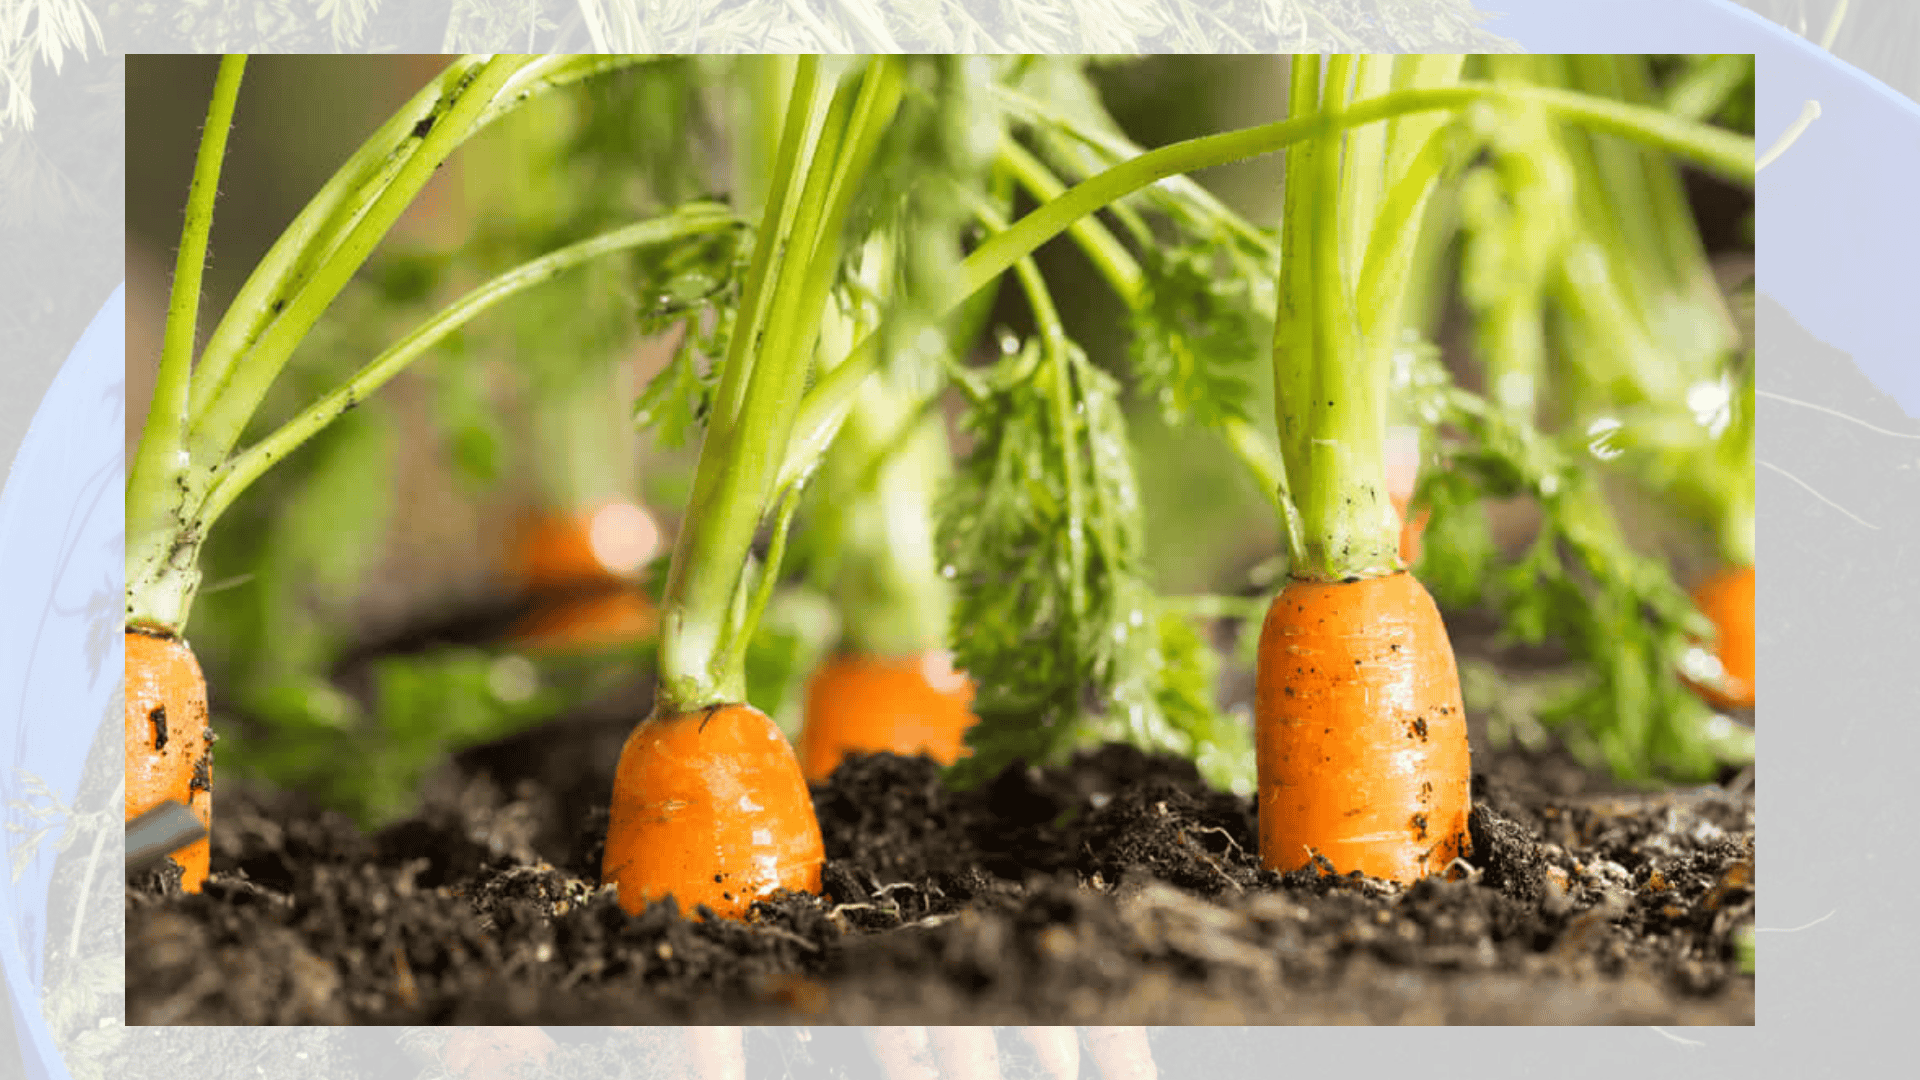
The best mud for a mud kitchen is a mixture of parts chemical-free topsoil to part play sand, combined with water.
What Age Is Best for A Mud Kitchen?
The absolute sweet spot for a mud kitchen is 2 to 5 years old, though they can be enjoyed from 18 months all the way up to age 8 and beyond.