
Many elephant ear bulbs fail long before the growing season begins, and the problem is usually not the bulb itself.
Most planting issues come from cold soil, incorrect orientation, or excess watering during dormancy rather than a lack of care.
Learning how to plant elephant ear bulbs properly matters because these tropical corms respond differently from common spring bulbs.
In many gardens, corms planted too early stay underground for weeks, leading gardeners to overwater before roots ever develop.
Success depends on timing, soil warmth, moisture balance, and correct placement. Here’s how to give elephant ear bulbs the right start from day one.
What Are Elephant Ear Bulbs?
Elephant ear bulbs are tropical plants grown for their oversized, dramatic leaves. Most actually grow from underground corms or tubers, though “bulb” is the common term used in nurseries and gardening guides.
The two main types are Colocasia esculenta and Alocasia.
Colocasia prefers consistently moist or boggy soil and has downward-facing leaves, while Alocasia needs better drainage and has more upright leaves.
Unlike true bulbs such as tulips, elephant ear corms do not have a clear pointed tip that shows which side faces up. That lack of an obvious growth point is why planting orientation confuses many first-time growers.
When and Where to Plant Elephant Ears?
Plant elephant ear bulbs only after soil temperatures stay between 60–65°F, which is usually a few weeks after the last frost date.
Cold soil keeps the corm dormant and greatly increases the risk of rot after planting.
Spring air often warms faster than the ground, so warm weather alone is not enough for planting. Use a soil thermometer and wait until the soil stays consistently warm before placing bulbs outdoors.
Soil Temperature vs. Air Temperature
- Soil 4–6 inches deep can stay cold even during warm spring days.
- Zones 5–6 often benefit from indoor pre-sprouting.
- Zones 8–11 can usually plant earlier because the soil warms faster.
Choosing the Right Spot
- Plant in rich, moisture-retentive soil with enough space to spread.
- Space plants about 1.5–3 feet apart, depending on the variety size.
- Full sun works best in cooler climates, while partial afternoon shade helps in hotter regions.
- Colocasia tolerates wetter soil, while Alocasia needs better drainage.
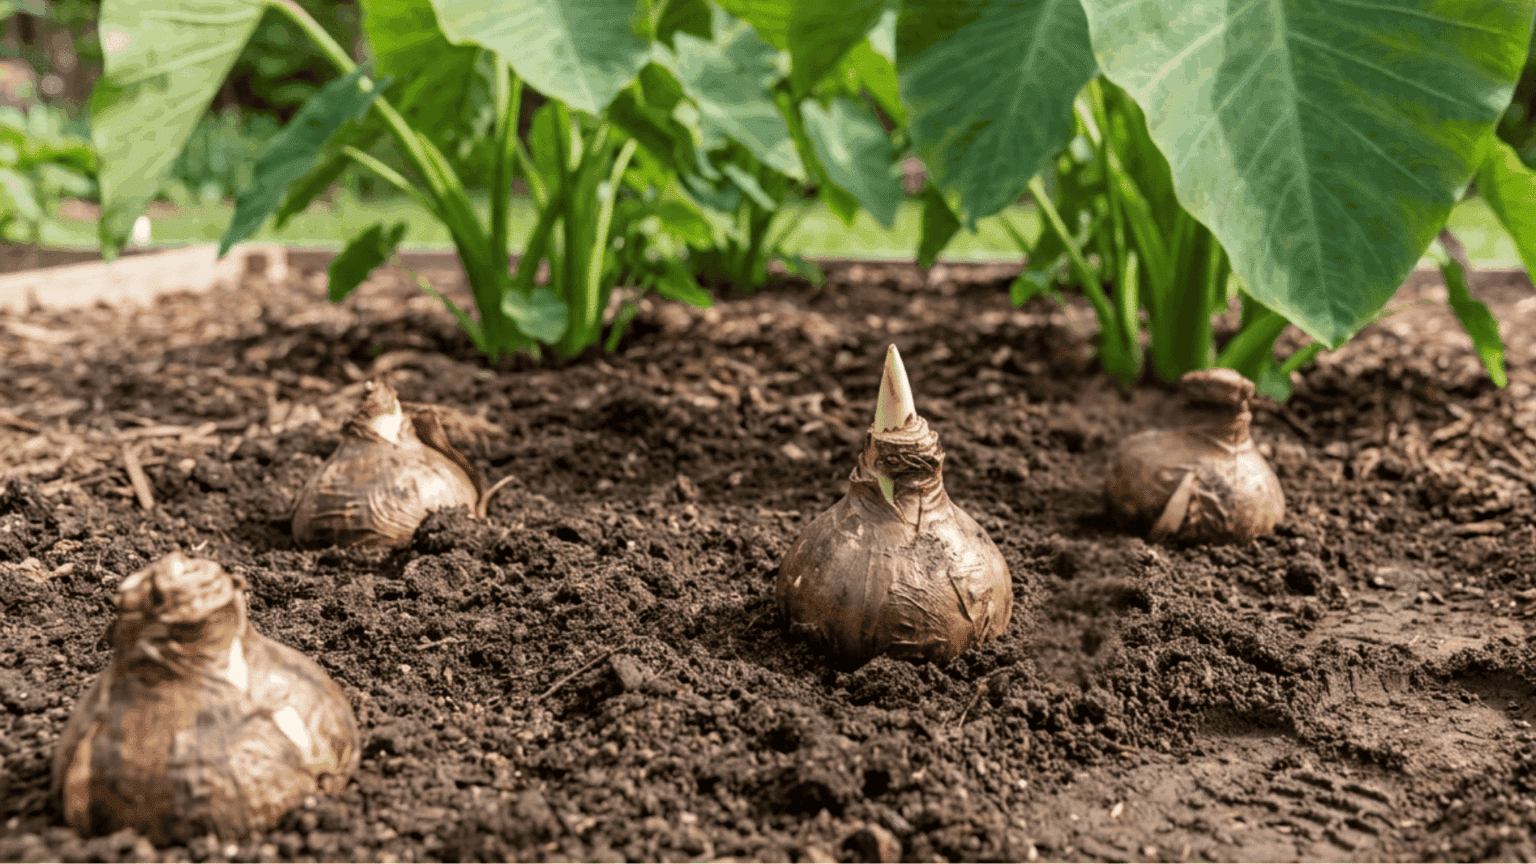
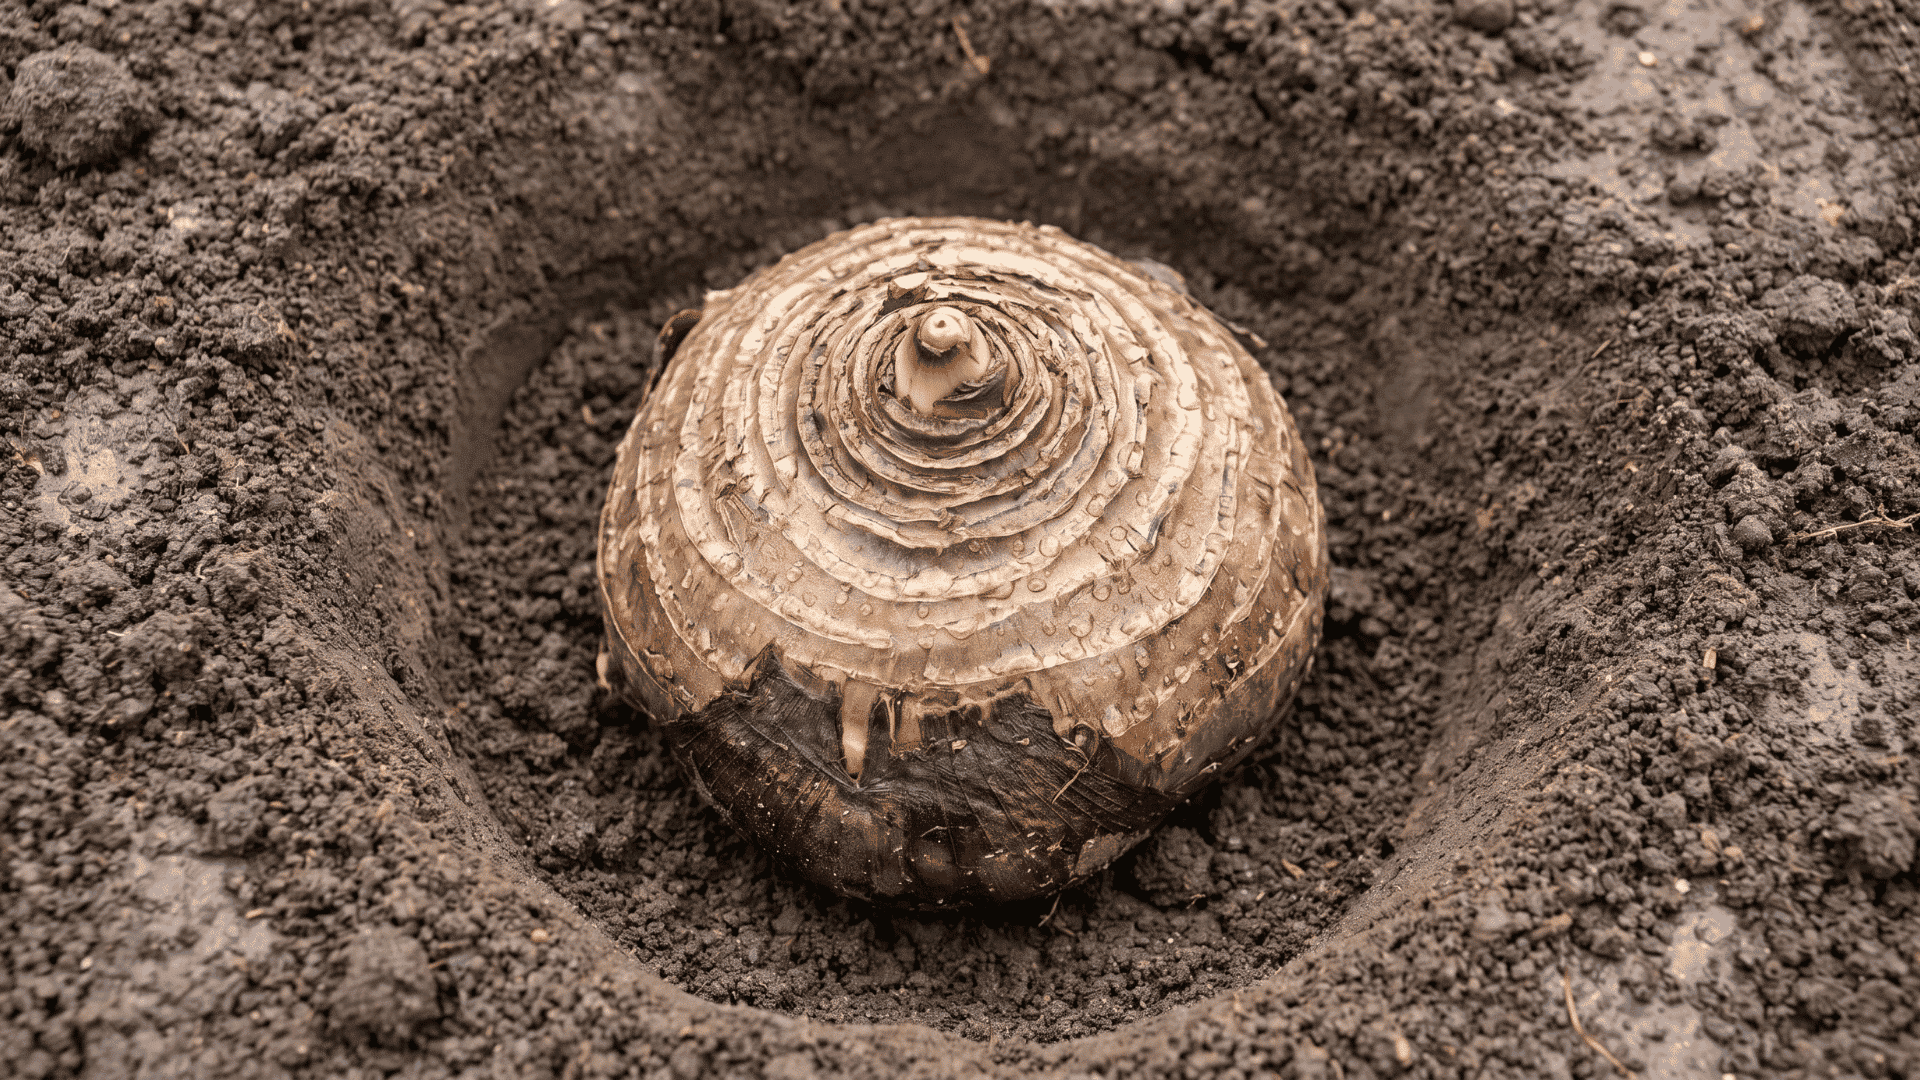
How to Identify the Top of an Elephant Ear Bulb?
Plant elephant ear bulbs with the concentric ring side facing up and the rough, fibrous side facing down. A corm depends entirely on stored energy until the sprout reaches light and starts photosynthesis.
If planted upside down, the sprout must redirect itself upward before emerging. That extra movement wastes stored energy and can weaken growth in cool or wet conditions.
Use these clues to identify the correct side:
- Concentric rings: Circular markings on the corm that show the old stem tissue. This side faces up.
- Old stem scar: A dried stub or small depression from last season’s stem. This side faces up.
- Rough, fibrous base: The side with dried roots or nodules. This side faces down.
If the corm has already sprouted, place the sprout facing upward. When rings are hard to see, clean the surface and inspect it under bright light.
Step-by-Step: How to Plant Elephant Ear Bulbs
Correct planting depth and moisture help elephant ear bulbs establish faster. Following the right steps also lowers the risk of rot after planting.
Step 1: Prepare the Soil
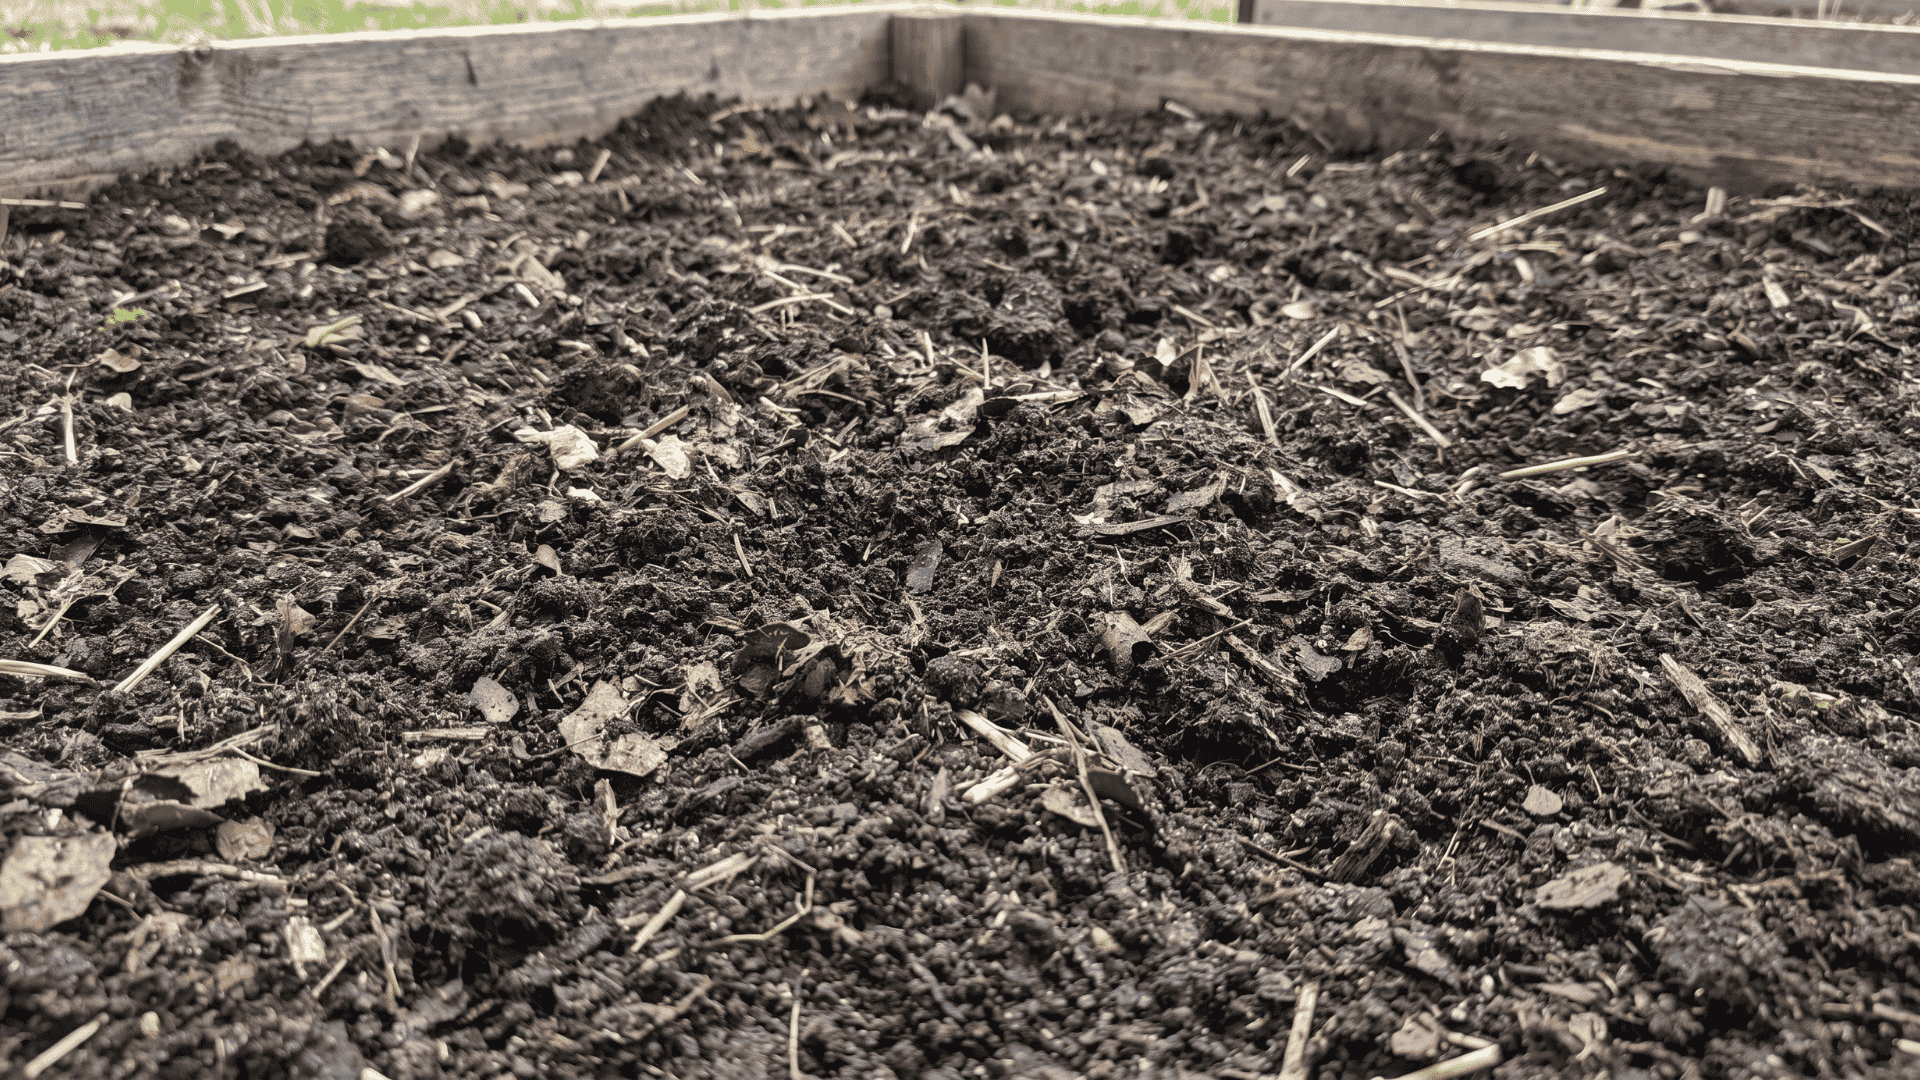
Loosen the soil about 8 inches deep before planting the bulbs. Mix in compost or aged manure to improve texture and drainage.
This helps the soil stay evenly moist without becoming soggy. Good drainage is important because wet, compacted soil can cause rot.
Step 2: Dig to the Right Depth
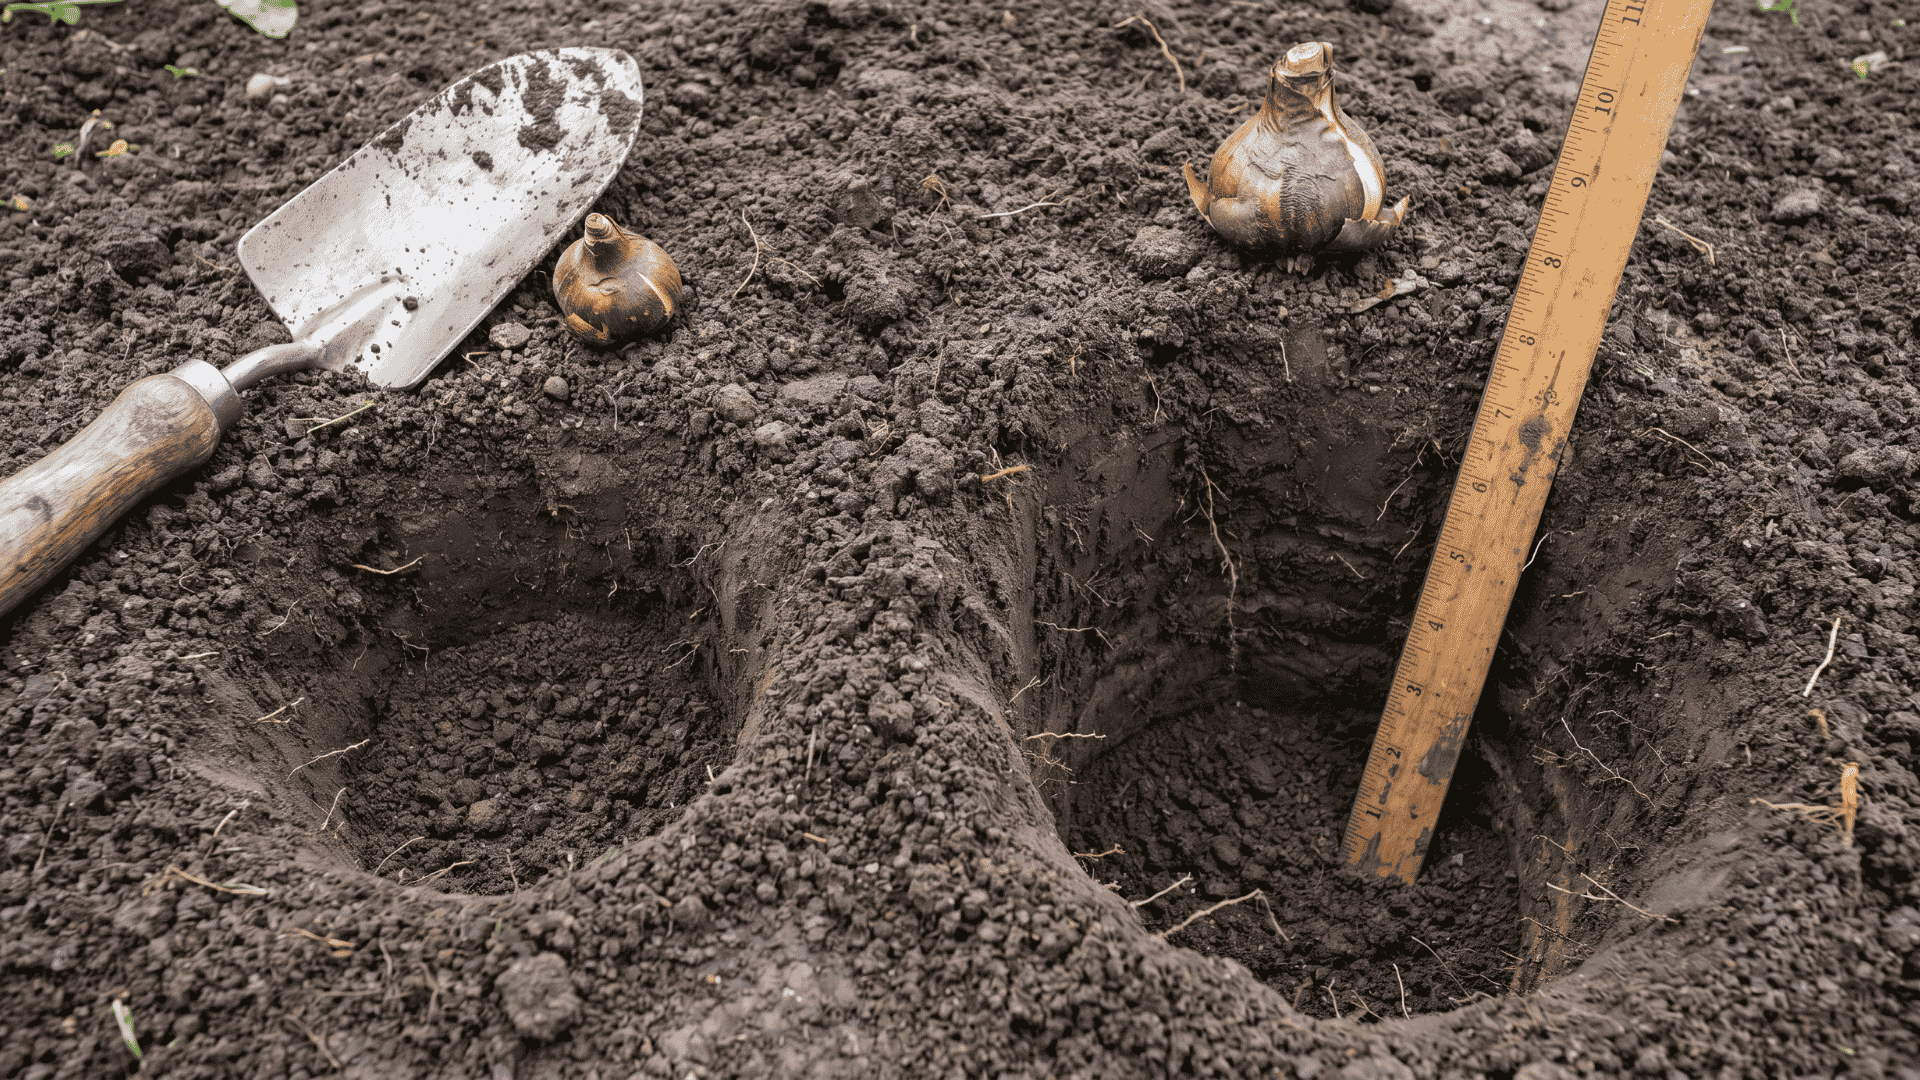
Plant smaller bulbs about 3 inches deep in the soil. Larger bulbs can be planted slightly deeper, around 5 inches.
Shallow planting can expose bulbs to drying and temperature changes. Planting too deeply slows emergence and traps extra moisture above the corm.
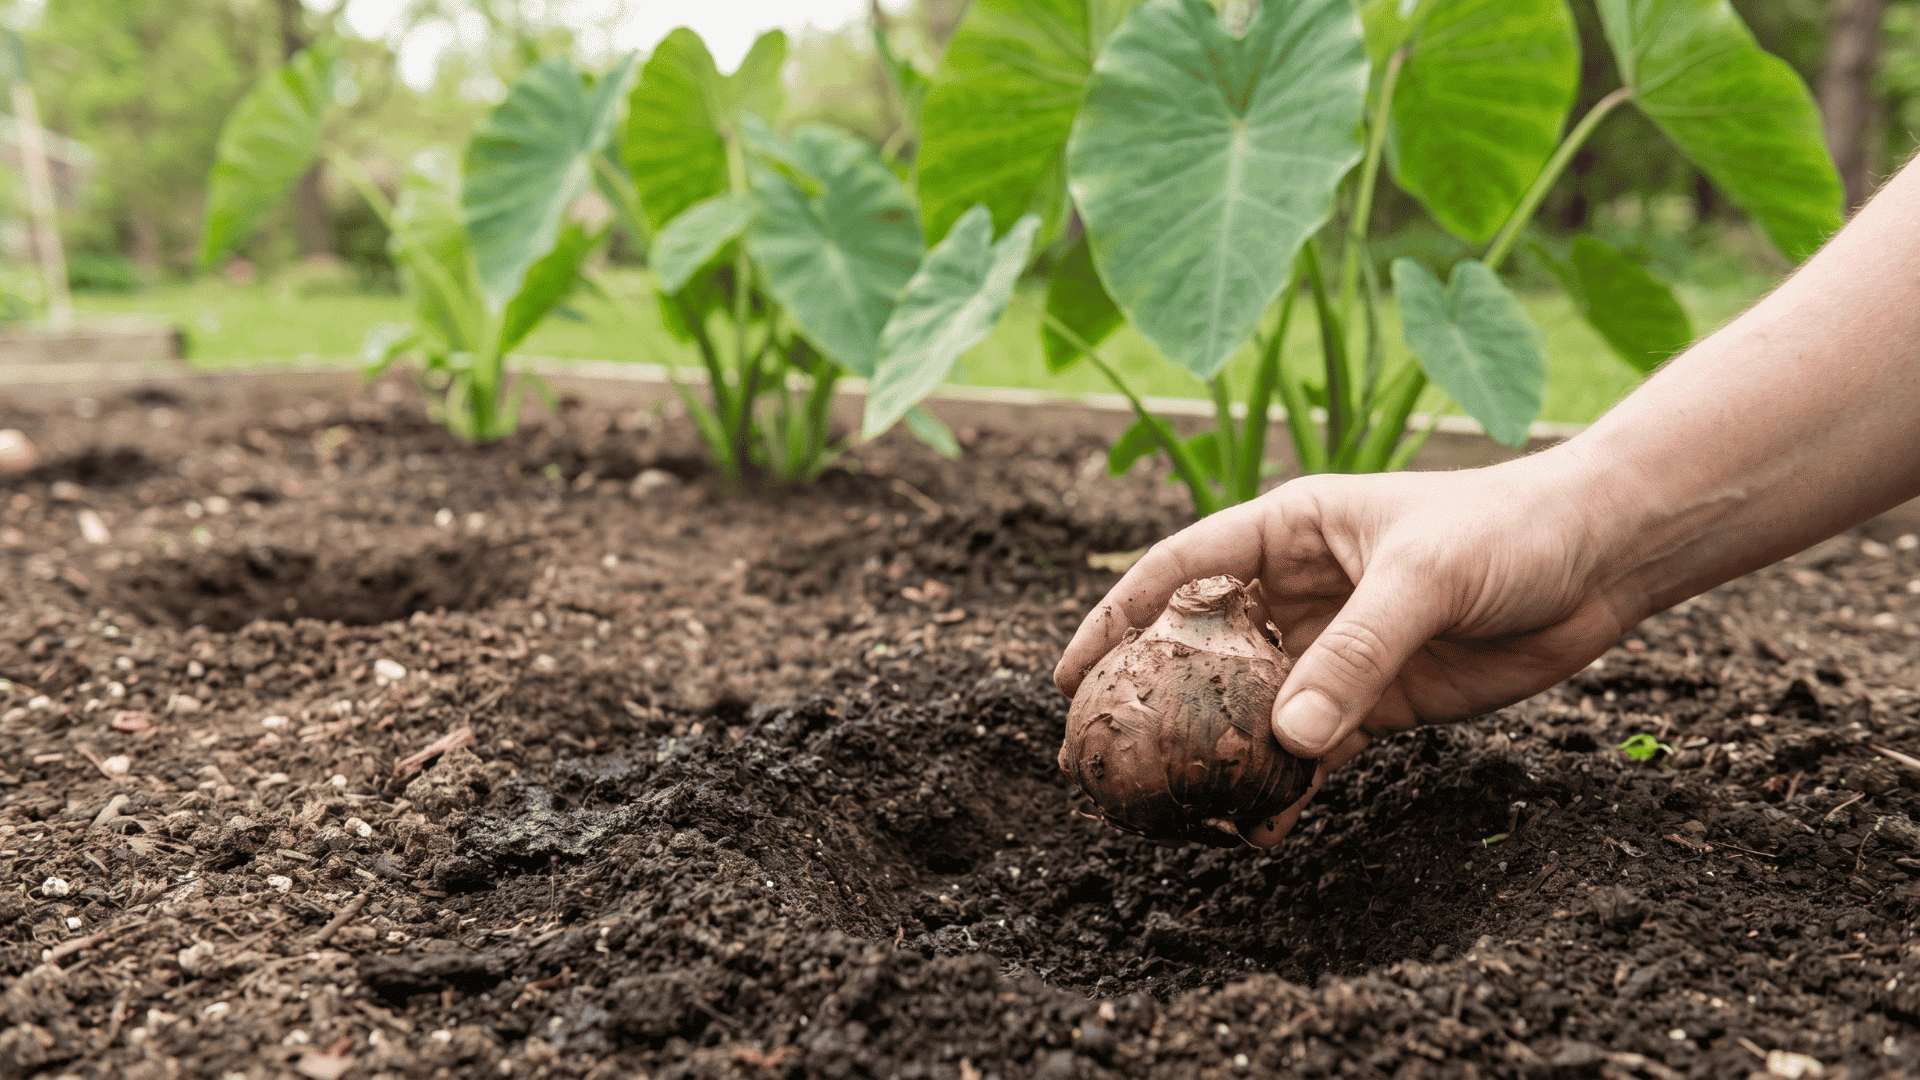
Step 3: Orient and Place the Bulb
Place the corm with the concentric rings facing upward in the hole. The rougher, fibrous side should rest downward against the soil.
If the bulb looks dry or slightly shriveled, soak it briefly first. One to two hours in room-temperature water is usually enough.
Step 4: Backfill and Water In
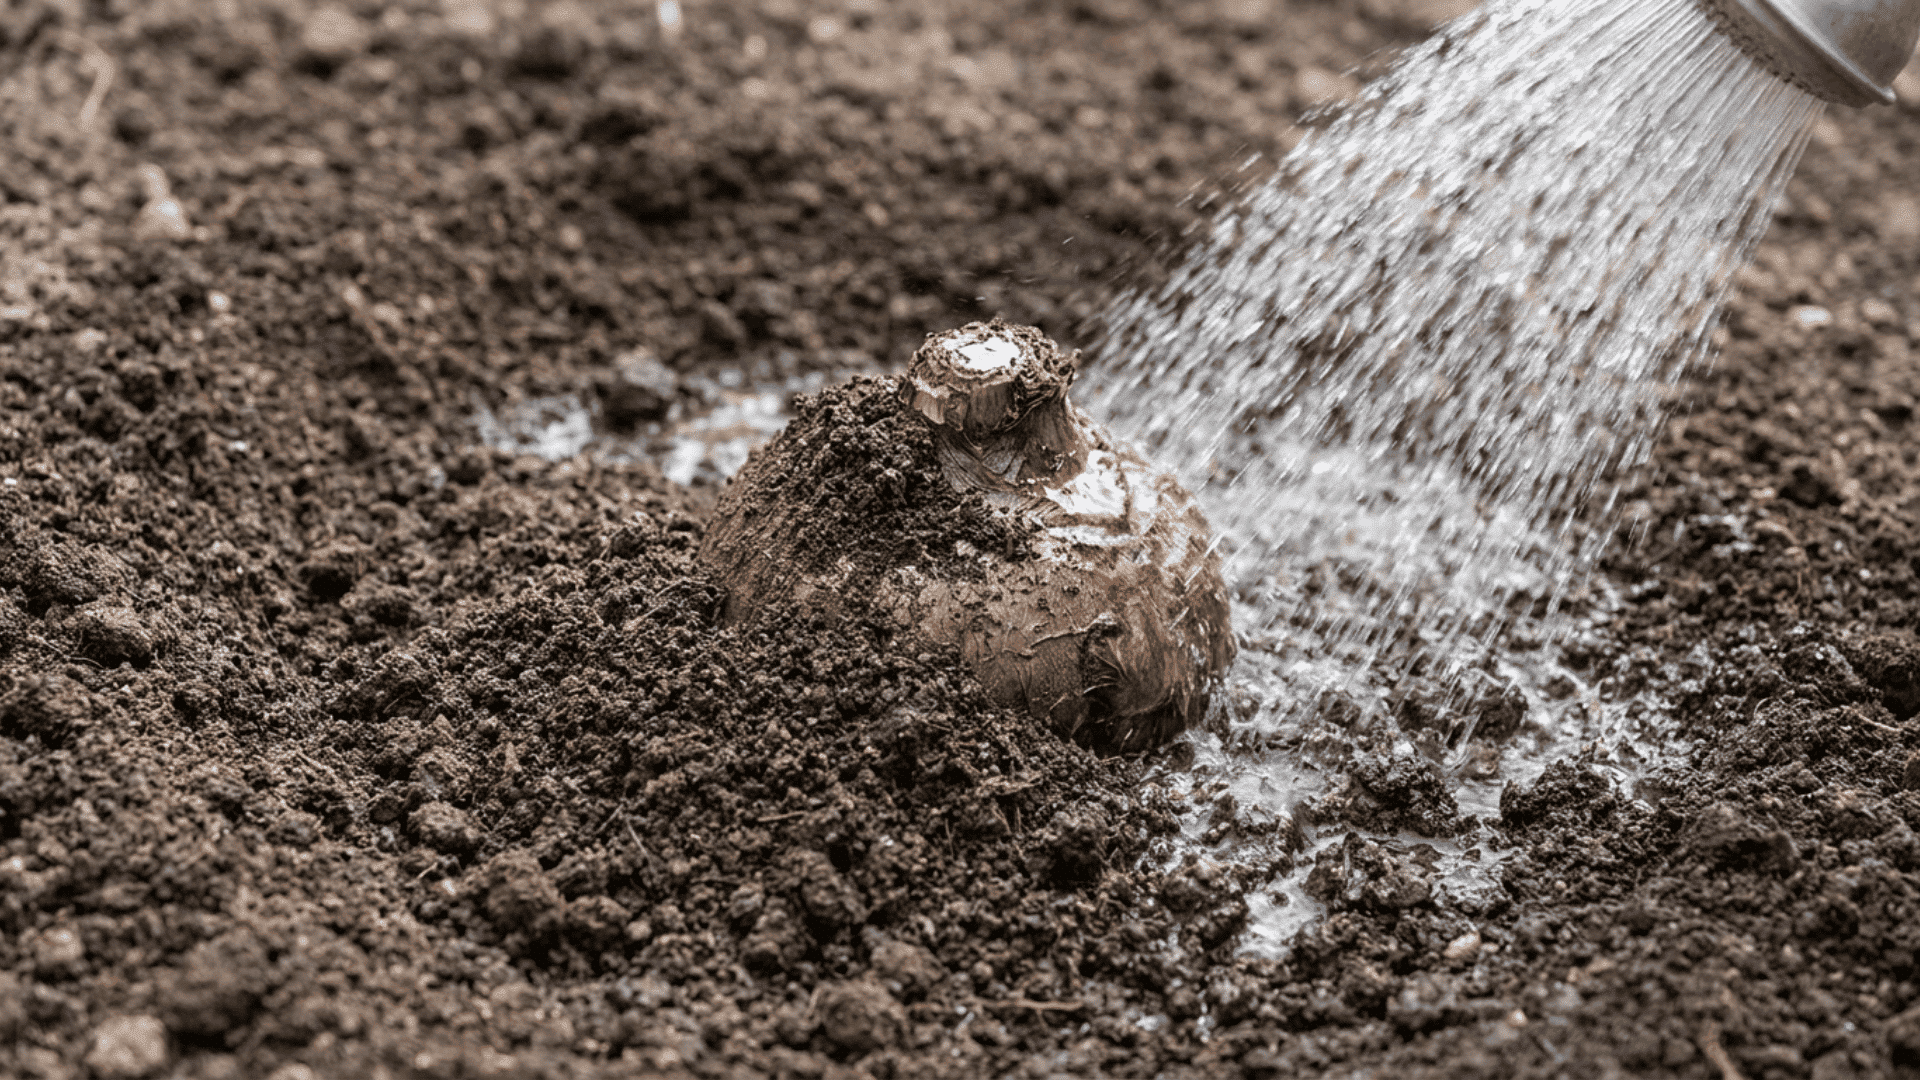
Cover the bulb gently and avoid pressing the soil down firmly. Compacted soil makes it harder for shoots to push upward.
Water deeply once after planting to settle the surrounding soil. After that, keep the soil lightly moist but never waterlogged.
How Deep to Plant Elephant Ear Bulbs?
Depth depends on bulb size and soil type. In loose, sandy soil, planting slightly deeper keeps the corm stable and holds moisture near the roots.
In heavier soil, it tends to be on the shallower end of the range to prevent waterlogging.
For containers, make sure at least 6 inches of soil is below the corm to promote healthy root development.
Elephant Ear Bulbs: Care Tips After Planting
Proper watering and feeding after planting help elephant ears establish faster and reduce rot problems. The biggest mistake is adding too much water before the roots become active.
- Water lightly before emergence because dormant corms cannot absorb excess moisture.
- Check the soil 2 inches below the surface and water only if it feels dry.
- Once shoots appear, water more deeply to support the growth of large leaves.
- Start liquid feeding only after shoots reach about 6 inches tall.
- Avoid fertilizing dormant corms, as roots are not yet active.
Conclusion
Planting elephant ear bulbs successfully comes down to timing, warmth, and moisture balance.
Warm soil, correct orientation, and steady care help the corm establish faster and reduce the risk of rot early in the season.
Unlike many spring bulbs, elephant ears respond more to soil temperature than calendar dates.
Checking soil warmth before planting and avoiding excess watering during dormancy can make a major difference in growth success.
Once established, these tropical plants grow quickly and produce bold foliage through the warm months.
Have you planted elephant ear bulbs before? Drop your experience in the comments below!
Frequently Asked Questions
How Many Elephant Ear Bulbs Should You Plant Together?
Plant three to five bulbs together for a bold, tropical look. Space them 1.5 to 3 feet apart, depending on variety size, to allow full leaf development without crowding.
Do Elephant Ear Bulbs Come Back Every Year?
In USDA zones 8–11, elephant ears return as perennials each spring. In zones 5–7, frost kills them back. Gardeners must dig and store corms indoors over winter.
Can Elephant Ear Bulbs Grow In Pots Or Containers?
Yes. Choose a pot at least 12–18 inches wide with drainage holes. Use well-draining potting mix and check soil moisture every two to three days once growth begins.