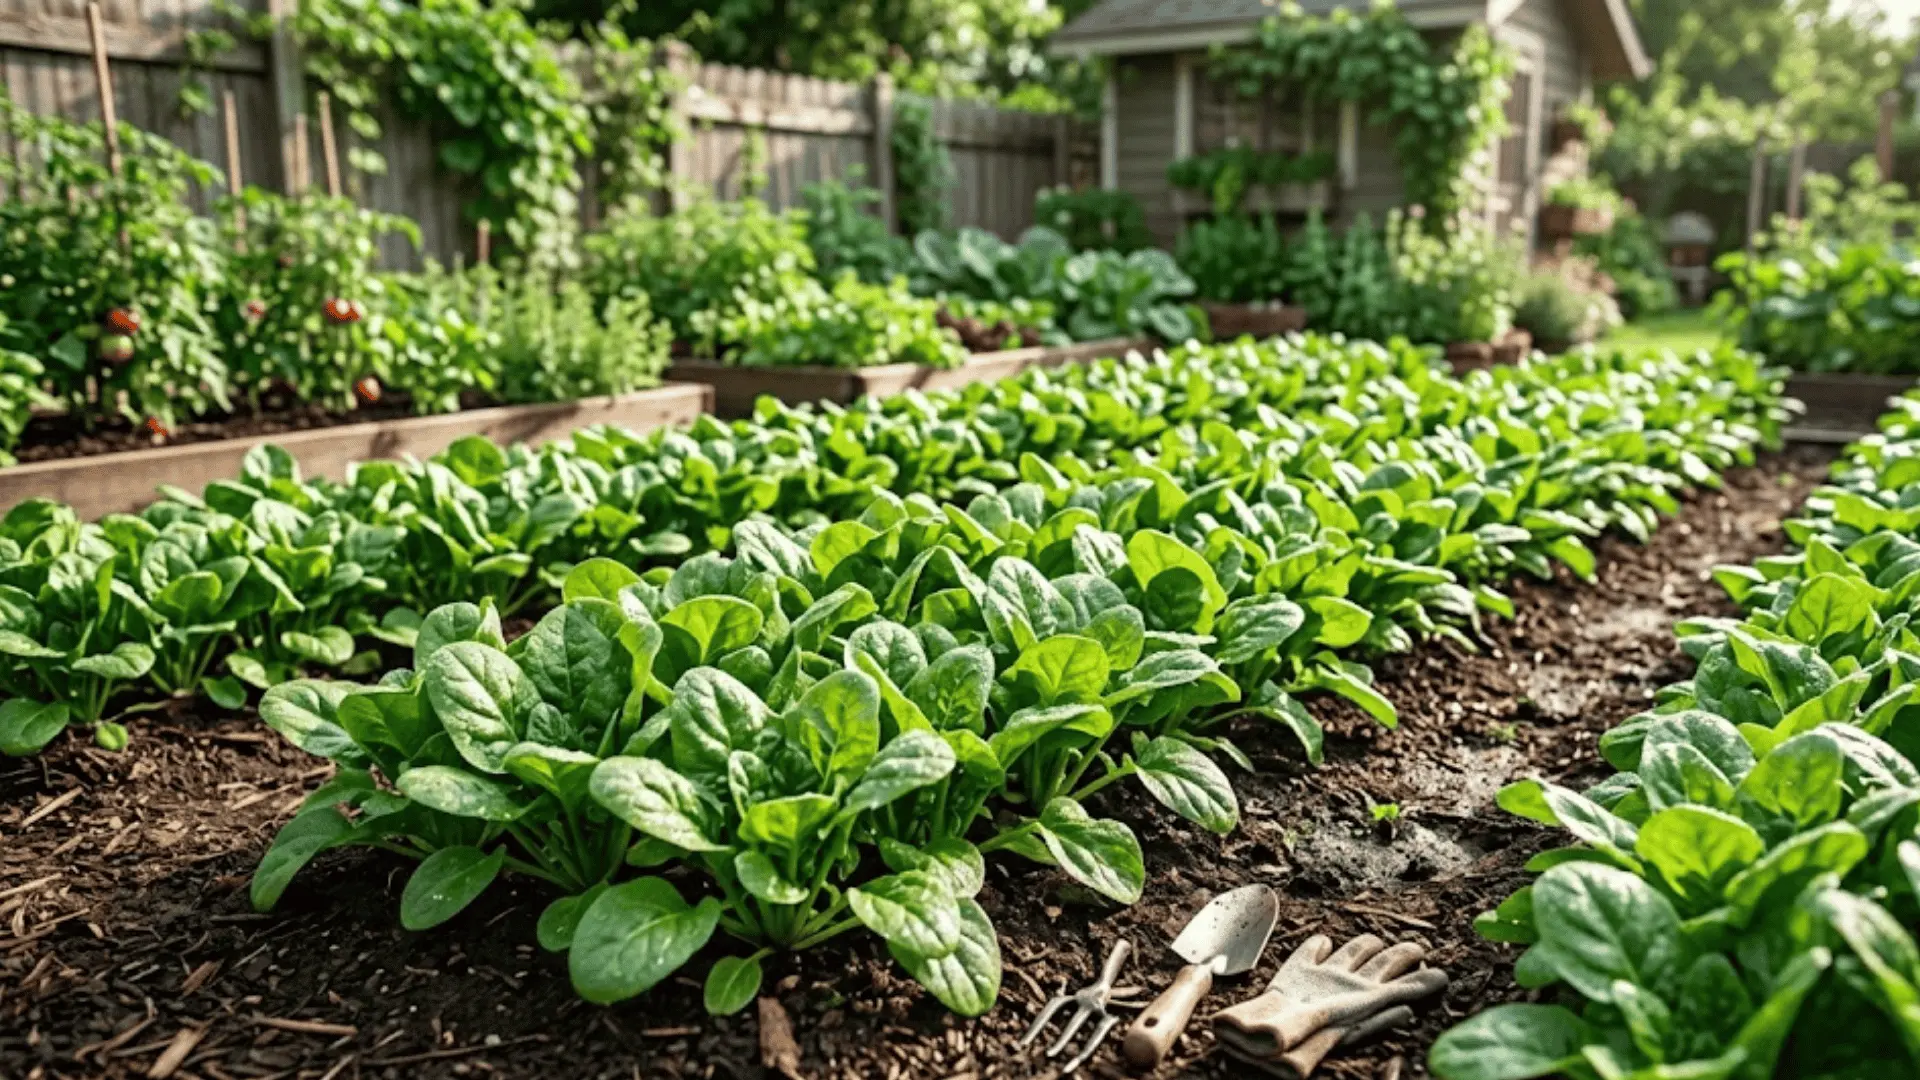
Onions may look ready from above the soil.
However, timing the harvest just right preserves the perfect flavor and storage life intact.
Many home gardeners struggle with this timing. Harvest too early and you get small or soft bulbs.
If you wait too long, rot could occur during storage.
When stored properly and cured, a good storage onion will retain its eating quality for 10 to 12 months.
This makes perfect timing worth the effort.
This guide shows you the key signs that tell when onions are ready to harvest, and you won’t be clueless again about your garden’s onion harvest time.
Additionally, you will also learn about proper post-harvest care to keep your onions fresh for an extended period.
Onion Harvest Time Guide According to Different Regions
Onions are actually really good at communicating when it’s time to harvest them.
The key is knowing what signs to look for. Your onions will show clear physical changes when they’re ready.
These changes happen naturally as the plant prepares for its dormant period.
Typical harvest timings by region:
Southern United States (Short-Day Onions): In states like Texas, Georgia, Florida, and Louisiana, onion harvest typically begins from late April to early June. These onions mature quickly in mild winters and longer spring days.
Midwestern Regions (Intermediate-Day Onions): Growers in Kansas, Missouri, Illinois, and Iowa usually harvest onions from mid-June through July, when daylight lasts 12–14 hours, which is ideal for balanced growth and bulb size.
Northern States (Long-Day Onions): In cooler regions such as Minnesota, Wisconsin, Michigan, and New York, onions mature later, with harvests typically from late July through August, benefiting from long summer days and crisp nights.
Coastal or Pacific Northwest Areas: States like Oregon and Washington often see extended harvests into September, as the cooler, moist climate slows maturation but enhances flavor and bulb quality.
Warm Tropical or Subtropical Zones: In warmer states such as Hawaii, southern Florida, and parts of southern California, onions can be grown and harvested year-round, with peaks usually 90–120 days after planting, depending on the variety.
Key Signs for Harvesting Onions
These signs tell you the onion bulb has stopped growing and is ready for harvest. Watch for these four key indicators that your onions have reached maturity:
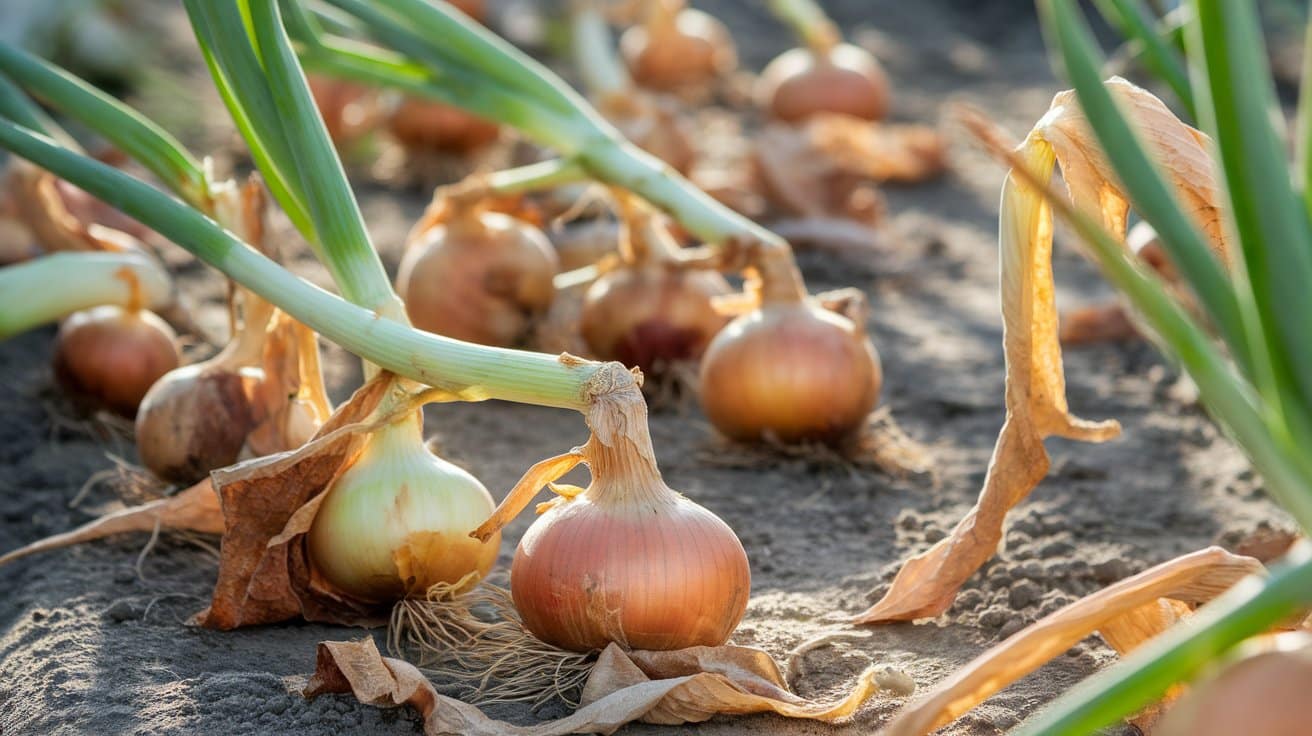
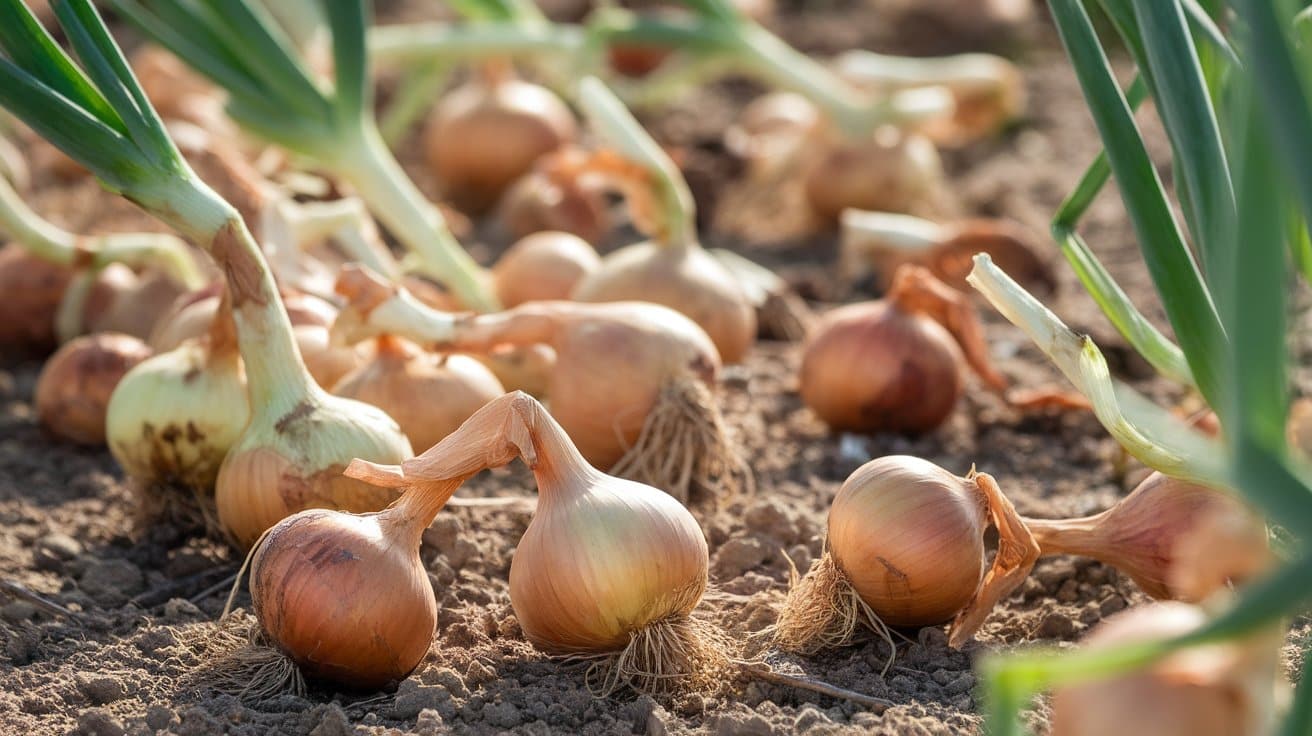
1. Tops Begin to Turn Yellow and Fall Over
This is the most reliable indicator that your onions are ready to harvest. When the leaves start to flop over at the point where they meet the bulb, it signals the plant has stopped growing.
Wait until 85-90% of the tops have fallen over before harvesting. Don’t rush this process. The onion is still drawing nutrients from the green tops as they dry.
The leaves will also turn brown and dry. This natural process shows the plant is ready for its dormant period.
2. Neck Softness
Feel the area right above the bulb where the leaves meet.
When this area becomes soft and pliable, the transfer of nutrients from leaves to bulb is complete.
This indicates that the bulb has reached its maximum size and no further growth will occur.
At this stage, reduce watering frequency. Too much moisture now can cause rot issues in storage.
3. Bulb Size and Visible Shoulders
Mature onion bulbs push slightly above the soil surface.
You’ll see the shoulders of the bulb peeking through the ground.
Check if your onions have reached their expected variety size. Most bulb onions should be at least as large as the sets you planted.
The bulb should feel solid when you gently press it. Soft or squishy areas indicate problems.
3. Days to Maturity
Most bulb onions need 90-120 days to mature from planting. Check your seed packet or variety label for specific timing.
Onions mature at different rates depending on how they’re planted:
- Those grown from seed take about 90–100 days (around four months),
- from sets about 80 days (just under three months),
- and from transplants, roughly 70–80 days.
Keep track of your planting date. This helps you know when to start watching for other harvest signs.
How to Harvest Onions Correctly?
Proper harvesting technique protects your onions from damage.
Careful handling is essential during harvest to prevent bruising, which can make the bulbs susceptible to storage rot.
The way you pull onions affects their storage life. Rough handling creates bruises that become entry points for bacteria and mold.
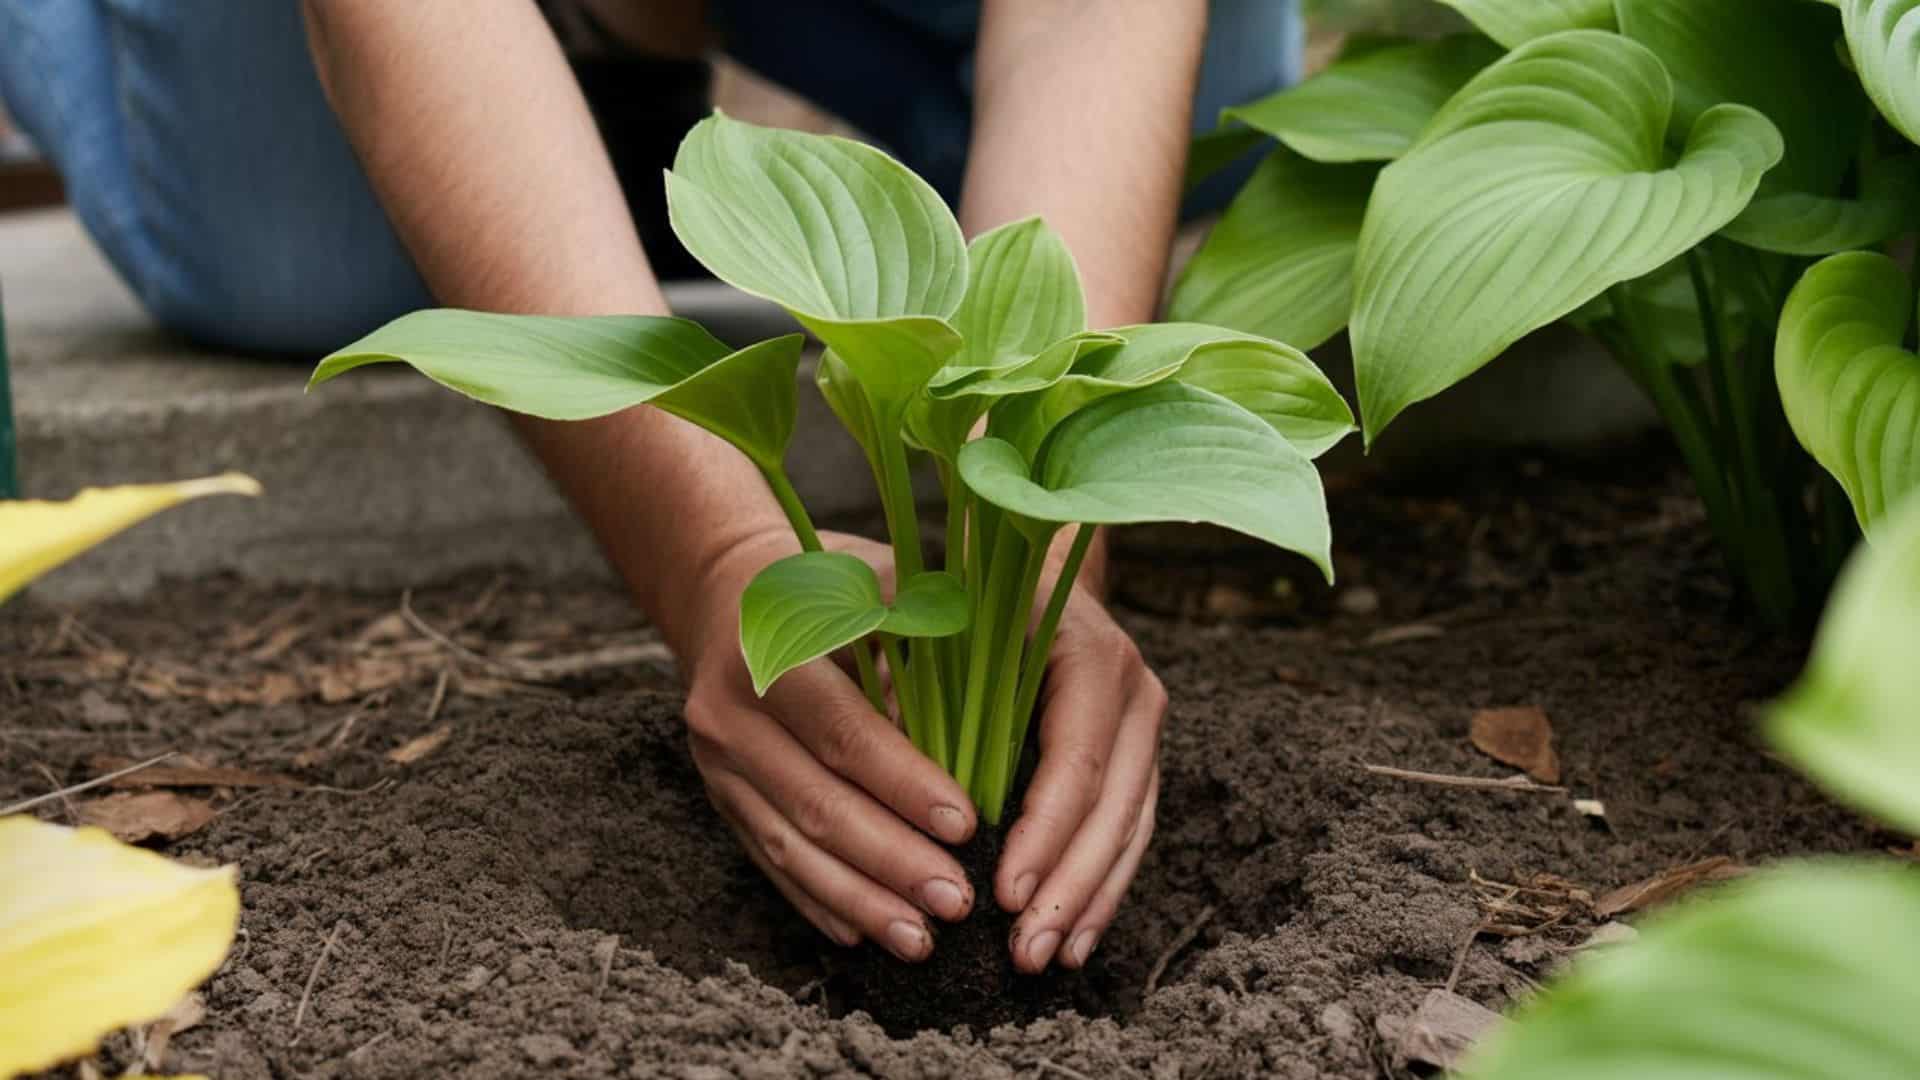
Step 1: Loosen the Soil
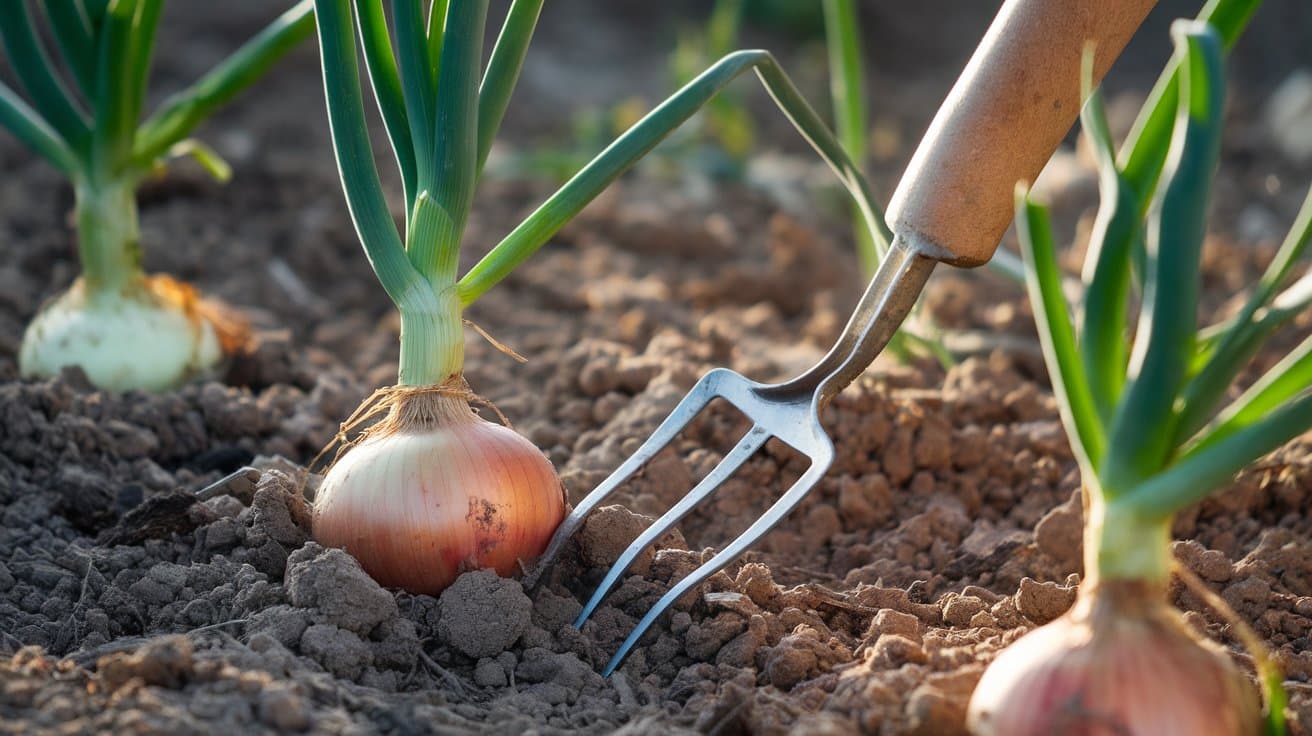
Start by loosening the soil around each onion. This prevents damage to the bulb during pulling.
Use a garden fork for best results. Hand cultivators, small spades, or hand tools also work well for smaller harvests.
Insert your tool below the bulb level. Push up gently to loosen the surrounding soil. Work carefully around each plant and avoid stabbing directly into the bulb area.
Step 2: Pull by the Base
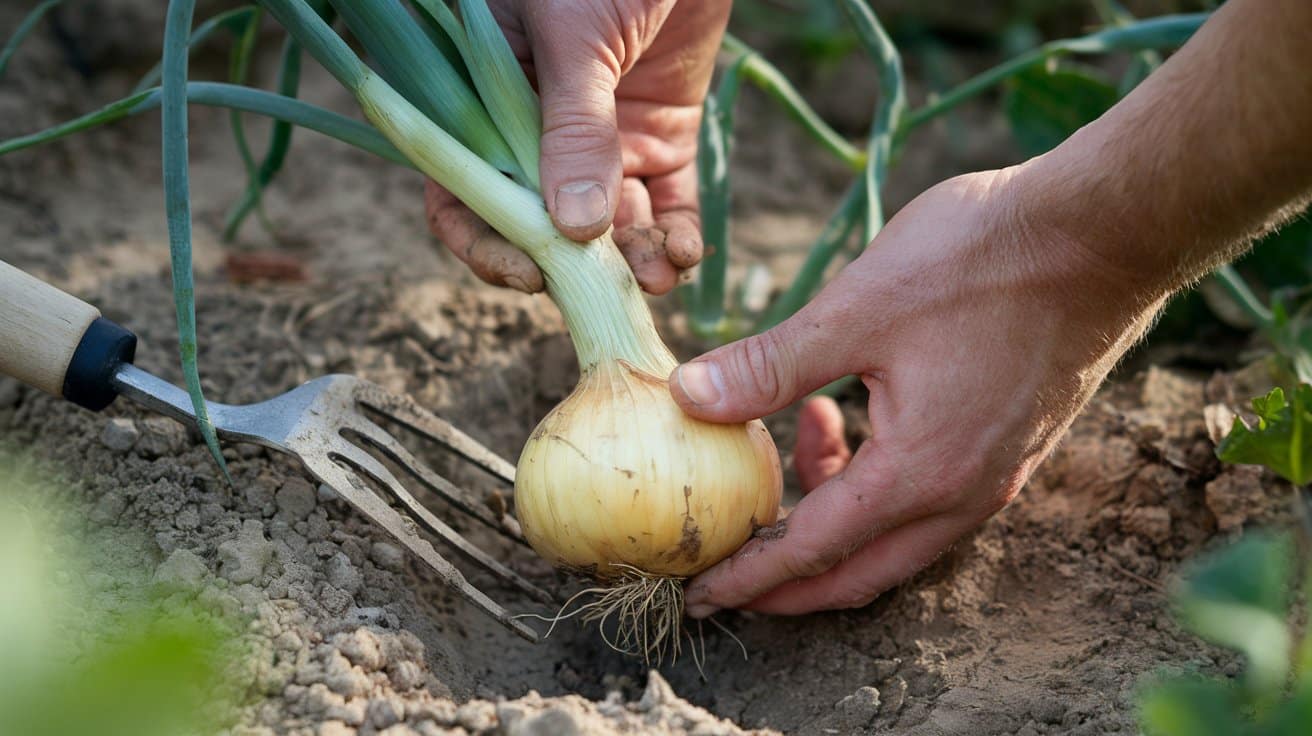
Pull onions by the base of the leaves, not the green tops. The base connection is stronger and less likely to break.
Grasp them near where leaves meet the bulb and pull straight up with gentle, steady pressure. Twist slightly if needed to break soil contact. Support the bulb with your other hand to prevent damage.
Don’t yank or jerk the plants. This can tear the neck or damage the bulb.
If an onion resists pulling, loosen the soil more. Never force a stubborn onion out of the ground.
Step 3: Clean and Prepare
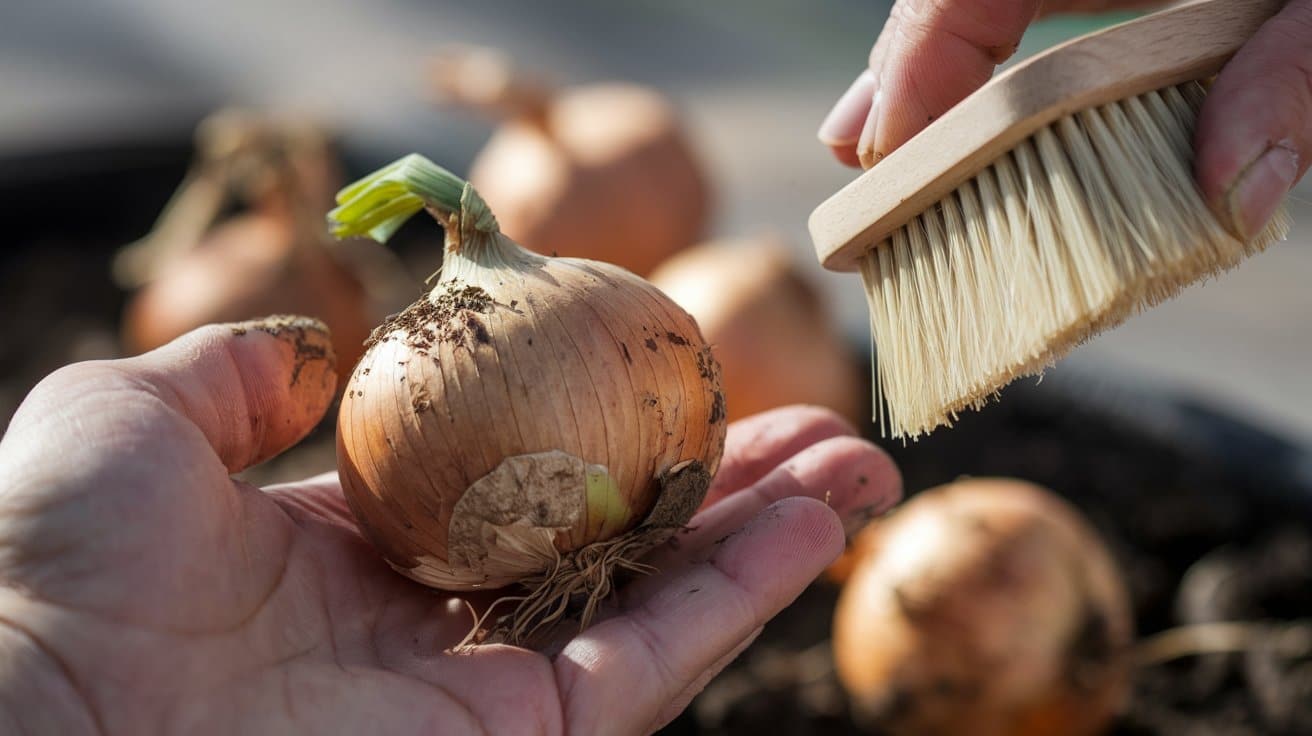
Right after harvesting, focus on light cleaning and sorting. Gently brush off any soil using a soft brush or gloved hand, but skip washing with water; moisture invites rot later.
Keep the tops and roots intact at this stage. Sort through your onions as you go, setting aside any with thick necks, bruises, or soft spots. These are best used fresh rather than stored.
Once cleaned and sorted, the onions are ready to move into the curing stage.
Step 4: Curing Process
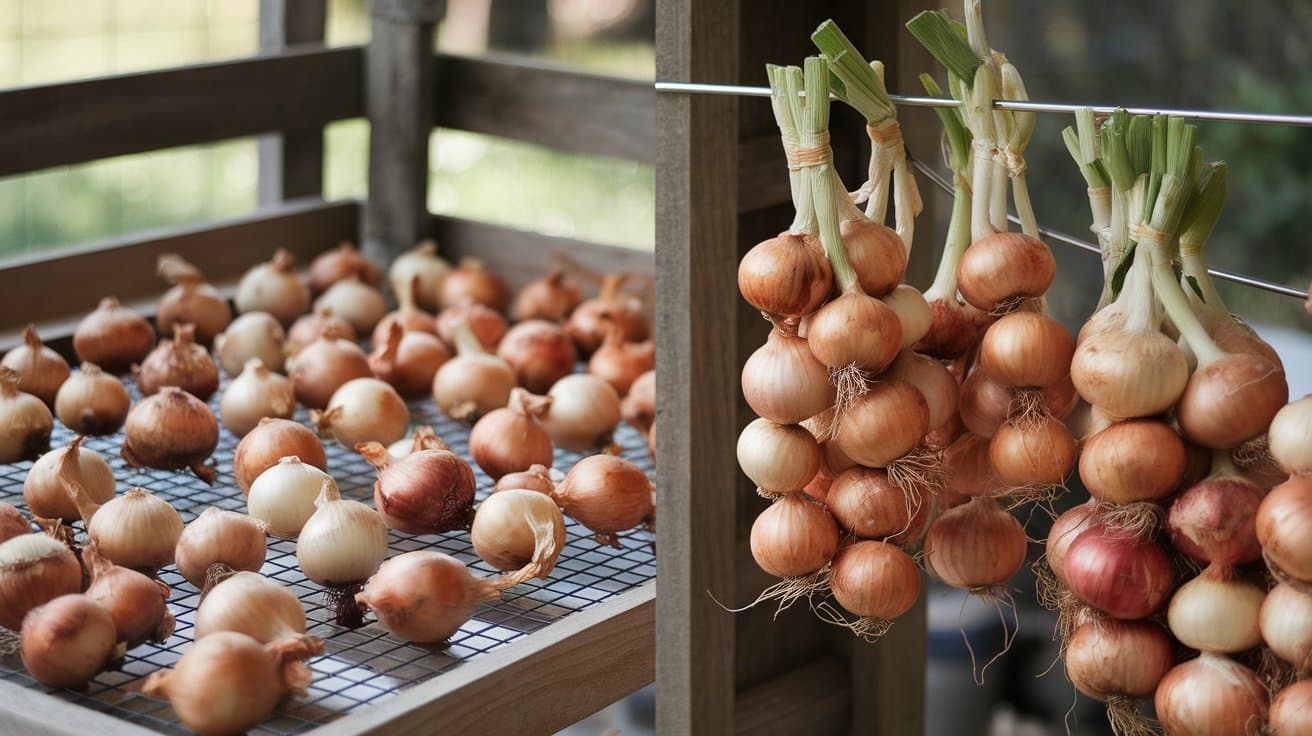
Curing transitions your onions from fresh harvest to long-term storage readiness. During this stage, the outer layers dry and tighten around the bulb, forming a natural shield that locks in flavor.
The process usually takes 2–3 weeks under the right conditions. Store onions in a warm, dry, well-ventilated space at a temperature between 75–90°F, away from direct sunlight and rain.
Curing setup options:
- Single-layer spread: Lay onions out in one layer with space between bulbs for airflow.
- Hanging method: Tie bunches and hang them upside down until the tops turn crisp and dry.
- Screen method: Place them on wire racks or mesh screens for even air circulation.
Turn the onions occasionally to help them dry evenly. Patience here ensures months of freshness later.
Step 5: Trimming
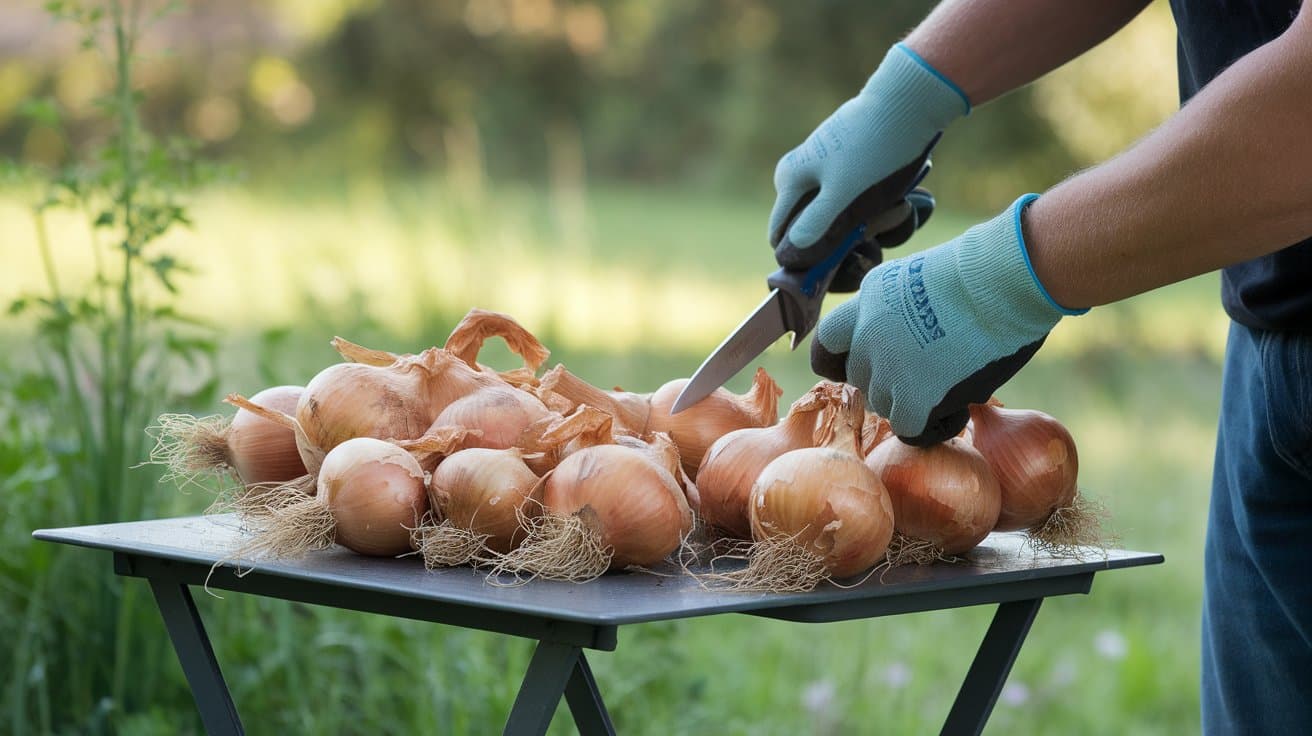
Once the onions are fully cured, they’ll have papery skins and dry necks. The bulbs should feel firm, and the outer layers should rustle slightly when touched, a sign that they’re ready for final cleaning.
Trim the roots and cut the tops to about one inch above the bulb using scissors. Wipe away any loose dirt with a soft cloth or dry brush, no water needed.
Cull any onions that still have green necks or damage. These won’t store long, but can still be used for immediate cooking. The rest are now ready for storage.
Storage Tips
How you store your cured onions makes all the difference in how long they’ll stay firm, flavorful, and ready to use.
Proper containers, temperature, and humidity control help prevent sprouting and rot, ensuring your hard-earned harvest lasts through the seasons.
With the right setup, onions can remain in excellent condition for months after curing.
- Use breathable containers: Mesh bags, wire baskets, or cardboard boxes with holes allow airflow and prevent rot.
- Maintain cool temperatures: Store between 32°F and 40°F in dark locations, such as basements, cellars, or garages.
- Control humidity levels: Maintain a humidity level of 60-65% and ensure consistent conditions that prevent freezing.
- Expect different durations: Pungent varieties last 8-12 months, while sweet onions typically last only 1-2 months.
Conclusion
Timing the harvest of onions correctly ensures months of fresh flavor instead of disappointing spoilage. The key signs are clear once you know what to look for.
Remember that storage varieties need complete drying, while sweet onions should be pulled at full size.
Proper curing in warm, dry conditions creates the protective layers that prevent rot.
Handle your onions gently and store them in breathable containers. Check them regularly and use any soft ones as soon as possible.
Knowing when to harvest onions properly means your homegrown onions can last up to 12 months in storage. The extra care during harvest pays off all year long.
How did your onion harvest turn out this season? Share your results or ask questions in the comments below!
Frequently Asked Questions
What Happens if I Harvest Onions During Rainy Weather?
Wet onions are prone to rot during storage. Wait for dry conditions or dry-harvested onions thoroughly before curing to prevent mold and bacterial infections.
Can I Harvest Onion Seeds for Next Year’s Planting?
Yes, let some onions flower completely and collect seeds when dry. However, hybrid varieties won’t produce true-to-type plants from saved seeds.
What Should I Do with Onions that Split or Crack During Growth?
Use split onions immediately as they won’t store well. Splitting usually occurs from irregular watering or rapid growth spurts during the growing season.
How Do I Know if My Onions Are Diseased Before Harvest?
Look for soft spots, black mold, yellowing from disease rather than maturity, or foul odors. Diseased onions should be discarded, not stored or composted.