If you have never had homemade sauerkraut, you are missing a true delight. Not only is it delicious, it is also incredibly easy to make at home.
 To begin, start with whole heads of cabbage, preferably with healthy dark green leaves still intact.
I am starting with three heads of cabbage weighing about four pounds each, for a total weight of just over 12 pounds.
 Remove the outermost leaves and give them a good wash to remove any dirt and debris.
Set these leaves aside as they will be important later in the process.
To make things easier on myself I used the stand mixer with a shredder attachment. Once the cabbage was cored and cut into palm-sized chunks, the shredder made easy work of creating this beautiful mound.

Be sure to have a clean crock or other suitable container on hand that is large enough to hold all of the cabbage. In this demonstration I am using a 3 gallon crock and 12 pounds of raw shredded cabbage filled it to just over 2/3 full.
As you shred the cabbage, add salt (approximately 1/2 Tablespoon per pound will work) and mix it through. The salt will help to keep the cabbage crisp through the fermenting process as well as helping it to release the liquid that is absolutely crucial to making delicious sauerkraut at home.
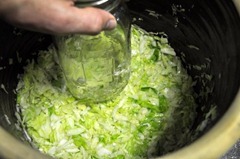
 Using a tamper, begin to work the shredded cabbage, pushing and compacting it. This releases the liquid. I love to use my fists to do this, as it helps me to release some pent up aggression at the same time! This is often the most time consuming and labor intensive part of the entire process, because you have to keep working the cabbage until there is enough liquid to cover the entire batch.
Depending on the freshness and variety of the cabbage you’re using, you may have to add water during the next steps, but it is important to work the cabbage well to ensure that you have released as much of the natural liquid as possible before you resort to adding water.

As you work, the naturally-occurring liquid will be released. Continue until there is enough liquid to pool up when the cabbage is pressed down.
 Remember those beautiful deep green outer leaves that you washed and set aside earlier? Now’s the time to bring them back to the party.
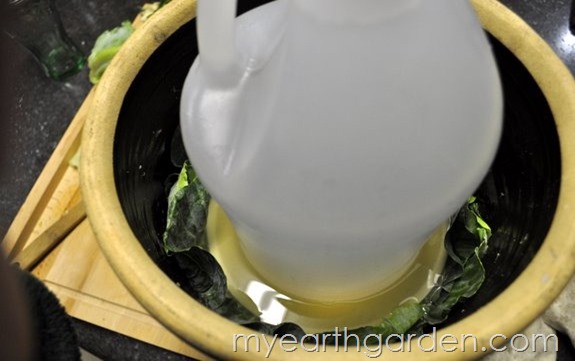
Cover the shredded cabbage completely with several layers of whole leaves, to ensure total coverage.
 Using a plate, press the leaves down in the center until the liquid completely covers all of the shredded cabbage.
This is absolutely imperative because the anaerobic nature of the brine is what allows the fermentation process to continue without spoiling the sauerkraut.
Use a clean weight (a boiled rock, a heavy bottle…) to apply firm and constant pressure to the top of the plate. This will keep the sauerkraut submerged.

I set the batch in an out of the way corner and cover my crock with a clean pillowcase to keep dust and pets from getting into the sauerkraut before I do.
Every day or so, check the surface of the liquid. It is completely normal for a light layer of mold to form and nothing is wrong when it does. Simply skim the surface, wash the plate and replace everything as above.
The kraut will begin to ferment in just a few days. I like to give nature about 2 weeks to get things going, then I’ll start scooping some out and keeping it in the fridge. If you pack the sauerkraut tightly it will keep refrigerated for several months.
If you need to can it for long term storage, here’s how:
- Bring the finished kraut to a slow simmer on the stove. Don’t boil it!
- Pack kraut into clean, hot jars leaving adequate headspace of about 1/2”.
- Lid and process in a boiling water bath for 15 minutes (pints) or 20 minutes (quarts).
I can’t wait to taste this batch of homemade sauerkraut, and I hope I’ve encouraged you to give it a try for yourself.


{ 0 comments… add one }