DIY

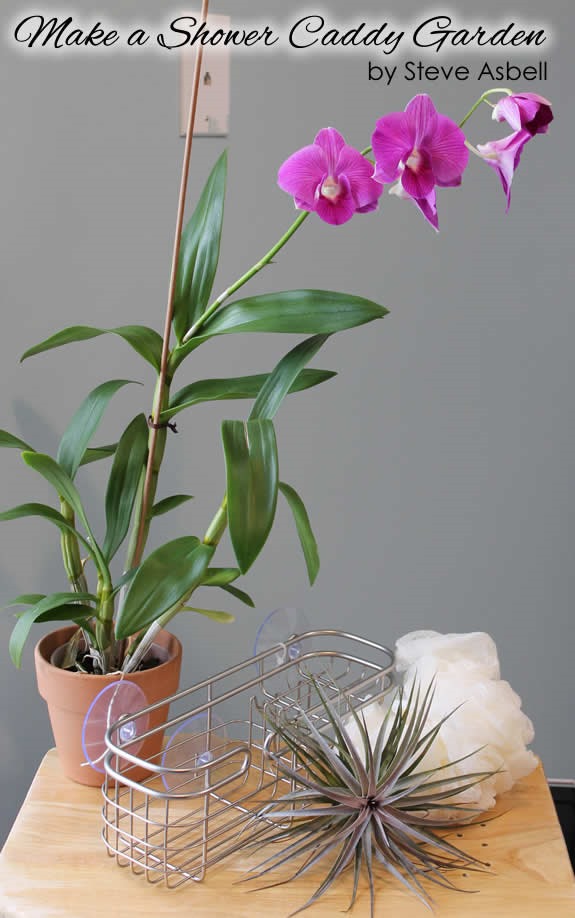
How to Make a Shower Caddy Garden: A Project by Steve Asbell

NOTE: This is a guest post by my incredible friend, Steve Asbell. Steve is the brilliant illustrator behind the gorgeous drawing in the MEG header, but he is also an accomplished gardener and a new author. I know you will enjoy this project as much as I did! – Michael

[click to continue…]

{ 2 comments }

Make Your Own Face Scrub


Rough, dry skin sucks. Facial scrubs help to exfoliate rough patches, alleviate dryness, and deep clean your pores, but they can be expensive.

Why pay for something you can throw together in a couple of minutes using as few as two ingredients out of the pantry? Homemade facial scrubs have the added benefit of containing only natural ingredients that you can pronounce!

You also don’t have to worry about those tiny plastic microbeads making their way into our waterways and harming the environment.

To make a scrub, you only need ingredients from two categories: exfoliants and carriers.

Make Your Own Sugar Scrub

Exfoliants

The list of potential exfoliants is long, but here are a few that you already have on hand:

  • spend coffee grounds
  • sugar
  • salt
  • baking soda
  • corn meal

Carriers

When it comes to carriers, your choices are just as varied:

  • coconut oil (my favorite)
  • olive oil
  • honey (not technically an oil, but try it anyway)
  • Almond Oil
  • Jojoba Oil

Of course there are many other options, but if you start with these you will find a facial scrub you love in no time.  As you experiment, think about adding essential oils like lavender, as well as citrus juice (lemon, vanilla, and sugar is amazing!)

2 Ingredient Energizing Coffee Scrub

Make Your Own Face Scrub

Perhaps the easiest scrub to start with is my energizing coffee scrub. Two just two ingredients – coffee grounds and coconut oil – it is the most basic recipe but none are very complicated.

Start with spent coffee grounds that have been dried. Add the grounds to a bowl and stir in a couple of Tablespoons of melted coconut oil. The consistency you want is to add just enough oil to coat all of the grounds but not leave them wet. It should be crumbly.

Place the bowl in the refrigerator for 30 minutes to an hour and the coconut oil will solidify again.

Use it just as you would any facial scrub.

HINT: It also works incredibly for rough elbows and heels.

{ 2 comments }

sadie-dog-treats

As my beloved Red Heeler Sadie will tell you, dog treats don’t need to be complicated. If you can turn on the oven, you can make them yourself. The basic recipe I use calls for only five ingredients that most of you already have on hand.

As you can see from the photo above, she loves my homemade dog treats and I know your pups will, too.

To start, gather these ingredients:

  • 1 1/2 cups Whole Wheat Flour
  • 1 cup Rolled Oats
  • 1 Egg
  • 1/2 Cup Chicken or Beef Broth +/-
  • 1 teaspoon salt

Preheat the oven to 350F degrees.

Add all dry ingredients to a large mixing bowl and stir well to combine.

dog-treats-ingredients

Make a small indention in the center of the dry ingredients and crack the egg in it. Add 1/2 cup of broth and begin to mix with your hands. Continue to mix and knead, adding broth a little at a time just until all of the dry ingredients are incorporated.

Turn out on a board and roll to 1/4” thickness. Cut into desired shapes. Place on a baking sheet lightly coated with cooking spray, or use a Silpat.

dog-treats-tray

Bake at 350F degrees for 30 minutes. Remove from the oven and cool completely. Store in a tightly-sealed container for up to 2 weeks. You can freeze extra and thaw them when you need more!

I’m seriously considering ordering these dog bone cookie cutters. I think Sadie would love them, don’t you?

Variations

You can vary the recipe in a number of ways. Sadie also loves:

  • Pumpkin puree
  • Shredded carrot (I actually use what’s left when I make carrot juice…shhhhh!)
  • Peanut butter

{ 0 comments }

Necessity is the mother of invention, or so they say. When I moved to a small neighborhood with a rather strict HOA late last summer, the season was all but over and I didn’t really put much thought into the garden I would grow in 2013. Then I started reading the dreaded Bylaws, and the Covenants and Restrictions.

I would have to get HOA permission to dig a vegetable garden on the property? SERIOUSLY? In America? I’m not a terrorist, I’m a gardener. I just want fresh, homegrown tomatoes for crying out loud. But them’s the rules.

What they don’t say is what I can and cannot do in containers, and technically speaking, a raised bed is a container, right? That’s when the idea began to take hold. My beloved fiancé and I started talking about how to lay out raised beds to make the best possible use of the space we had available while simultaneously beautifying our quaint (read: postage stamp tiny) backyard.

BF and I talked about what we wanted out of our garden this year, and listed our priorities and requirements along the way. That led to lots of measuring, tons of daydreaming and more calculating and recalculating than either of us will ever admit.

Here’s the original design sketch I created when we came up with the plan:Michael Nolan's Raised Bed Patio Design Plan 2013
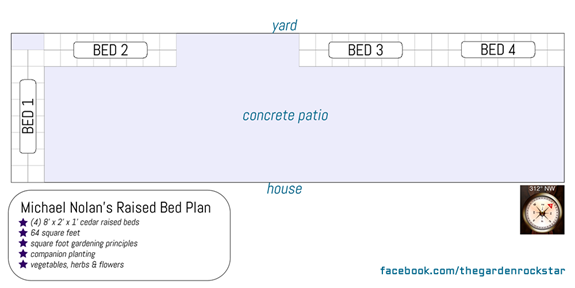
Michael Nolan's Raised Bed Patio Design Plan 2013

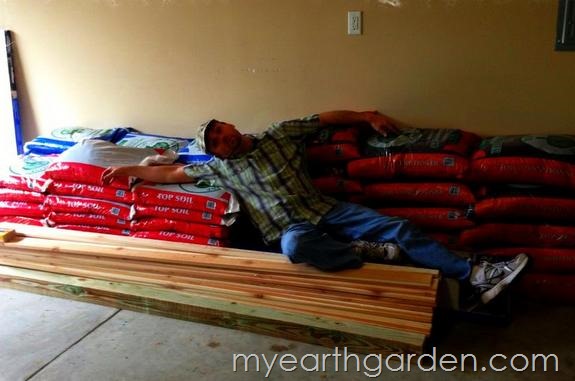
The design creates a total of 64 square feet of growing space that will reside atop the no frills concrete pad that is our patio. From there it was a simple matter of designing the beds themselves, then a trip (or three) to the home improvement store to gather the necessary supplies not only to build the beds, but to fill them as well.

In addition to the wood, screws, and landscape fabric, we bought 65.5 cubic feet of soil, compost, and amendments. They were not light. Advil was consumed in abundant quantities.
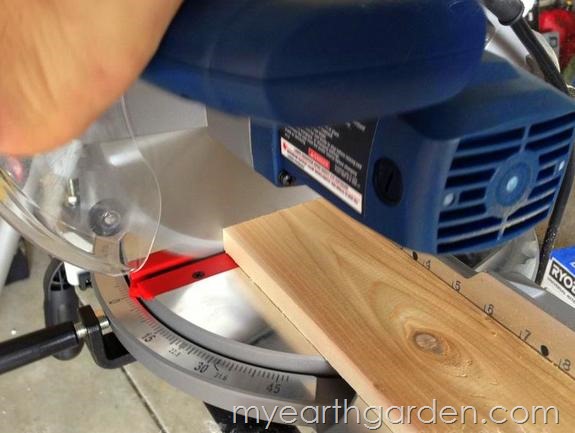
Michael Nolan's Raised Bed Patio Design Plan 2013BF manned the new Ryobi miter saw, turning a stack of 8 foot lumber into four impressive-yet-simple raised beds.

Without any plans, the process was learn-as-you-go, but the end result is better than I ever could have imagined it would be.

This is a “before” shot of the patio, with four GrowBoxes ready to be planted:
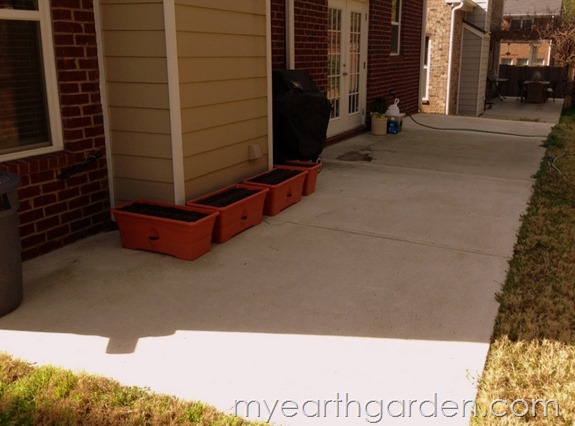
Michael Nolan's Raised Bed Patio Design Plan 2013

Two beds completed, installed, and filled with soil, compost, and amendments:
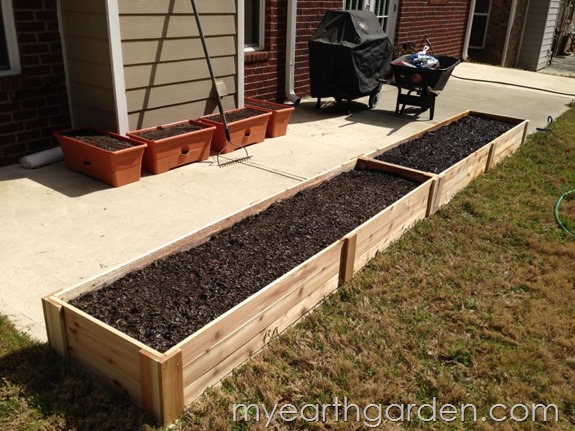
Michael Nolan's Raised Bed Patio Design Plan 2013

All four beds installed and ready for planting:
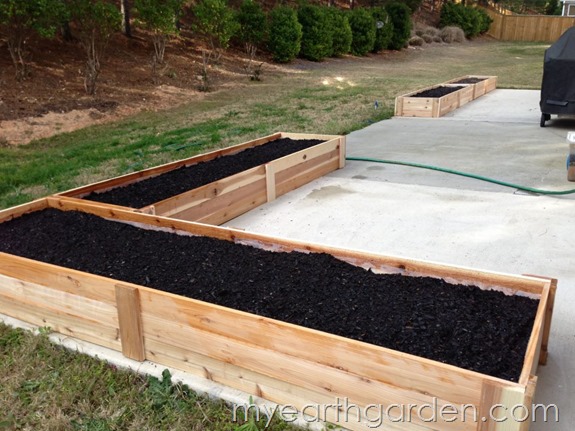
Michael Nolan's Raised Bed Patio Design Plan 2013

If you look carefully in the photo above, you can see the top edge of the plastic sheeting I stapled to the interior of the beds to create a barrier between the soil and the wood. This was done to slow down the wear-and-tear on the wood by limiting its contact with the moist soil.

I gave the beds a good, thorough soaking to give the bagged soil a chance to reconstitute and settle before I began planting the next afternoon.
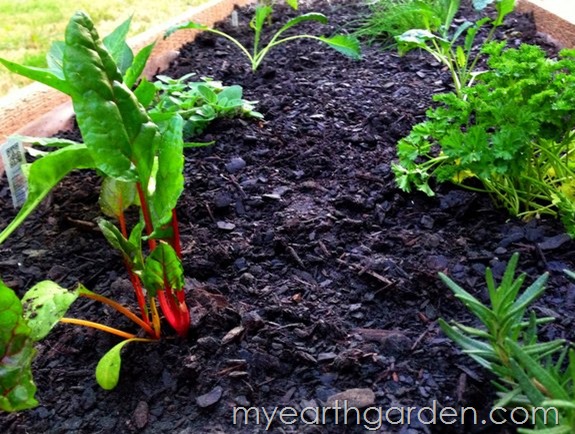
Michael Nolan's Raised Bed Patio Design Plan 2013

I am working on a cost breakdown of the project to analyze exactly how much these beds cost to build per square foot. That will allow us to calculate the value at the end of the season based on the return we see in the form of edible produce. Interested in what is being planted in these beds? I’m going to talk more about that, too.

More on all of that later. For now, it’s great to be back writing on the blog after spending a few weeks getting adjusted to my new full-time contract with The Home Depot. I promise I’m going to spend a lot more time here from now on.

Ooh! One final thing before I run off… in the process of building and planting the beds, I did something I’ve done for years without a second thought. When I snapped a photo and shared it on my Facebook page, I realized that it was something that a lot of people were excited about. These templates for square food gardening are simple to make out of a 1’ square of cardboard, and they make planting according to the grid method ultra-simple without having to lay out strings or boards to keep your boxes straight.

Michael Nolan's Square Foot Gardening Templates

{ 6 comments }

3 weeks ago today I started my first winter sowing container outside made from a 2-liter soda bottle. It is a green bottle which is why I loving refer to it as my tiny greenhouse.

I know. Clever.

My Earth Garden: Winter Sowing Under the Steps

Because we live on an elevated slope that catches a lot of wind from three directions, I needed to find a secure location for my winter sowing container. As luck would have it, the front steps provided just such a shelter, allowing for adequate light and protection from wind and accidental flooding.

After preparing the container and adding seeds, I stowed it away in the Fort Knox of winter sowing containers (seen above).

As I go into the house, I have made it a habit to look between the steps to see if there is condensation on the inside of the bottle. If the condensate is minimal, I give it a quick spray with a mister bottle and return it to the secret hideaway. I have only added moisture twice in the past three weeks. To put this into perspective, my indoor seedlings have required watering almost daily. They’re needy and starting to get on my nerves.

Thinking that somehow three weeks was the magic number (don’t ask me why), I pulled out the greenhouse this morning and took a closer look.

My Earth Garden: Winter Sowing Tomatoes

When what, to my wondering eyes should appear but 3 Aunt Ruby’s German Green tomato seedlings! Yes, three. I know you can only see 2 in this photo, but there’s 3, I swear. Fine, don’t take my word for it.  Here:

My Earth Garden: Winter Sowing Tomatoes

Recap: As of Day 21, of the 7 seeds planted in this winter sowing container, 3 of them have germinated successfully.  Daytime temperatures have been quite warm for the most part though temps at night have dipped into the low 40s more than once.

I look forward to seeing how these seedlings fare over the next couple of weeks.

{ 1 comment }

Make Your Own Natural All Purpose Spray Cleaner

2 March 2012

Call me a prude, but the smell of most commercial household cleaners gives me a massive headache. Obviously I’m not the only person with homemade cleaning products on the brain because the blog post containing my recipe for homemade laundry detergent powder is the most-visited page on this site. Then in November of last year, […]

Read the whole story →

What Does Clean Smell Like?

1 November 2011

When you love to garden and routinely have your hands in the soil, grime and God knows what else, you tend to think a lot about getting clean – at least I do.  Lately I have been thinking more about the idea of clean and what it means.  Of particular interest is the concept of […]

Read the whole story →