DIY

How to Make a Shower Caddy Garden: A Project by Steve Asbell

NOTE: This is a guest post by my incredible friend, Steve Asbell. Steve is the brilliant illustrator behind the gorgeous drawing in the MEG header, but he is also an accomplished gardener and a new author. I know you will enjoy this project as much as I did! – Michael

[click to continue…]

{ 2 comments }

Make Your Own Face Scrub


Rough, dry skin sucks. Facial scrubs help to exfoliate rough patches, alleviate dryness, and deep clean your pores, but they can be expensive.

Why pay for something you can throw together in a couple of minutes using as few as two ingredients out of the pantry? Homemade facial scrubs have the added benefit of containing only natural ingredients that you can pronounce!

You also don’t have to worry about those tiny plastic microbeads making their way into our waterways and harming the environment.

To make a scrub, you only need ingredients from two categories: exfoliants and carriers.

Make Your Own Sugar Scrub

Exfoliants

The list of potential exfoliants is long, but here are a few that you already have on hand:

  • spend coffee grounds
  • sugar
  • salt
  • baking soda
  • corn meal

Carriers

When it comes to carriers, your choices are just as varied:

  • coconut oil (my favorite)
  • olive oil
  • honey (not technically an oil, but try it anyway)
  • Almond Oil
  • Jojoba Oil

Of course there are many other options, but if you start with these you will find a facial scrub you love in no time.  As you experiment, think about adding essential oils like lavender, as well as citrus juice (lemon, vanilla, and sugar is amazing!)

2 Ingredient Energizing Coffee Scrub

Make Your Own Face Scrub

Perhaps the easiest scrub to start with is my energizing coffee scrub. Two just two ingredients – coffee grounds and coconut oil – it is the most basic recipe but none are very complicated.

Start with spent coffee grounds that have been dried. Add the grounds to a bowl and stir in a couple of Tablespoons of melted coconut oil. The consistency you want is to add just enough oil to coat all of the grounds but not leave them wet. It should be crumbly.

Place the bowl in the refrigerator for 30 minutes to an hour and the coconut oil will solidify again.

Use it just as you would any facial scrub.

HINT: It also works incredibly for rough elbows and heels.

{ 2 comments }

sadie-dog-treats

As my beloved Red Heeler Sadie will tell you, dog treats don’t need to be complicated. If you can turn on the oven, you can make them yourself. The basic recipe I use calls for only five ingredients that most of you already have on hand.

As you can see from the photo above, she loves my homemade dog treats and I know your pups will, too.

To start, gather these ingredients:

  • 1 1/2 cups Whole Wheat Flour
  • 1 cup Rolled Oats
  • 1 Egg
  • 1/2 Cup Chicken or Beef Broth +/-
  • 1 teaspoon salt

Preheat the oven to 350F degrees.

Add all dry ingredients to a large mixing bowl and stir well to combine.

dog-treats-ingredients

Make a small indention in the center of the dry ingredients and crack the egg in it. Add 1/2 cup of broth and begin to mix with your hands. Continue to mix and knead, adding broth a little at a time just until all of the dry ingredients are incorporated.

Turn out on a board and roll to 1/4” thickness. Cut into desired shapes. Place on a baking sheet lightly coated with cooking spray, or use a Silpat.

dog-treats-tray

Bake at 350F degrees for 30 minutes. Remove from the oven and cool completely. Store in a tightly-sealed container for up to 2 weeks. You can freeze extra and thaw them when you need more!

I’m seriously considering ordering these dog bone cookie cutters. I think Sadie would love them, don’t you?

Variations

You can vary the recipe in a number of ways. Sadie also loves:

  • Pumpkin puree
  • Shredded carrot (I actually use what’s left when I make carrot juice…shhhhh!)
  • Peanut butter

{ 0 comments }


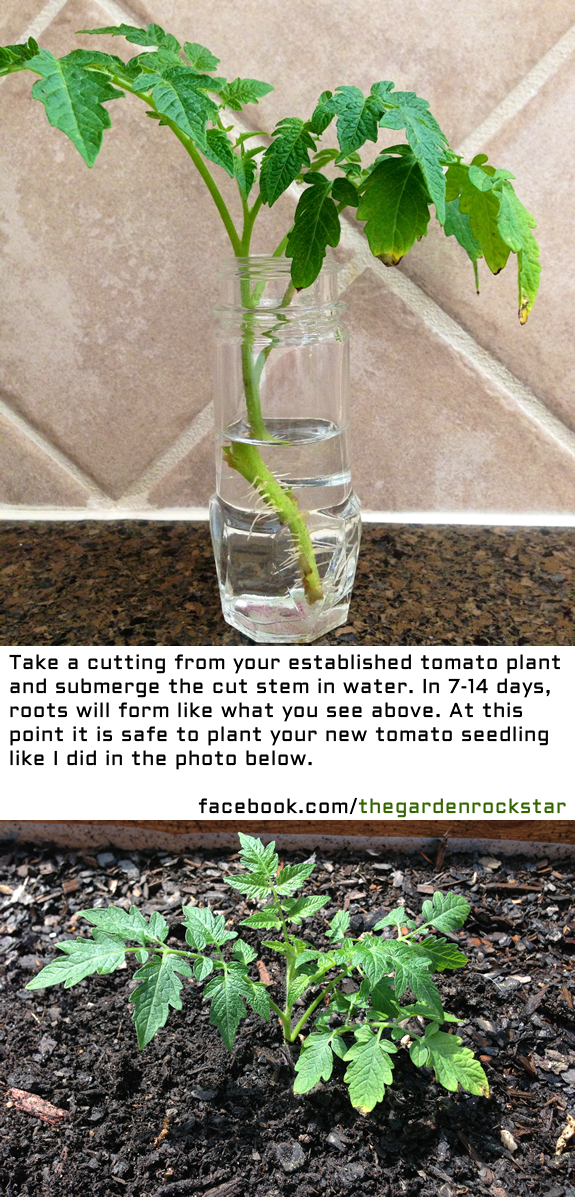
Learn how to regrow a tomato plant from a cutting!

{ 1 comment }

My Earth Garden: Regrowing Celery DAY 18

Did you know that it is possible to grow celery from the root of the celery you buy at the grocery store? Here’s how:

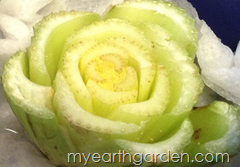
My Earth Garden: Regrowing Celery DAY 1

Start with a stalk of organic celery that you have either grown yourself or purchased at the supermarket. Why organic? Celery is very high in water content, and it is one of the most likely to have pesticide residue when it is not grown organically.

Cut the root away from the celery ribs (the part you eat), leaving about 3/4” of celery intact. The photo above shows Day 1. The celery in the photo has just been cut and placed in a cup of water. A paper towel has been soaked in water and bunched up around the roots to keep them moist in the even that I forget to check the water level.

Place the cup in a sunny window and leave it alone.

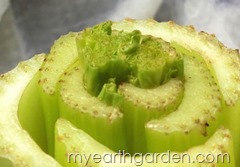
My Earth Garden: Regrowing Celery DAY 5

At Day 5, you can already see new growth at the center of the stalk. Keep the root wet and let it do its thing. Mother Nature is pretty amazing to watch, and this is a great project to do with kids because the changes happen so quickly that they aren’t as likely to get bored with the process because they can literally see changes almost every day!

At Day 18, there will be a substantial number of leaves and new growth. The image at the top of this post is the same celery at Day 18. At any point after you see this level of growth it is safe to plant your regrowing celery in the garden, container, or raised bed outdoors. If you do so, be sure to keep a close watch on the moisture level of the soil to keep it damp at all times.

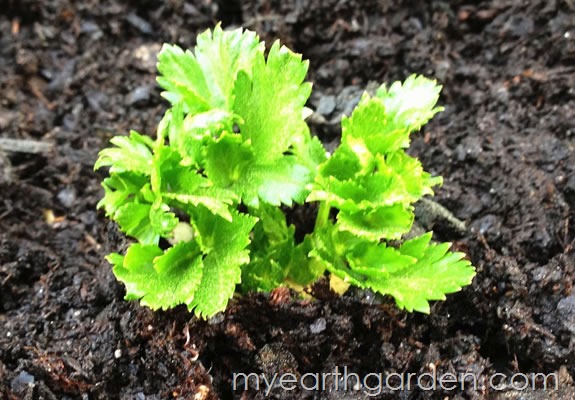
My Earth Garden: Regrowing Celery DAY 31

The photo above was taken at Day 31. The celery is now located in a raised bed in our new back patio garden and growing well.

This process can be repeated indefinitely. When the celery grows large enough to be used, the root can again be used to grow more celery. Stop buying celery and regrow your own already!

{ 0 comments }

Extreme Patio Makeover–Raised Bed Edition

11 April 2013

Necessity is the mother of invention, or so they say. When I moved to a small neighborhood with a rather strict HOA late last summer, the season was all but over and I didn’t really put much thought into the garden I would grow in 2013. Then I started reading the dreaded Bylaws, and the […]

Read the whole story →

How to Make Homemade Fabric Softener

28 March 2012

Learn how to make natural alternatives to store-bought fabric softeners and dryer sheets.

Read the whole story →